Paint Colors

Best White Paint Color BM OC 130 Cloud White in Real Homes


Best White Paint Color BM OC 130 Cloud White in Real Homes

Before someone crucifies me….Is this the ultimate, bestest, going to work with every single-house-white-paint color?

No. That white doesn’t exist.

Benjami Moore Cloud White OC-130.png

But it is a white paint color that I’ve used in many different projects…from mid-century modern to old vintage houses, this white is a great one.

Cloud white is a WARM white. That means it has some yellow undertones with a smidge of black. Don’t be scared off by the word ‘yellow’ in the description of it.

That being said, if you’ve got some stark white furniture or stark white tile, Cloud white is NOT going to look great next to it.

Benjmamin Moore’s Cloud White is great because it’s right there in the middle of the stark pure white and some warmer whites.

Which is why it can straddle design asethetics so well.

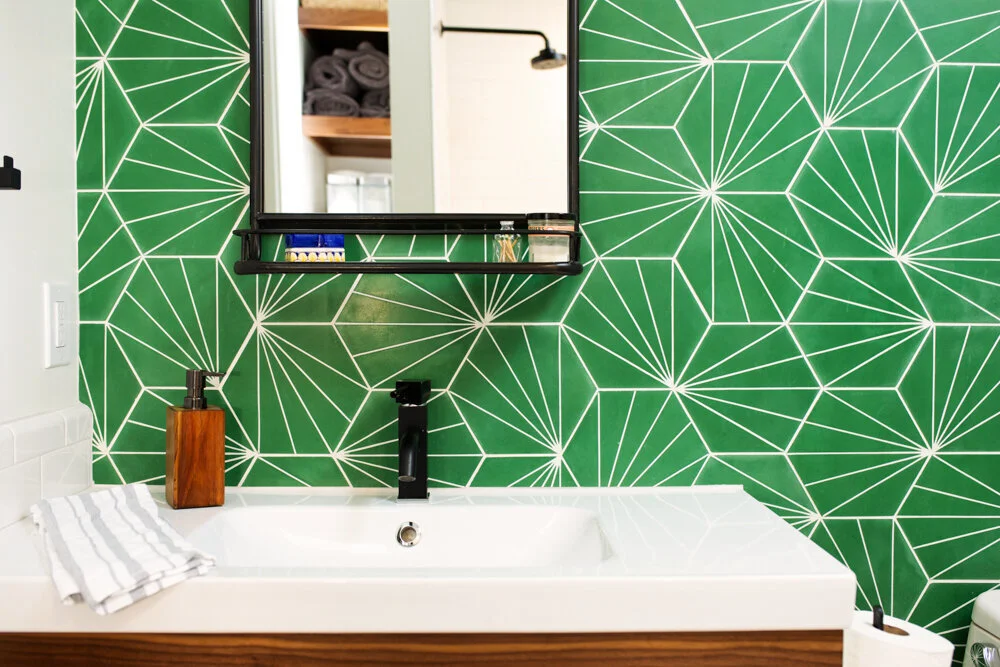
The first four of these spaces are in a mid century modern home we did a few years ago.

Bathroom with Benjamin Moore OC 130 Cloud White walnut vanity.jpg
cloud white white brick fireplace walnut mantel mid century living room ben moore oc 130.jpg
OC 130 Benjamin Moore Cloud white with walnut sliding door.jpg
Mid century gallery wall OC 130 Cloud White Benjamin moore eames chair.jpg

These next pics are from a house built in the early 1900’s- the decor has some modern pieces, but is a much different house than the previous one.

You will notice that the paint color does not look the same between the two houses.

The pictures were taking on different days, with different lighting, and different photographers. Not to mention the window and natural lighting situation is completely different between the two.

This is a great example how the same paint color can look different in different spaces- and why you should ALWAYS get samples first.

Cloud+White+OC+130+entry+way+with+table+and+desk.jpg
OC+130+Cloud+White+Benjamin+Moore+Vintage+House.jpg
OC+130+CLoud+White+Benjamin+moore+gallery+wall+and+cream+linen+curatins.jpg

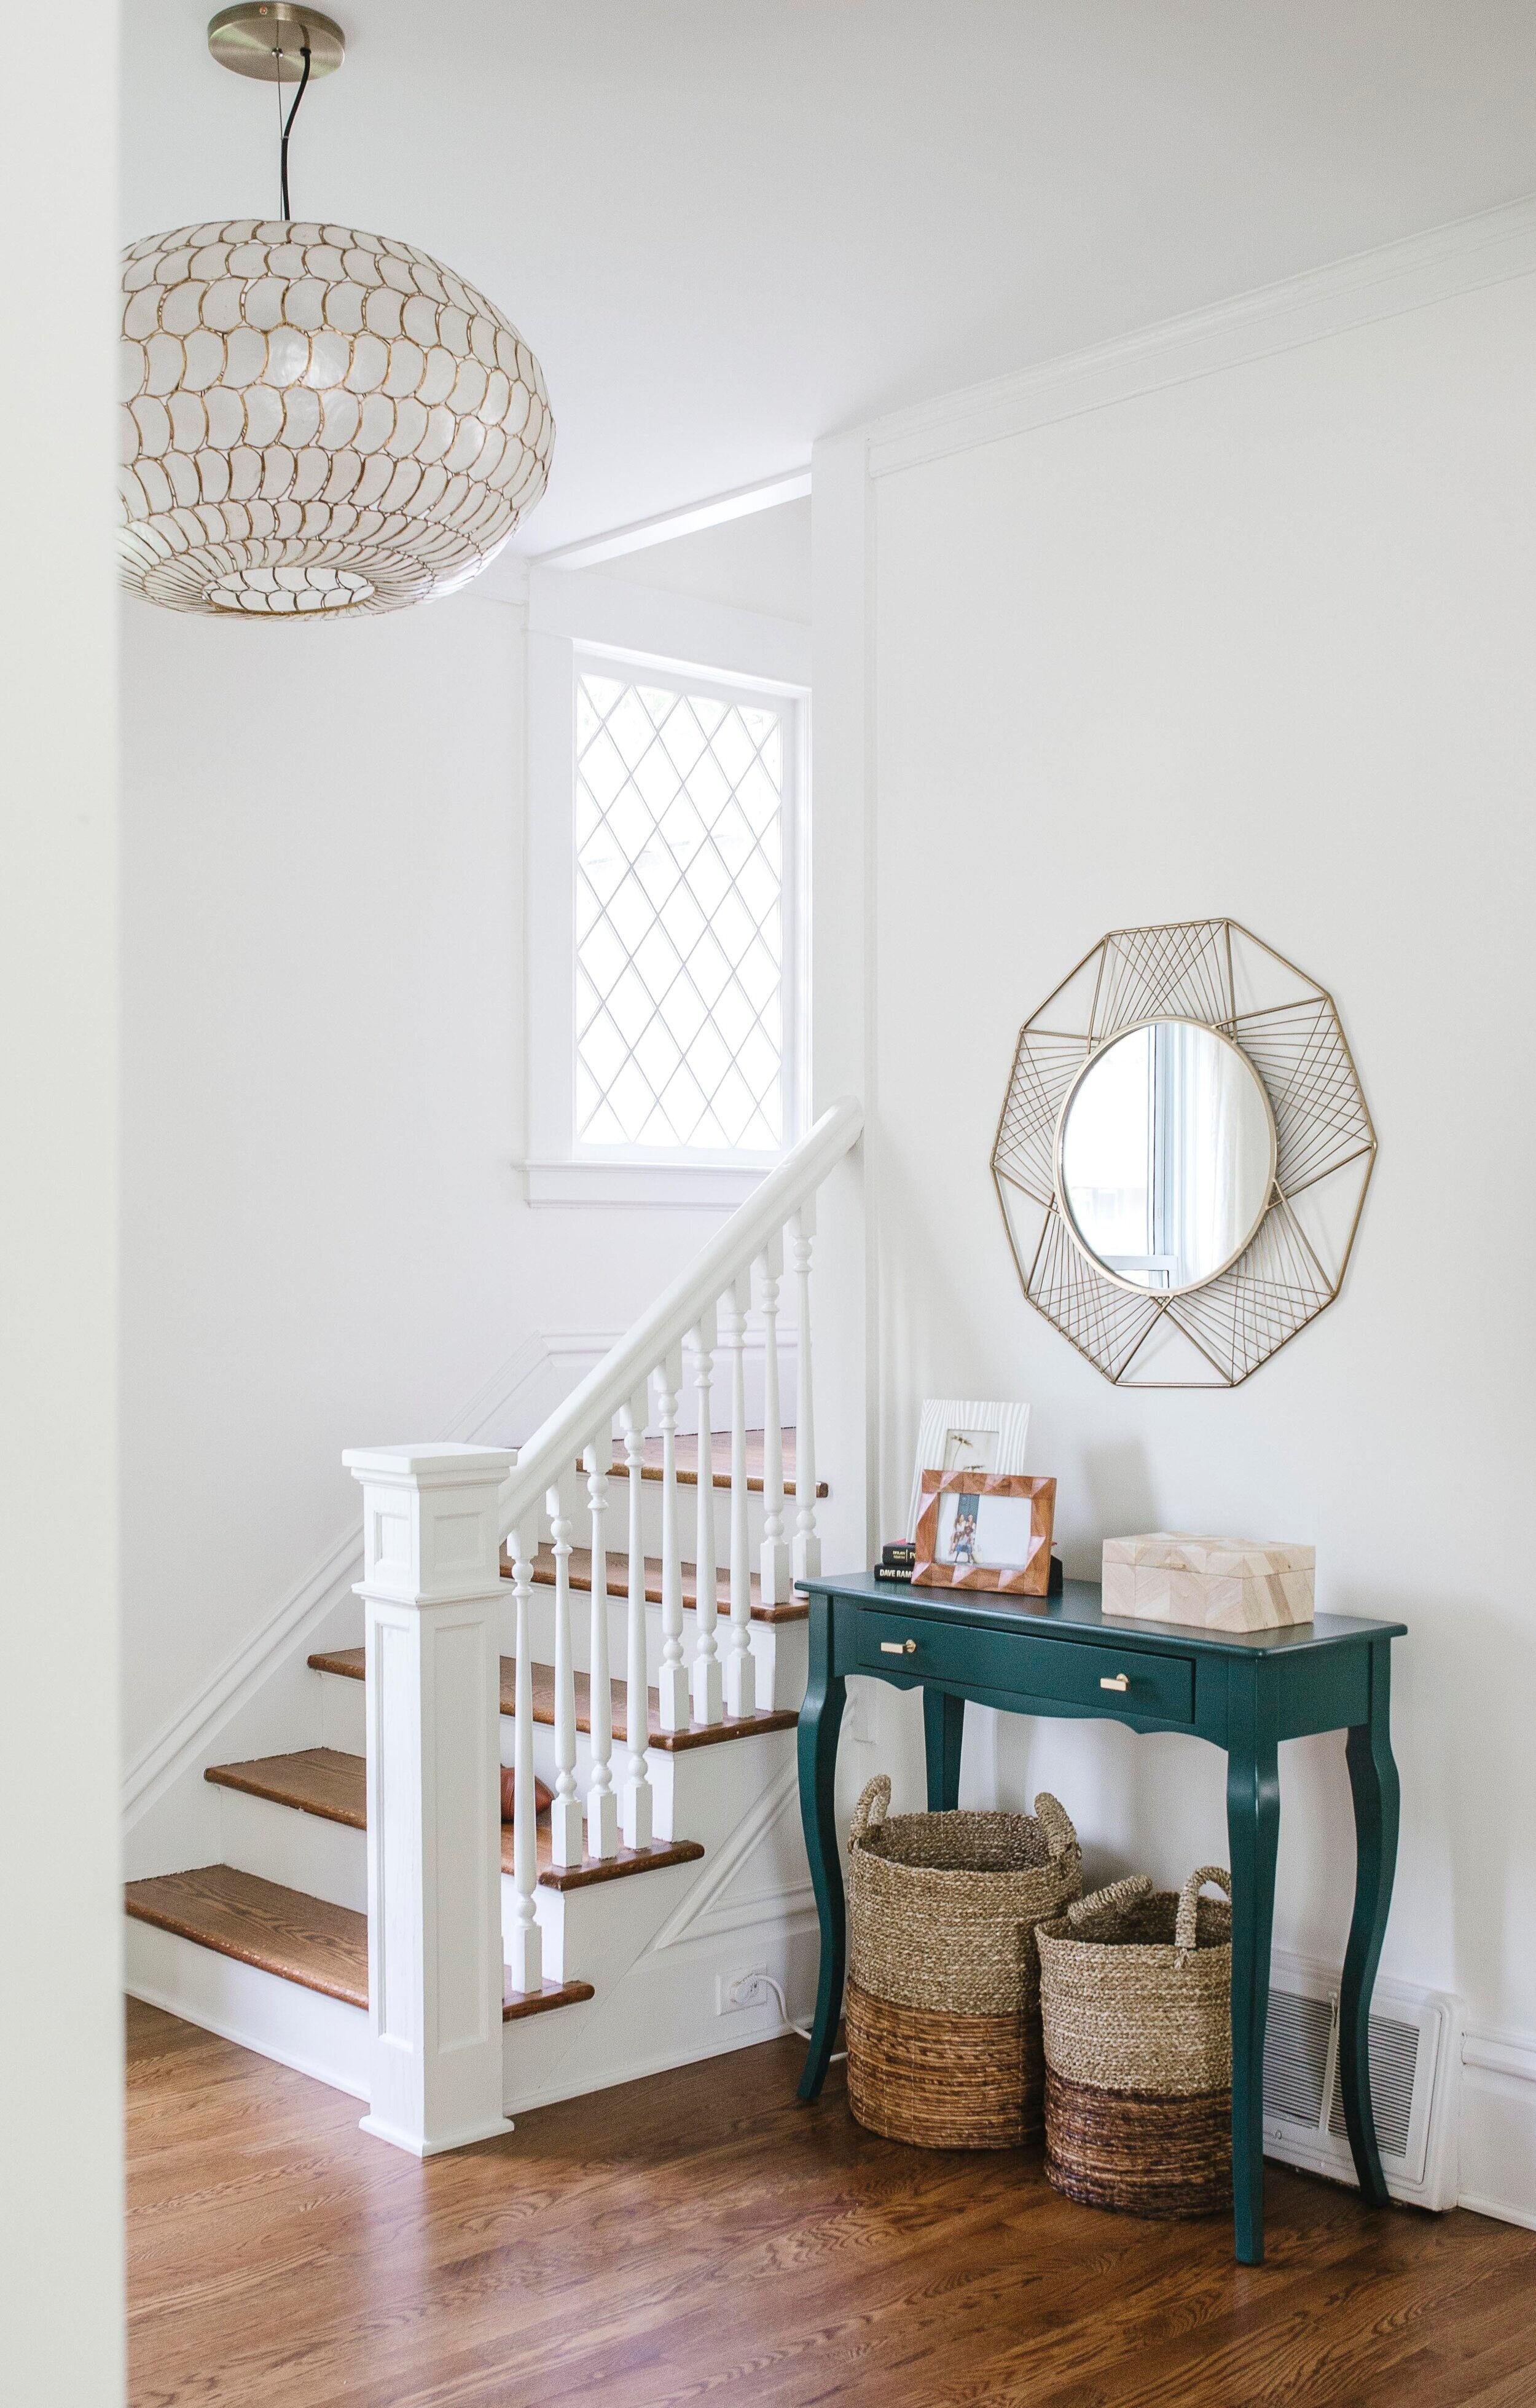
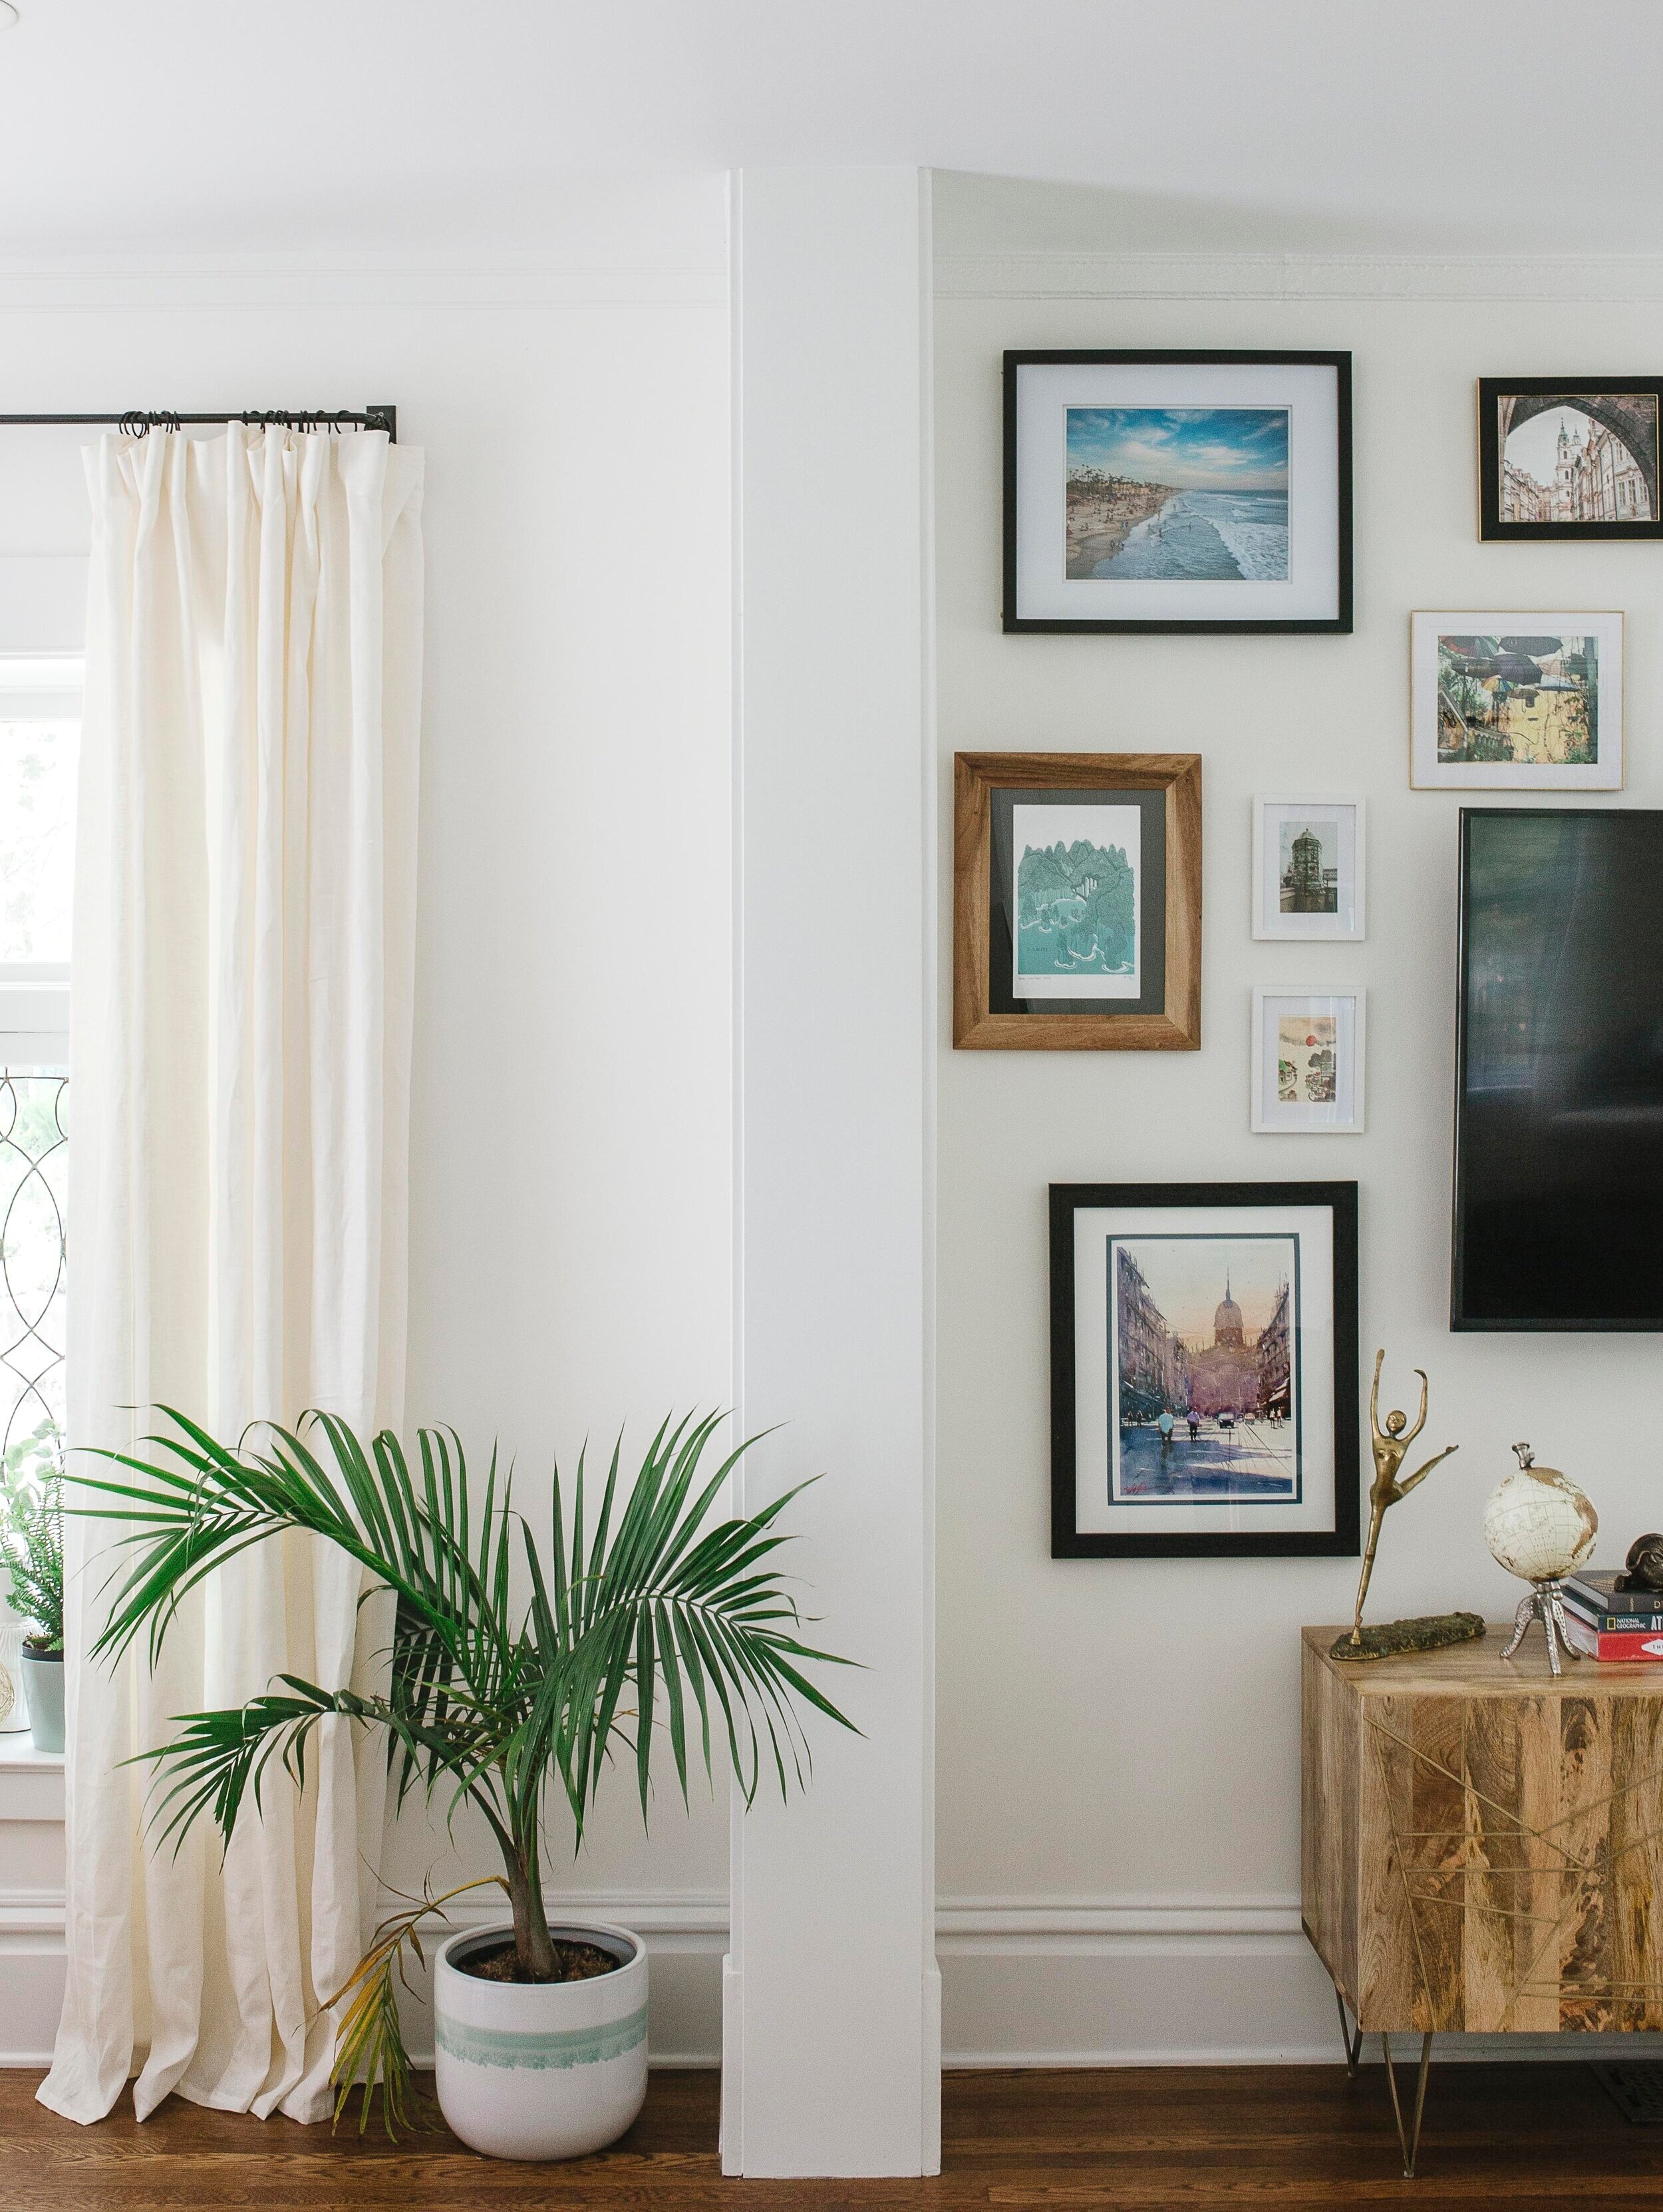
Despite Cloud White looking different in each space, it still looks great and does so well in both houses.

While I do love other whites as well (Simply White, Decorators White if you were curious), Cloud White will always be one of my favs.


Learn How To Create A Kitchen You Love by Painting Your Cabinets


Learn How To Create A Kitchen You Love by Painting Your Cabinets

(No paint sprayer needed)

So you hate your kitchen cabinets and don’t want to spend the money for new ones. 

I get it. 

Painting is a great way to change the whole look of a kitchen without spending a ton of money.  It takes some time and effort, but you can do it well…even WITHOUT a paint sprayer. 

DIY paint your kitchen cabinets with paint roller. mustard yellow kitchen cabinets grand rapids interior designer.jpg

I painted the lower cabinets in the kitchen above for the fall 2020 One Room Challenge and they turned out really well. (Scroll to bottom to see what they looked like before, and some more after pics).

I’ve sprayed kitchen cabinets before & I’ve rolled them.  They both have pros & cons, but this time around I didn’t want to deal with all the spray prep, and I also didn’t have a warm place to do the painting if we were to spray them. 

Ben Moore Advance Paint.png

The thing that makes it possible to roll these is the most amazing paint product to ever hit the market….Benjamin Moore’s Advance line.

No, they’re not paying me (unfortunately). This paint is a latex paint, but levels like an oil. Which means it takes 16 hours to dry (boo!), but gives you the best finish you could ask for as a non-professional (yay!).

Supplies You Need To Paint Your Cabinets

  • ziplock bags (for door hardware

  • Screwdriver

  • Orbital Sander

  • 100 Grit, 200-300 grit sandpaper

  • Fine grit sanding block

  • 4” roller with short nap

  • 1-2” Angled paint brush

  • Benjamin Moore Advance Primer

  • Benjamin Moore Advance Paint (Matte/Satin/Semigloss/High Gloss options)

    • I have used all of these sheens for painting cabinets or furniture, and the only one I don’t like is the satin. For some reason I never like the way it comes out.

Step One: You gotta take the cabinet doors off.

No. Don’t try to do this with the doors on. It’s gonna look bad. Real Bad. Pro tip is put hardware from each door into a ziplock bag and label it with door number. Write the door number in the notch where hardware goes, so you know it won’t be painted over (if you’re spraying cabinets, cover the number with a small piece of painters tape so you know what doors go where)

how to paint kitchen cabinets with roller for beginners.jpg

Step Two: Sand, Sand Sand

This step is the hardest and the worst.  It takes the most time, and if you don’t put the time and effort in, your whole project is gonna look real crappy real soon. 

You have to sand those suckers down and get rid of all the gloss on the cabinets so the paint will stick.  And when I say sand, you need to sand em’ good.  You also have to remember that you want the finish to stay smooth, so don’t sand with 60 grit, or it’s going to gouge out the fronts.  You should start sanding with 100 grit to get all of the initial finish off, and then go to 180-200grit to smooth everything up. 

how to paint kitchen cabinets sand kitchen cabinets.jpg

Use a sanding sponge in the corners and the places that are hard to reach with your sander.  

Plan for the sanding to take you a few hours at the VERY LEAST, if not longer.  Do not skimp on this step.

Step Three: Clean Cabinets

I first vacuum the fronts with my dyson, and then I wipe them down with a soft, damp cloth, and then I vacuum them AGAIN.  Then I run my hands all over them to make sure that A) they’re consistently smooth and B) there is not any dust on them.  (you can also use tack cloth for this, but I prefer a damp rag)

Step Four: Prime Kitchen Cabinets

If you’re fancy, you will drill holes in the bottom of your cabinets door fronts so you can have the sticking up and paint both front and back and same time.  I’m not fancy. 

I used bins in my basement to set the fronts on. 

How to paint kitchen cabinets with roller ben moore advance paint.PNG

Remember to start painting the BACK of the cabinet FIRST.  You do this because then you will need to flip them over, and there is always a chance paint is dinged slightly from laying on a new paint job (which is why people suspend them in the air). 

Prime both sides and then let them dry.  We use Benjamin Moore Advanced line to paint, and use the Ben Moore Advanced primer.  If this is the only project you’re doing, then tint the primer to match your final color.  We bought a gallon of the primer in white, because we have a lot of projects we are using it for. 

Step Five: More Sanding

Oh yay!  Use a really smooth grit (200-300grit) to sand the primer. 

Try to get a really really smooth finish, because this will dictate how smooth your final finish is. 

Step Six: Painting Cabinets For Real

Finally the fun part! Remember to start with the back of the cabinets (also will give you some time to practice how to get a smooth finish with the roller). 

I used a 4” roller with a really smooth roller nap that is meant for cabinets and smooth surfaces (ask your local paint store to recommend the best kind). 

How to paint kitchen cabinet with roller BM advance paint yellow kitchen cabinets.PNG

The trick to this paint is to try to get the most even surface (ie, don’t do one section of cabinet with a ton of paint, and the other just using what ever is left on the roller).  The paint will do an amazing job of leveling (smooth out), but try to put the same amount of paint with no huge blobs. 

Do not try to suck as much paint out of that roller as you can- on a wall with eggshell, you can roll and roll and use all the paint prior to getting more paint.  If you do that, you will not have a great finish. 

For these cabinets, I used a combination of a 4” roller and a small angled brush to get into the corners and crevices. 

You will need 2-3 coats of your final color. 

Step Seven: More Sanding

If you want to do an extra nice job, you will sand the cabinets between each coat of paint.  I was sort of lazy, so I only sanded them after the primer, and then prior to the 3rd and final coat of paint.  (don’t be lazy like me). 

Step Eight: WAIT FOR 2-3 Weeks

Now the trick is to let the door fronts sit for 2 weeks AT LEAST.  The Benjamin moore paint takes up to 21 days to cure completely, so if you start using them right away, the paint with ding…and chip.  If you wait until it completely hardens, you are much more likely to have a durable finish. 

I had to put the fronts on earlier than I wanted so I could get pictures to finish the One Room Challenge, and they got dinged up pretty bad in that first week.  After another week or so, they’ve been pretty hardy and are still looking good a few months later. 

Let me know if you have any questions and/or how your project goes!

What the kitchen looked like before:

black tile kitchen yellow floral wallpaper.jpg

And After:

Grand Rapids Interior Designer How to paint your kitchen cabinets with a paint roller.jpg
DIY paint your kitchen cabinets with a roller mustard yellow cabinets gold hardware.jpg
How to Paint your kitchen cabinets with a paint roller yellow kitchen banquette bench.jpg
 

Black Mid-Century Modern House Reveal


Black Mid-Century Modern House Reveal

It’s taken a while (like 4 years) to share the official reveal of our Project Sunset Lake Boulevard exterior….but it takes awhile to share everything, so better late than never.

“Before”

“Before”

This house was a pretty boring ranch house but had some good mid-century lines to work with. We knew from the very beginning we were going to paint the house black. A contractor suggest a dark grey instead of black, and my response was “gray is for pussies”.

“After”

“After”

Just kidding. That wasn’t my response, but I wanted it to be. I’ve just been very, very, very, over the 50 shades of gray that has taken over the world since the late 2000’s.

Benjamin Moore Snow Cone Green Front door with black house.jpg

So here are the deets!

  • Siding: Cement Hardie Board siding on left and cedar lap siding on right

  • Siding Paint Color

    • Cement Siding (left side of house) is painted Sherwin Williams Black Magic in Satin

    • Cedar lap siding (right side by garage) is painted Sherwin Williams Black Magic in Flat

  • Front Door Paint Color

    • Snow Cone Green by Benjamin Moore

  • Garage Door/Cedar Siding

    • Tongue and groove clear cedar with Cabot stain in Natural

  • Windows: From Sierra Pacific (not sure how much I would recommend them though)

  • Address Numbers from Etsy

  • Door Mat from Target.

Mid-Century Modern Black House with Cedar garage door cedar siding (2).jpg
Black Hardieboard siding Sherwin Williams Black Magic.jpg
Mid Century Modern House Rock Cairn.jpg

The most common question we get asked about this project is the garage door. The garage door is just a standard metal garage door with tongue and groove cedar panels glued to to each panel of the door.

While it wasn’t the cheapest garage door, it wasn’t too crazy to get this look. I believe we paid about $2k for the clear cedar that went on the door (plus the cost of the door).

cedar garage door black house.jpg
Black Hardie board siding cedar siding mid century house.jpg

And that’s about it! To see the before and after of the backyard exterior, click here

If you have any questions, leave one in the comments!


Week 4 One Room Challenge: Modern Vintage Kitchen


ORC Week Four: Modern Vintage Kitchen Update

It’s week four of the One Room Challenge. And I’m being reminded again why it’s a challenge.

To see the previous weeks, click below:

Week One I Week Two I Week Three

ORC.Logo.jpeg

This is gonna be a short one because no one wants to read in detail about the millions of coats of paint that I painted on our kitchen cabinets.

It was 3 actually…on each side….which meant 6 nights of painting after the kids went to bed which means I’m tired and annoyed now.

finished doors…look better in photos! The color is BM 280 Renaissance Gold

finished doors…look better in photos! The color is BM 280 Renaissance Gold

Annoyed especially because I probably should’ve sprayed the cabinets or paid someone to spray them. But I was being lazy and cheap, and I rolled them and…well, I’ve done better work.

built in banquette bench with drawers one room challenge.jpg

The exciting part of this week was our banquette bench was installed! It has drawers! This means 6 feet of storage space under there. HUGE drawers. Can you imagine all the rubbermaids I can store under there??!

Yes, I’ve reached that point in my life where I get excited about rubbermaid storage.

I also am pretty excited to see what it’s like when I reupholster it. Assuming I figure out HOW to reupholster it.

built in bench banquette with drawers black marble tulip table lucite chairs.JPG

The husband also finished the top row of uneven tile- you can still tell that ceiling is unlevel, but since we did a vertical stack with 2x8 tile instead of continuing the 4x4 tile, it’s less noticeable…and I almost have myself convinced it looks like we planned to do a tile border at the top.

When the window on the right is removed, he can finish tiling across that wall and install some shelves!

Mustard Yellow kitchen cabinets Benjamin moore Renaissance Gold 280 Black zellige subway tile backsplash grand rapids interior designer.JPG

I think we are also going to use a dark grout instead of white grout so that the uneven ceiling is less noticeable. I have mixed feelings about this because I had been planning on light colored grout. TBD.

And. That’s about all we’ve done!

To see the rest of the guest designers progress, click here! To see what all the featured designers are up to, click here!


Fall 2020 ORC Week Two: Modern Vintage Kitchen


Fall 2020 ORC Week Two: Modern Vintage Kitchen

It’s only week two of the One Room Challenge and my husband is already wishing his covid-related paid leave from the airlines was over.

ORC.Logo.jpeg

He was living his best life this summer…road tripping…vacationing…and then we got home and he became my tile guy. And my electrician. And my plumber. And my carpenter.

Despite being paid in sex, he still thinks he’s grossly underpaid…especially when it comes to dealing with dark grout.

In case you are just joining….The One Room Challenge is a Bi-annual event hosted by Linda from Calling it Home and Better Homes and Gardens (thank you guys!) Designers from around the country/globe have 6 weeks to transform a room…documenting the whole process.

To see our design plans and all the before pictures, see our Week One post here.

Background on Design

I forgot to mention last week - While we own this house, we aren’t planning on staying in it forever, and will probably rent it out in the next few years. Hence, we are trying to update the spaces without ripping everything out, because A) that’s a lot of money & B) the kitchen is brand new…so it seems pretty wasteful.

grand rapids interior designer one room challenge white square subway tile black grout.jpg

Update

We got a lot done this week (by we I mean the husband, the tile guy).

The half bath off the kitchen is almost done…..still waiting for some wallpaper to go up in there and I want to paint the faucet, but may not because I’m lazy.

The husband has spent the last week tiling the floors and walls of the bath- he’s just putting the sink and toilet back in place as I type. Fingers crossed the toilet doesn’t leak.

“Whose idea was it to do black grout? I would charge 3 times as much to do this. This is ridiculous.” he complains.

The husband is not a fan of my design asks.

grand rapids interior designer one room challenge white square subway tile black grout (2).JPG

The cutest tile guy in the world right here. He just wants to play with all the sharp tools…he’s never happier than when walking around with something that could dismember him or poke out his eye.

Sooooooo….about those design plans I mentioned the first week? The whole “painting the kitchen cabinets green,” thing? Well, I got a bunch of samples…and while I absolutely loved every shade of green I picked out…I didn’t love it in the space.

One room challenge green cabinet kitchen makeover.jpg

Sooooo….I did a 180 degrees and decided to go the yellowish-gold route for the lower kitchen cabinets.

The trick is the floor which has yellow/orange/honey tones in it and I don’t want the cabinets to be an extension of the floor. So I got the wallpaper out, my paint decks and went to town.

yellow floral wallpaper yellow kitchen cabinets one room challenge grand rapids interior designer.jpg

And then I picked up 49 yellow paint samples to try to get an idea of which route I wanted to go. I’m pretty sure the paint store people thought I was nuts.

And they wouldn’t be entirely wrong.

Mustard Yellow paint colors Benjamin Moore Rennaisance Gold.JPG

I very easily cut 4 of the colors out of the running, and kept two in my kitchen for the last 5 days staring at them morning and night and deciding which I liked better.

After painting the top two contenders on some large cardboard and keeping those in the kitchen, I decided to go with the darker yellow on the right- Benjamin Moore Renaissance Gold.

Painting kitchen cabinets yellow Benjamin Moore Renaissance gold 280 Benjamin Moore Hollywood Gold 279.JPG

The yellow on the left is Benjamin Moore Hollywood Gold, and I liked the name of that one better…but alas, I’m not a hollywood girl so it only makes sense.

What are your thoughts? Are you disappointed I didn’t stick with the green?

Stay Tuned next week for week 3 of the One Room Challenge.

Don’t forget to check out all the featured designers and the other guest designers and see some really cool fun stuff!


Blue-alicious. A paint Color Journey. ORC Week Two


Blue-alicious. A Paint Color Journey. ORC: Week Two

Week two of the One Room Challenge brought to you by the fog of sickness, craziness of moving and being driven literal bananas by 3 children.

I’m pretty sure we all have Covid, even though I tested negative..but with false negatives 30-40%, and having almost all the symptoms between us, it sort of makes sense.

First Coat of Honorable Blue by SW

First Coat of Honorable Blue by SW

So tired. But life must go on, and right now life includes the One Room Challenge. Life also includes raw sewage coming up into the basement of our new house due to a broken sewage pipe (thankfully on city property(we think)), but no one wants to read about that, so we are sticking to paint colors today.

sherwin williams commodore blue.jpg

All right- where were we? Blue-alicious should be the title of this room.  The color I had picked out for this room was Commodore blue by Sherwin Williams.  I was going off this swatch above from the computer, which looked the same as my SW paint swatch book in person. 

Now.  You will read to always get paint samples and try them on your walls prior to picking a color.  In fact, I ALWAYS advise my clients to get samples and try them on multiple walls to see what they look like IN the room on different walls with different light.

But sort of like a doctor tells his patients to lose weight and then goes and eats 4 donuts, I decided I didn’t need to do this.  There was a pandemic going on after all, and I was trying to decrease the amount of trips I needed to make to pick up paint from the curbside paint pick up.

Not only did I NOT do this, while on the phone with Sherwin Williams, I called an audible (the only football reference I know and will use) and changed my mind to Honorable Blue.  A blue with purple undertones. 

sherwin williams honorable blue paint color (2).jpg

Yeah…I was sitting there staring at the paint deck looking at those purple undertones, and somehow still thought was a good idea.  (hint. It wasn’t).   See above.  Now you’re probably thinking it doesn’t look that bad- on my computer screen it looks less purple than it does on my phone, which looks less purple than in real life. Let’s just say it looked PURPLE!

Yay! Now after 3 coats of a purplish superman blue, I get to repaint!  Yay!

So I went and got 5 different colors and did what I should’ve done originally.  Now- you shouldn’t paint the swatches right on the wall when the colors are so crazy like this, because the wall color is going to throw off the real color of the swatch.  I also painted them on white paper so I could get a sense of the true color.  But I wanted to see how many coats it was gonna take to repaint over purple superman. 

From Left to Right: Commodore blue, Loyal Blue, Regatta, Salty Dog, Dress Blues

From Left to Right: Commodore blue, Loyal Blue, Regatta, Salty Dog, Dress Blues

This is where it gets crazy, and why you should ALWAYS paint swatches before picking a color.  The color I liked the least prior and almost didn’t even get a sample of?  That’s the one that looked best in the room and I loved. 

Regatta by Sherwin Williams is the middle color and is what I picked.  See below after being completely repainted.

Sherwin Williams Regatta with wood trim and wood floors.jpg

It’s actually exactly what I was looking for- less dark and more color than a navy, but not as bright and crazy as cobalt. It looks different in all different lighting situations which I LOVE.

And you can see what else we accomplished this week.  We moved all our crap into the house. 

IMG_0002.jpg

Regarding paint in dining room…I think I might just leave it. Looks white to the eye, but is actually a very very pale gray. Pale enough for me to look sort of white, which means I probably won’t paint it right now, because we are going to have to get the ceilings fixed eventually, and then I can repaint then.

IMG_0003 (1).jpg

I’ll be lucky if I can get all the boxes unpacked and organized before the ORC ends, much less finish these rooms.  Holy Moly does everything take about 193 times longer when the children are around 24/7 and one is exhausted and sick.

You’re welcome for probably the least interesting ORC update of the year. Gonna go take a nap now…mmmkay?

To check out the progress of others during the ORC, head to this link and see what every body is doing!

ORC-Gold-4oow.png