
Yeah…yeah…it’s week two of the One Room Challenge and I’m technically on week one. Oops!

Sometimes I get an idea in my head for a piece of furniture and I can't find it anywhere. Or I find a picture of something similar, yet it's about 487 million dollars, and it turns out I only have 387 million dollars, so alas, I can't afford it.

Life is hard. Hashtag first world problems.
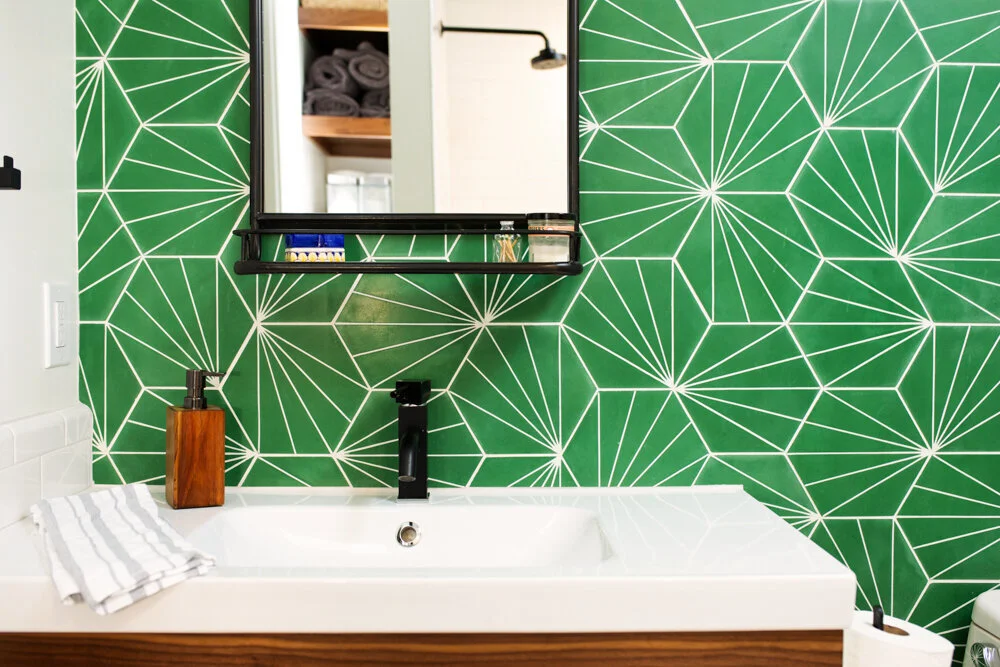
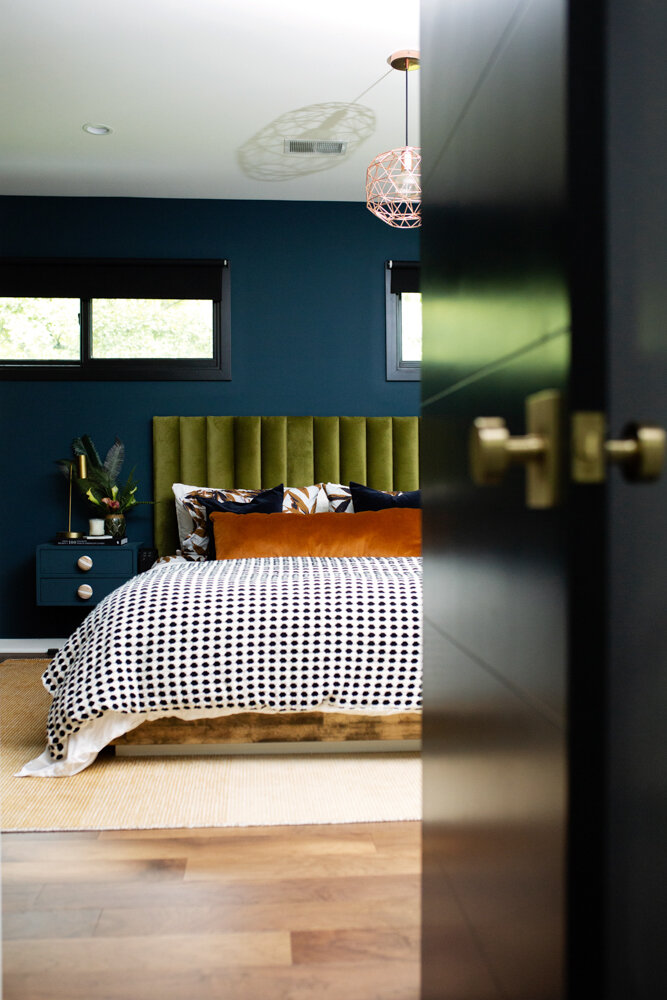
That is the story of this headboard. It was almost four years ago, and I couldn't find a green velvet headboard ANYWHERE.
It's one of the most commented on item when I post on instagram so I wanted to share how I made it. It's really easy. If you read all the way down, you can see how I made it with NO SAWS or cutting items (because I don't do saws, because I like all my fingers).
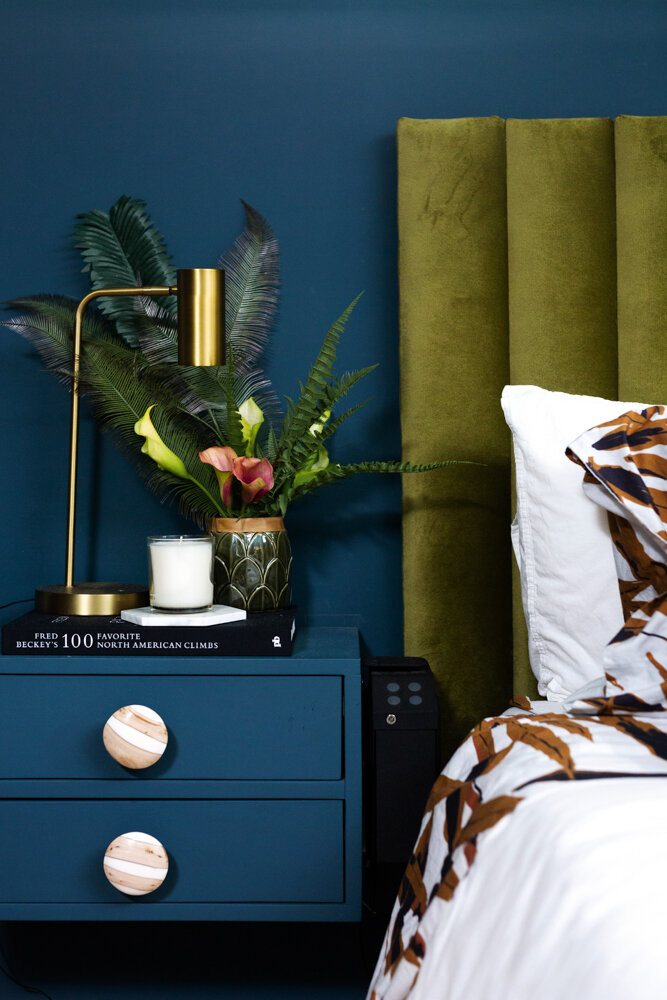
(You can now find a green velvet headboard lots of places, but if you want a different more unique color- you’re gonna have to make it yourself)
Boards: Decide what width you want the channels to be, and how high of a headboard. (If you want to be most cost conscious, do a headboard height that can be cut out of 8 or 12 feed boards evenly (so 4ft/6ft high), as opposed to picking a 5ft tall headboard and having a bunch of 3 ft left over scraps).
batting (do not try to do it without the batting)
staple gun and LOTS of staples
1x2" boards for back
drill
screws
Fabric
1. Figure out how many boards you need. I used 1x6's (which are really more like 1x5s) and needed 12 of them, and for our bedroom I needed them to 40” tall. I went to Home Depot and had them cut the boards for me there. The signs there say they charge for more than a few cuts, but I've never had an issue with being charged (and even if you are, it's like $0.25 a cut, which is a heck of a lot cheaper than a saw...also less chance of losing fingers) I also got 1 x 2" cut long enough to go the width of the headboard
2. Next step- Measure out each piece of foam on a board and cut the foam into pieces. You generally want to make sure the piece of foam is the same size as the board or slightly smaller, or you'll have some overhanging foam bulge (the technical term for it) and it could be more difficult to connect all channels together.

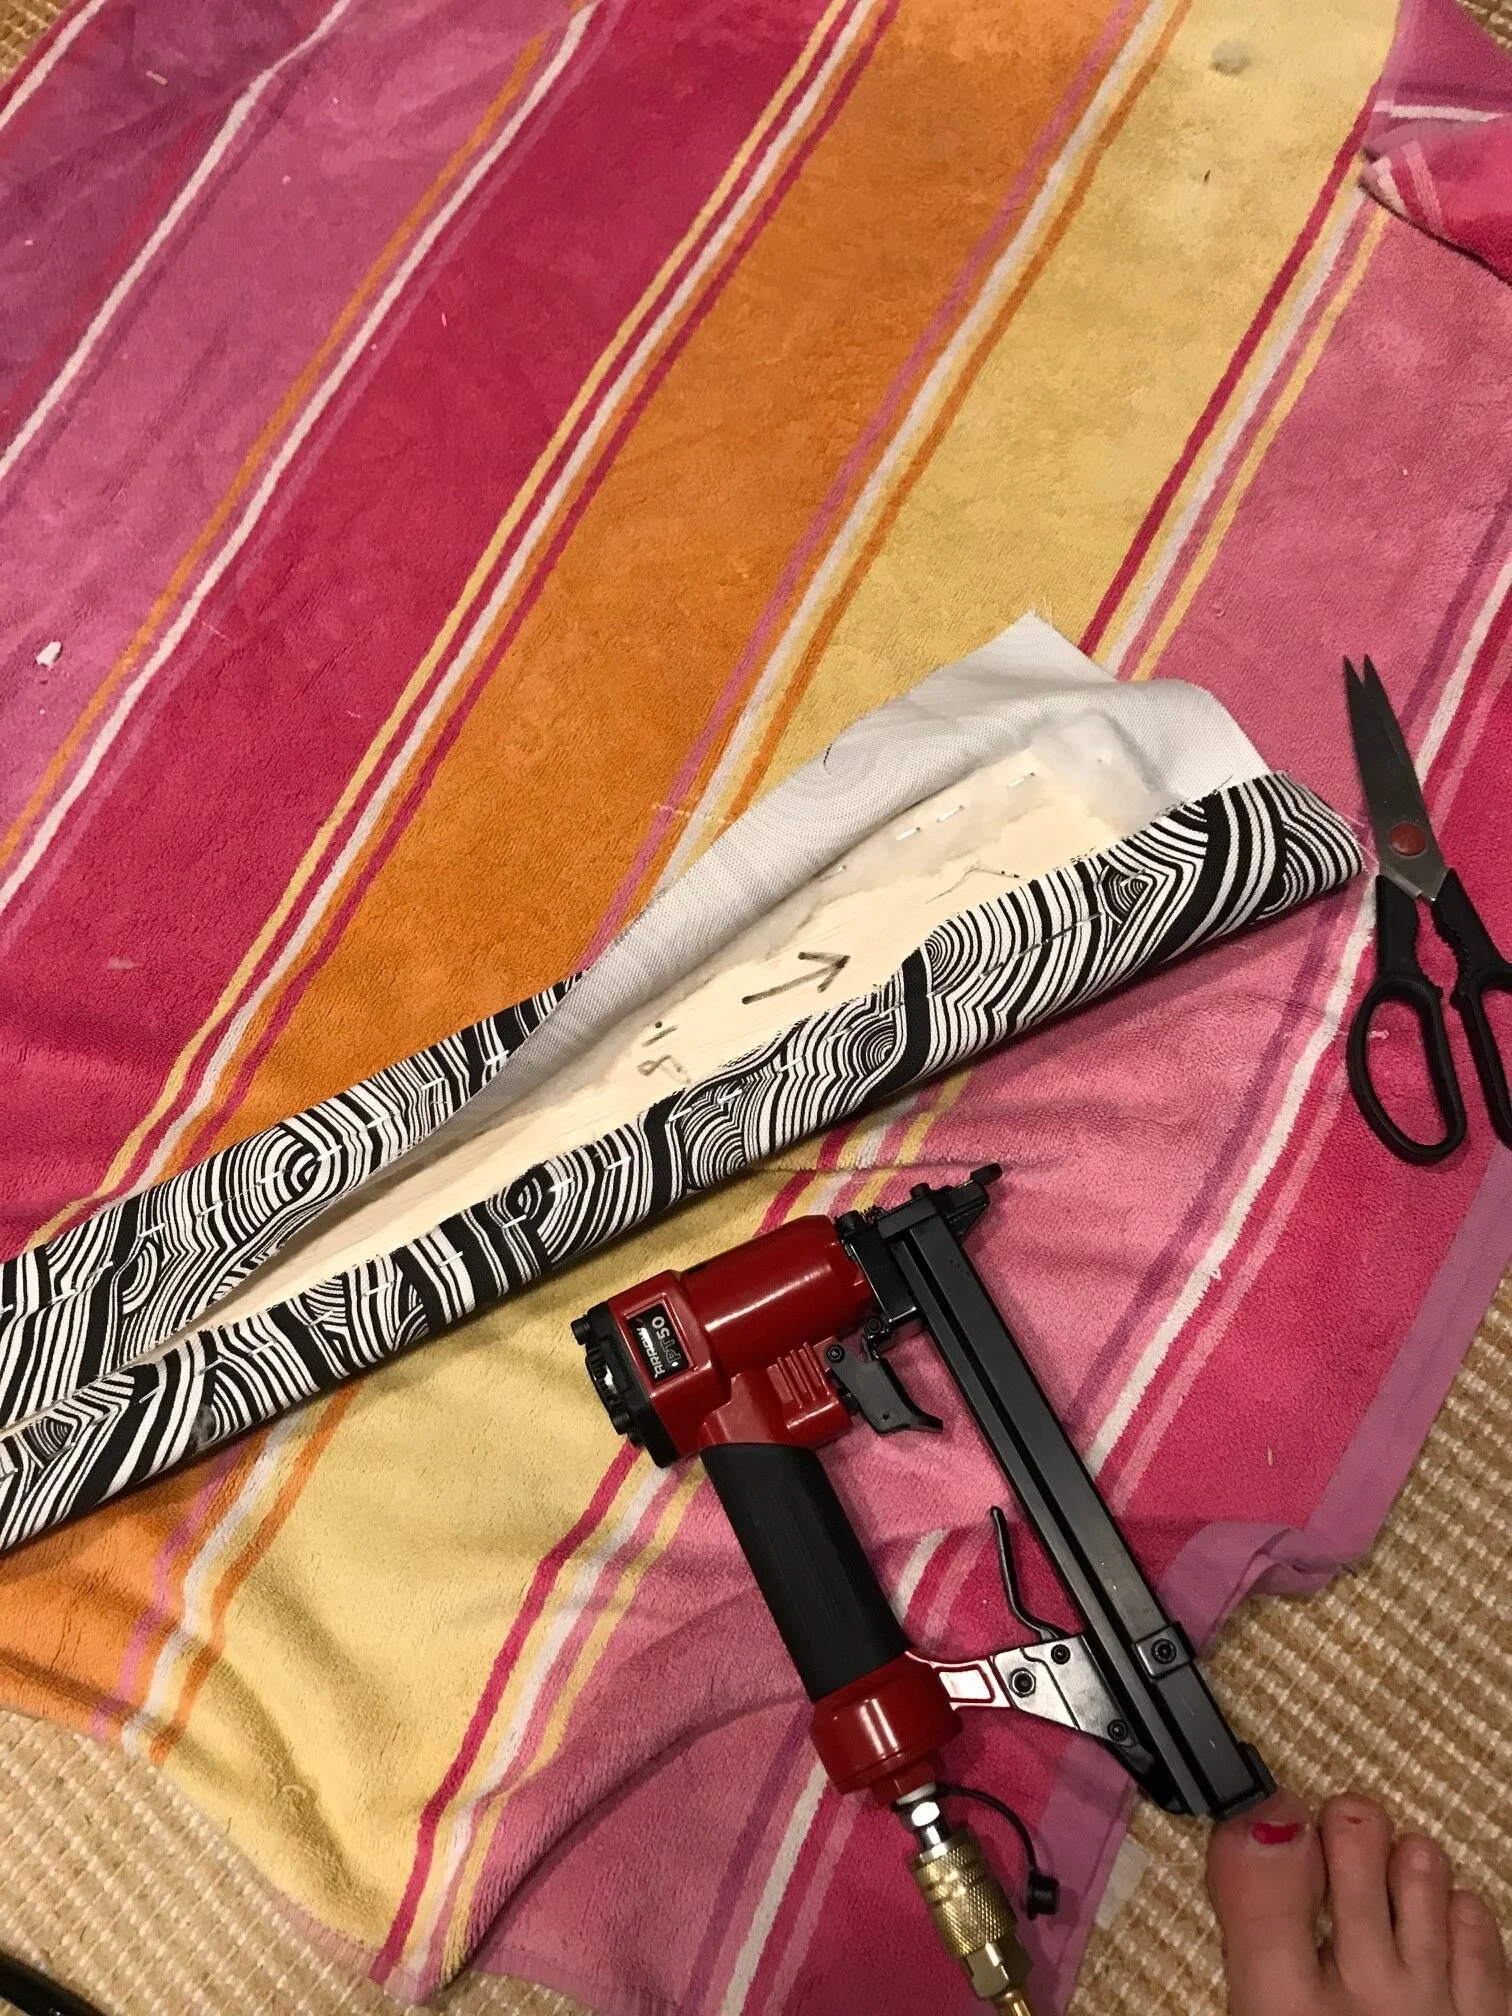
3. Batting: you're going to need a piece of batting large enough to wrap each piece of foam and board. Think about wrapping a present, Staple the crap out of the batting.


4. Fabric: Once you've got each board wrapped with batting, cut fabric to size to cover each individual board (once again you want to wrap it like a present). Flip the foam board covered with batting upside down on the fabric (so you can see the staples you just put in) and proceed to wrap board like a present. Take care when folding the corners at the top, so they're flat and uniform on all the boards, because you'll be able to see them. Staple away.
5. Once you've got all the boards foamed, wrapped in batting and covered in fabric, line them up in the order you want them to be. Then flip them fabric side down/staple side up on the floor.
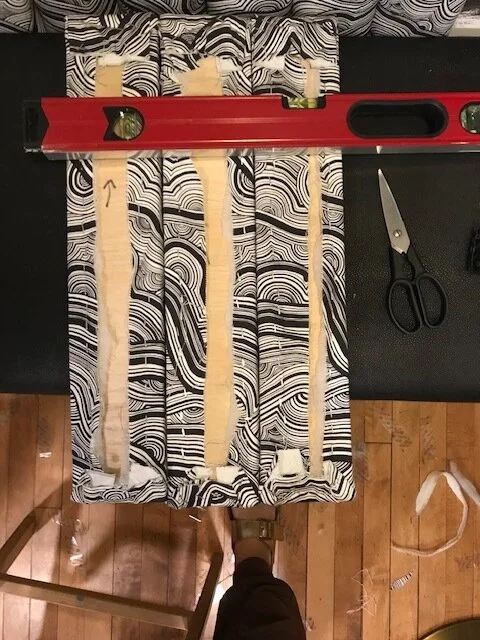
6. You might need help with this step- or you could use some heavy things to hold the boards together.
You want to take the 1x2's and place them on 2 sections of the headboard- their purpose is to hold all the boards together. you want the highest one to be about 1/3 of the way down the headboard, and the second about 2/3 of the way down so they're placed evenly. (In the picture above, the level is to imitate how you would attach a 1x2 to the fabric wrapped pieces of wood).
Screw some long enough screws into the wood, so you can connect the two boards (you want the screws long enough to go into the second board and hold the two boards together, but not too long that it's going to poke out the foam in the front...Not a super comfy bed if a screw is hitting you in the head).
7. Attach the french cleat onto the back of top 1x2". Attach other french cleat to wall (do some measuring first to make sure it's in the right spot, and make sure you're using a few studs. (use a big french cleat with a high weight limit)
8. Hang headboard on wall.
9. Go take a nap in your nice new bed.

(You’ll notice some of these pictures are from the channel tufted banquette we made recently- you can go to that post to see more info. Both the headboard and banquette were made with same method, but I lost the pictures from when I made the headboard)

Let me know if you have any questions!
Life goes something like this: You graduate from college. You get a solid job. You miraculously climb out of the student loan hole. First home purchased. First home sold. More exciting second home purchased.
Anticipation of finally using that inspiration folder you’ve been keeping for the last 10 years of ripped out Architectural Digest and House Beautiful pages.
After all, you are now a fully formed adult with taste, style and (most importantly) a home improvement/design budget.

They Cute….but they ruin everything.
Then… the double blue line. One baby, two babies, and three (followed shortly by a vasectomy) while your folder sits gathering dust.
There’s no way you can have kids in a beautiful home.
They. Ruin. Everything.
Plus, who knew they needed so much stuff?? You went from Millennial Minimalistic to next in line for being profiled on “Hoarders” in 4.2 years. Giving up just seems like the right thing to do.
But, wait! *Cue tinkling music* Behold: the Fairy Godmother of your design dreams
We’ve got a bag of kid-friendly design tricks that will last longer than midnight and possibly longer than Prince Charming too.
You’ve got to do something about the piles. Open shelving is not your friend. What 6 year-old is going to neatly stack his books in chromatic order or curate her stuffed animals by height?
Not mine! And probably not yours either.
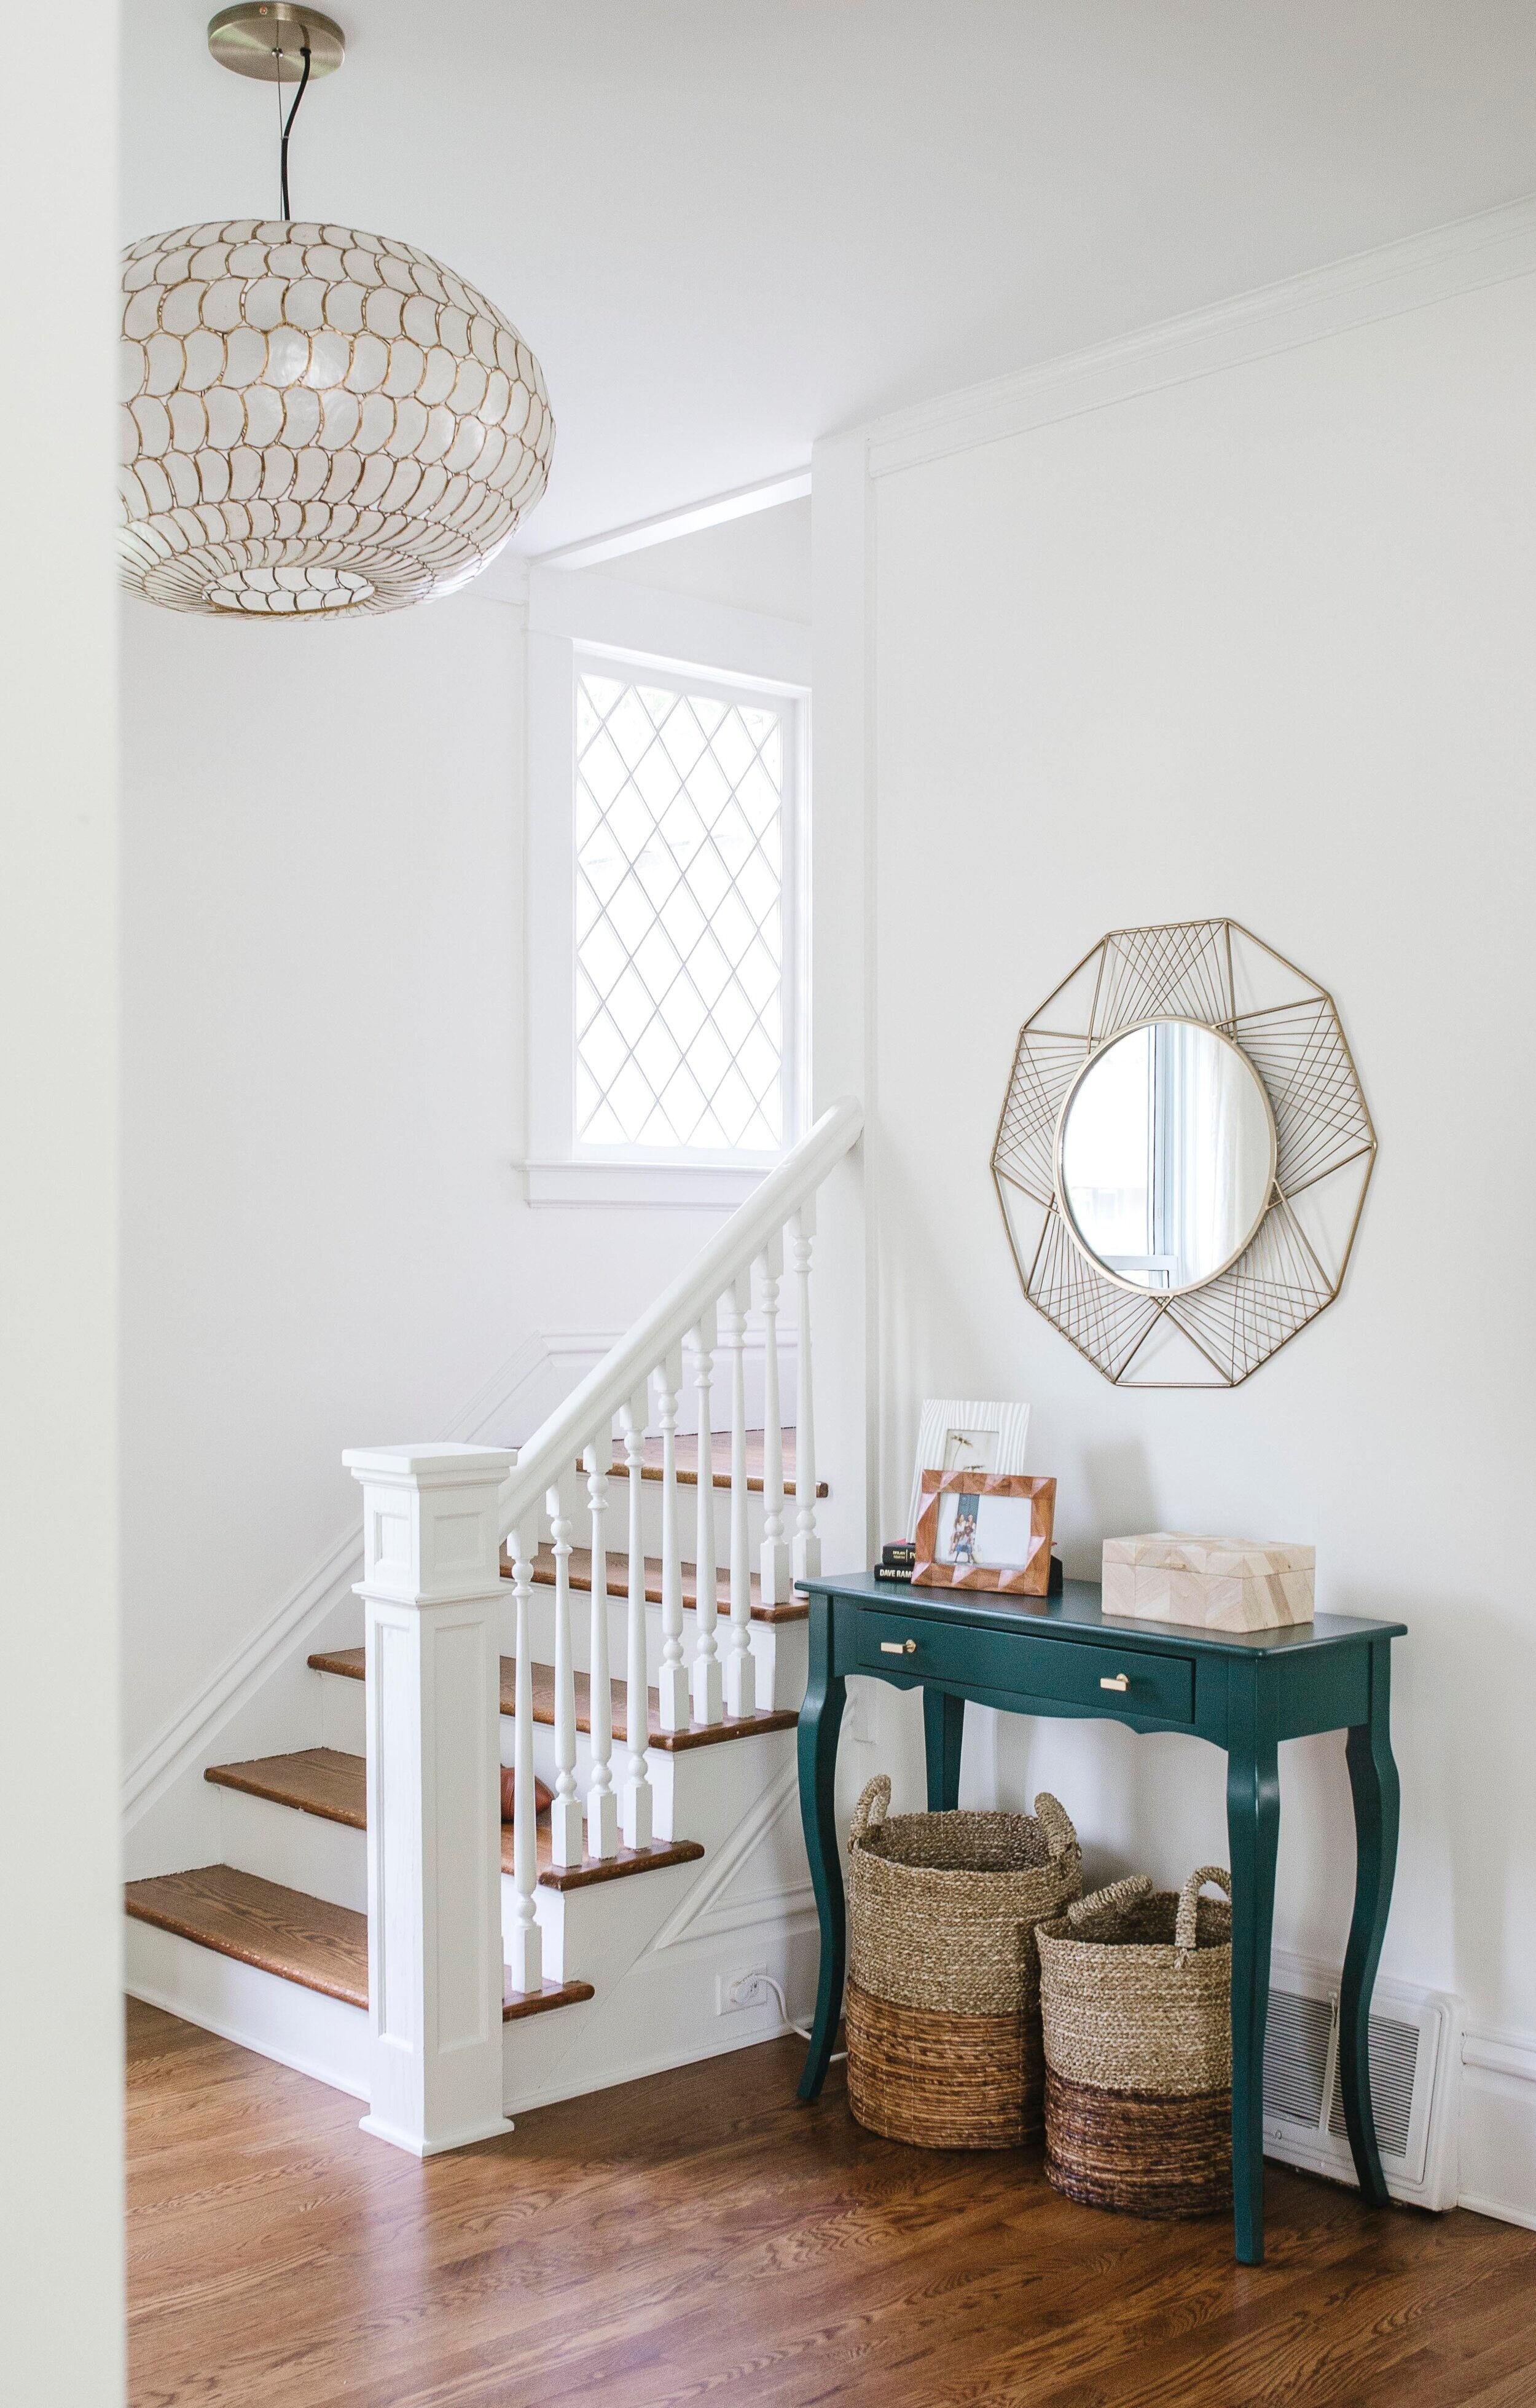
Fill your home with storage ottomans, lidded bins, cupboards with doors and nightstands with drawers.

That gold table holds a ton of kid crap!
Don’t forget that sometimes you’re hiding things from your children. Examples include remotes, ink pens and the emergency pacifier (not to mention the emergency chocolate). This requires doors + height
If you’re anything like us, you need to be able to do a 6-minute clutter clear when your mother-in-law calls to say she’s dropping by. Six minutes is not enough time for vacuuming, wiping, sweeping or scrubbing.
This is when you’re going to call and thank us for talking you out of the white tile floor, pinstripe rug and matte blue countertop.
Become friends with patterns of all types: plaids, modern florals, deconstructed stripes, mottled granite, 2” hickory planks, etc.

Toys get lost on this rug. It’s magic.
They can all perform the most amazing optical illusion known to parents – looking clean when they most certainly are not. Check the bottom of your socks for proof.
Wondering how to put this all together without looking like the circus threw up in your house? Look out for our upcoming post on working with patterns!
First tip: if you have access to a Children’s Hospital they do a wonderful job with forehead stitches, but cost approximately 257x as much as Urgent Care.
Second tip: Urgent Care won’t treat a concussion; they’ll make you drive 100mph to the Children’s Hospital.

Poufs!
Third tip: the coffee table isn’t worth it. There are great alternatives to just about every sharp-edged object you’ve had your eye on.
Think about poufs and ottomans as tables, waterfall edges, radiator covers and fabric covered everything. Your HSA thanks us.
Speaking of fabrics….you do not want to spend the next 18 years of your life staring at that spitup stain. Fortunately the options for materials that repel and resist all the standard kid ammunition are currently endless.
Yes, leather is good. But Sunbrella is better (and cheaper!). Also, have you ever heard of Crypton? We are just blown away by the magic of this textile technology.
On second thought, maybe you can have that white couch or that non-poodle based dog breed… but we woudn’t recommend both. That just seems like laughing at God.
We’ll make this sweet and simple. If you’d like a chance at privacy to go to the bathroom, get dressed or eat stolen Halloween candy while living with a 15-36 month-old, don’t use lever handles. I’m not sure why schools are so obsessed with STEM education. Kids intuitively understand simple machines.

It’ll take them much longer to learn how to open these.
Only if they lock or you know how to use furniture coasters. Failure to follow this rule will result your favorite coffee table being used as a weapon in the murder of your formerly favorite lamp.
However, if you’ve mastered the lock/coaster technique, wheels can be the key to your success. Especially if your kitchen island can act as a child lock for your beverage cooler.
Make it your new favorite word. Choose objects and materials that gain character and depth with every scratch, ding and scuff mark.

This vintage Eames reproduction can handle anything
Wood and leather are shoe-ins for this job. Don’t avoid vintage furniture and décor. They come pre-seasoned! Take a few steps back and you’ll see that small blemishes don’t usually diminish the overall beauty of a piece. Also, teach yourself to not panic: Mr. Clean Magic Eraser is just that – MAGIC.
Kenny Rogers had the right idea. Design happiness can come to you if you know when to hold ‘em with the one item you love most and make everything else a sacrifice.
Know when to fold ‘em and accept the lesser but also less breakable version – surprisingly we’ve actually come to love faux plants.
Know when to walk away. Your inspiration folder shouldn’t be recycled just yet.
Some things might just have to wait until retirement.
First off, you should hire us because we are awesome, fun to work with, and generally all around amazing. Maybe not so humble…but we can’t be everything.
Now to the info you’re looking for.
We enjoy Full Service Design because we love being physically in the space and being a part of the project from conception to installation. We like to be in control of all the details and we love getting to know our clients super well over a time period of a year or more during long projects.
However, we realize that not everyone can afford Full Service Design. Just because someone can’t afford Full Service Design doesn’t mean they don’t appreciate great design so we decided to start doing E-design in order to help make a well-designed home more accessible.

An E-design Board for a kitchen project. See Below For progress shot of kitchen

An in progress shot of a virtual design project we are working on
If you can read numbers on a tape measure and write legibly, and can order and install furniture and art, then keep reading about the benefits.
Timing: Generally E-design can be done quicker than Full Service traditional design, so if you’re in a rush and have the time to implement, this can be a great option. There still may be a wait to receive furniture, but the whole process is generally faster.
Budget Friendly: E-design is done quicker so it’s cheaper for you. You generally are responsible for measuring and taking pictures and sending it to us. You have the option of when to purchase items in design plan, so you can make it fit your budget.
More flexible scheduling: All meetings are online so you don’t even have to put on pants, which is always a win in our book.
Expert Sourcing: If you’ve ever tried to design & furnish a room, you know it can take you HOURS to find that perfect light fixture or chair. We are sourcing items all day long, so can usually find cooler things much quicker because we’ve got a whole list of vendors to choose from.
See the final product before you buy any furniture: Instead of spending a ton of money on multiple different items purchased over time and then realizing it doesn’t fit the space, you can see everything together in a 3D rendering and KNOW it works, and then purchase on your own time schedule. We integrate furniture you already own into projects and make the whole space cohesive.
Floorplans and Layouts: No longer will you buy a couch and get into your living room and realize it is TOO BIG for the space. No longer do you need to spend all day re-arranging furniture to see what looks best. We have already done that work for you. We give you 2D floorplans with all items labeled so you know exactly where to put each item.
It can be a lot of work logistics wise taking care of product ordering and communicating with contractors and sub trades. (which is a reason people hire us for Full Service: because it can be a second full time job).
Design & Products are somewhat limited. All products are retail items which mean no custom items or super specialized design elements that would take collaboration with other trades. So if you’re looking for an exceptionally unique space a la Architectural Digest, this option isn’t for you.

Design board for an E-design Bathroom (scroll below for real life pic)
We charge approximately $1,749 to complete an E-design for one room. (Full Service Design can be 2-3x that cost).
Powder rooms and entry ways are priced on a case by case basis and are generally cheaper. Kitchens or other complicated rooms are also on a case by case basis if they include any cabinetry layouts.
2D Floorplan of room with furniture placement
3D Renderings of spaces
Design Concept Board (aka mood board) which includes all products and items needed to fully implement design
All products loaded into our project management software with links to purchase products
Paint color suggestions
Window covering options

Real Life pic of Project in Progress
You can click here to take our questionnaire
After taking our questionnaire, you will be able to book a free discovery call with us. During the call we will talk about your project and help you figure out if E-design will work for you.
If so, we send you a fee proposal
After design fee is paid, design work starts:
design concept, drawings, sourcing product, (A minimum of 14-21 days for design time is required prior to presentation of design concept).
Presentation via Email/Phone/Zoom, depending on client preference.
Follow Up/Revision
Revise any parts of design per client, answer any questions prior to project completion
If you have any questions about how E-design works, comment below or drop us an email and we will get back to you!
Before someone crucifies me….Is this the ultimate, bestest, going to work with every single-house-white-paint color?
No. That white doesn’t exist.

But it is a white paint color that I’ve used in many different projects…from mid-century modern to old vintage houses, this white is a great one.
Cloud white is a WARM white. That means it has some yellow undertones with a smidge of black. Don’t be scared off by the word ‘yellow’ in the description of it.
That being said, if you’ve got some stark white furniture or stark white tile, Cloud white is NOT going to look great next to it.
Benjmamin Moore’s Cloud White is great because it’s right there in the middle of the stark pure white and some warmer whites.
Which is why it can straddle design asethetics so well.
The first four of these spaces are in a mid century modern home we did a few years ago.


These next pics are from a house built in the early 1900’s- the decor has some modern pieces, but is a much different house than the previous one.
You will notice that the paint color does not look the same between the two houses.
The pictures were taking on different days, with different lighting, and different photographers. Not to mention the window and natural lighting situation is completely different between the two.
This is a great example how the same paint color can look different in different spaces- and why you should ALWAYS get samples first.

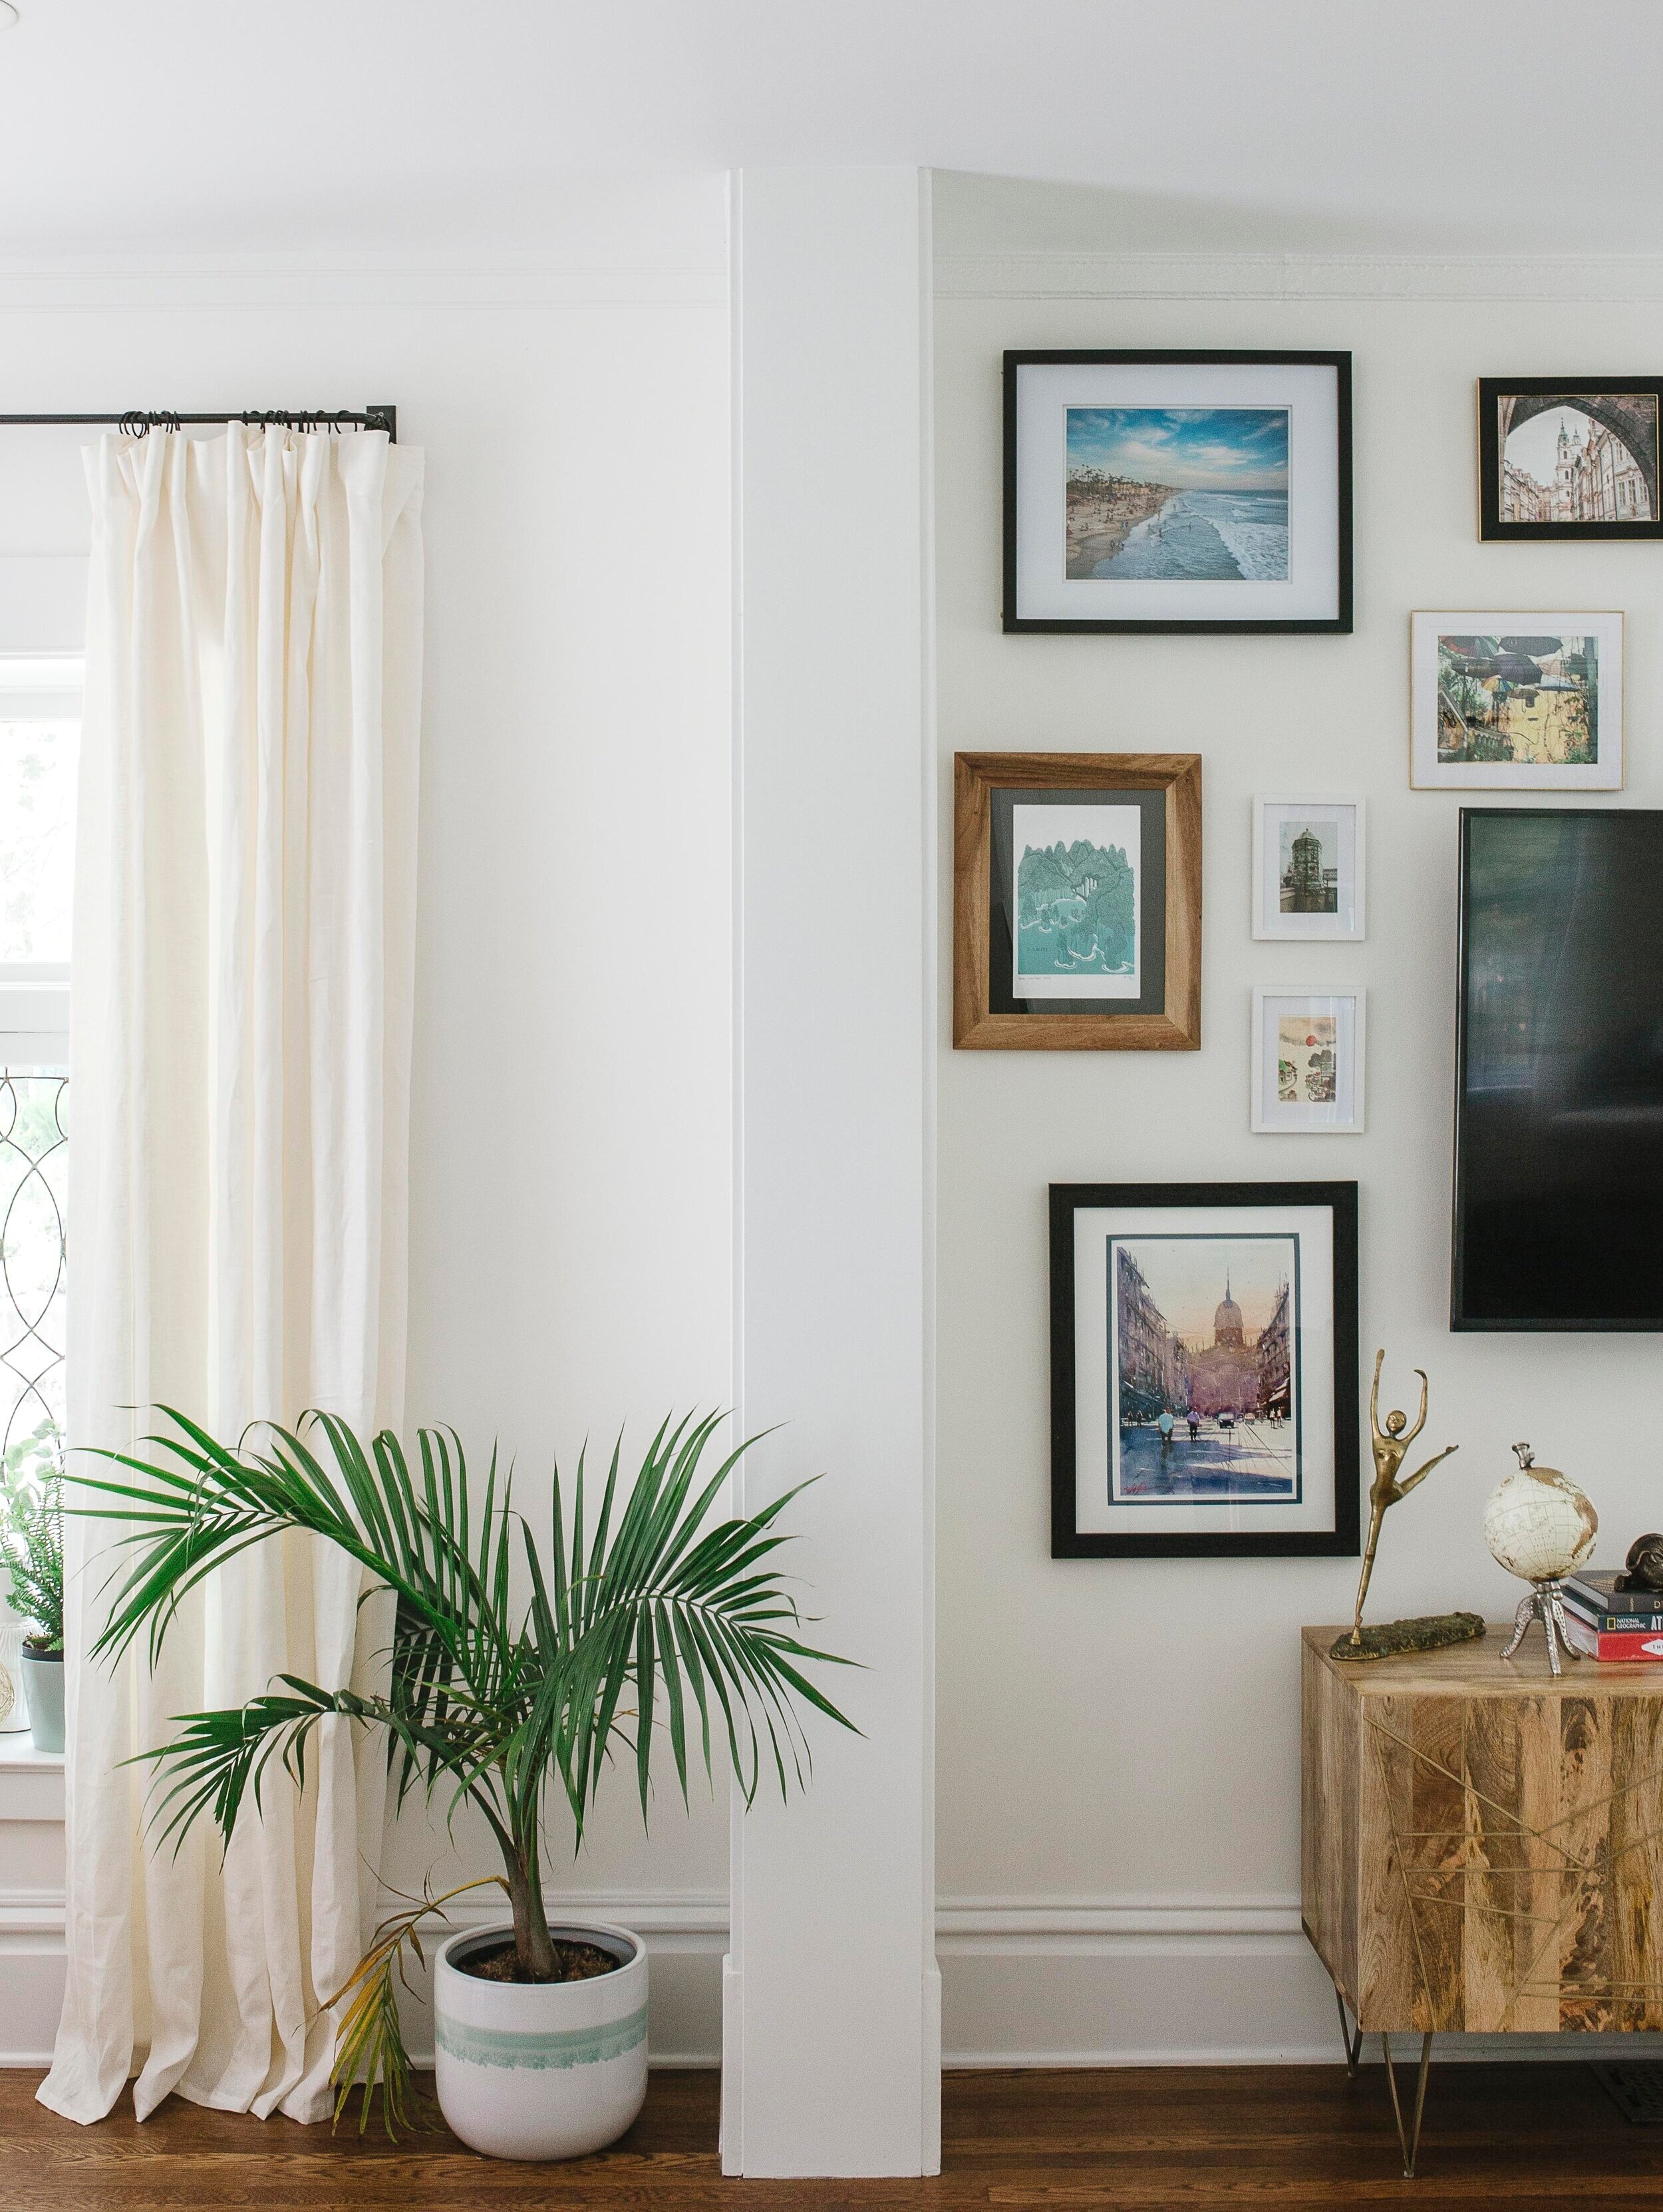
Despite Cloud White looking different in each space, it still looks great and does so well in both houses.
While I do love other whites as well (Simply White, Decorators White if you were curious), Cloud White will always be one of my favs.
Small rooms and small houses are some of the hardest spaces to design well. You have to fit a certain amount of necessary furniture in them, while also wanting to make the space feel like ‘you’.

It really forces you to get creative, not only with furniture layout, but with the color scheme because it is VERY easy to think you’ve just got a few things going on, and then WHOA, overload and it all makes the room look smaller.
- Don’t be afraid of dark colors. The color of the room matters less than how many colors/items are in the room. You can paint a room dark if you are going monochromatic and the other items in the room blend in with the walls. (The only reason we didn’t go dark in this girls room was because we went super dark in the bedroom next door and wanted something different)
- Don’t be afraid to paint the ceiling dark (it makes the ceiling recess and makes the space seem larger
- Use Mirrors. They will reflect the light and the space giving the impression of a larger space.
- Keep the floor uncluttered. Use a sconce or table lamp instead of a floor lamp. If you can, use floating pieces of furniture that give more space. Use unused space under a bunk bed for a crib or toy storage
- Don’t forget lighting. In this particular room, the ceiling pendant light and the table lamp give off enough light, even though it is a dark room with a north facing window- but if you had a slightly larger room, you would probably also want some can lights in the ceiling to brighten the space up.
- Don’t buy a tiny rug. Buy the largest rug that will fit in the space. Small rugs make a space seem even smaller. In this room, we only had room for a 4x6. If you are decorating a living room, I can guarantee a 4x6 will be too small…unless you are a tiny person and your couch is 2 feet long.

This shared girls room project in Grand Rapids Michigan, is one of the harder spaces I’ve designed because it is SOO small. Per code, a bedroom has to be wider than 7 feet. And this bedroom is like 7.5 feet.
Prior to experiencing the space, I designed a moodboard for the room- based off of some items I already owned and liked. I love lots of color, and wanted to incorporate color into the room.

Turns out the final result was exactly opposite of lots of color, yet it was one of my favorite rooms in the whole house.
First mistake in this was painting the ikea kura bed black. In a larger room, this would’ve looked great still- if the bed was less bulky, and more spindly like a jenny lind bed,(like the crib in the pic) I still think it would look great and not too overwhelming and dark.

With just too much color and too many things sticking out and the room closing in and feeling smaller, I decided to go mostly monochromatic and use pattern and texture to make the room interesting.

I had always loved this wallpaper from Hygge & West- I had contemplating using the blue version on the back of our kitchen island, (and then didn’t since I decided to do an extra row of cabinets for storage), and thought about using the black and white version in our tv room (but didn’t because wasn’t the vibe I was going for), so when I remembered they had a white and gold version I felt like I had cured cancer. (turns out figuring out a design conundrum doesn’t save any lives, but I’m not going to let that rain on my parade).

With that figured out, this is the moodboard I came up with. I wanted to accent with a little wood to bring a little something besides white- also to complement the wood pendant light and wood floor.
We already owned the white eames rocker and and the gold/wood circular table(which also is tub, so it doubles as the girls costume storage).
I bought a low white bunk bed from wayfair, and the cheapest white crib from ikea. We cut off the legs off the ikea crib so we could slide it under the bunk bed and voila! Two kids fit in an extremely small, space.

I choose a lucite bookshelf from CB2 for their books so it would blend into the wall and not stick out like a sore thumb-bonus is in another house, I can use this in an adult space. You could have the same effect by painting a bookshelf or dresser the same exact color as the wall. It will blend into the wall and make the space seem bigger.

What are your thoughts? Did you ever think you could have a functional room this small?