
How To Create A Channel Tufted Headboard
Get a Luxe Look For Less
Sometimes I get an idea in my head for a piece of furniture and I can't find it anywhere. Or I find a picture of something similar, yet it's about 487 million dollars, and it turns out I only have 387 million dollars, so alas, I can't afford it.

Life is hard. Hashtag first world problems.
That is the story of this headboard. It was almost four years ago, and I couldn't find a green velvet headboard ANYWHERE.
It's one of the most commented on item when I post on instagram so I wanted to share how I made it. It's really easy. If you read all the way down, you can see how I made it with NO SAWS or cutting items (because I don't do saws, because I like all my fingers).
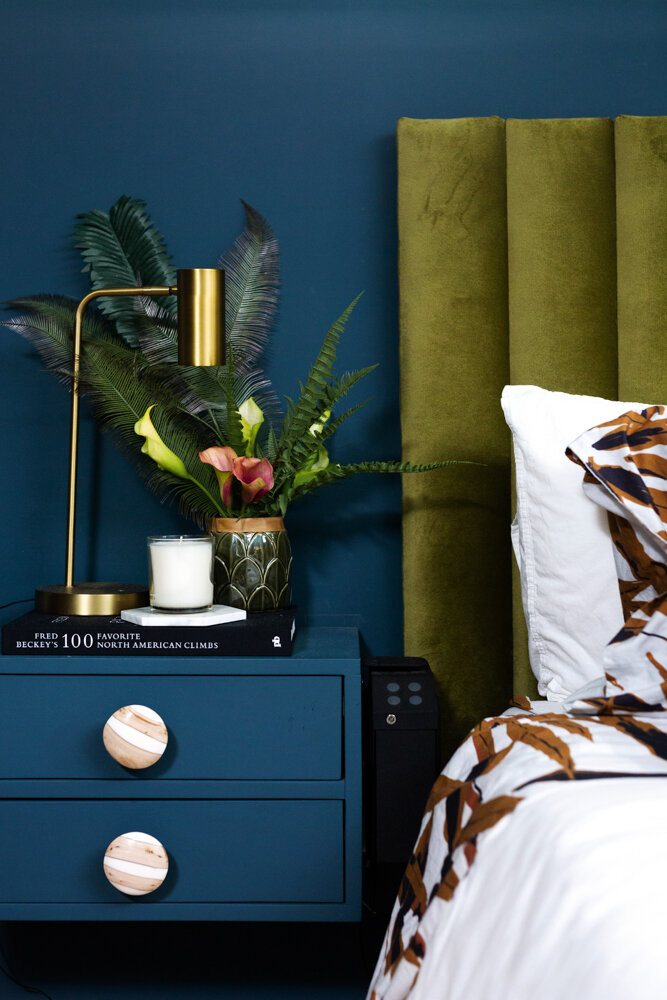
(You can now find a green velvet headboard lots of places, but if you want a different more unique color- you’re gonna have to make it yourself)
Supplies Things You Need:
Boards: Decide what width you want the channels to be, and how high of a headboard. (If you want to be most cost conscious, do a headboard height that can be cut out of 8 or 12 feed boards evenly (so 4ft/6ft high), as opposed to picking a 5ft tall headboard and having a bunch of 3 ft left over scraps).
batting (do not try to do it without the batting)
staple gun and LOTS of staples
1x2" boards for back
drill
screws
Fabric
How To Steps
1. Figure out how many boards you need. I used 1x6's (which are really more like 1x5s) and needed 12 of them, and for our bedroom I needed them to 40” tall. I went to Home Depot and had them cut the boards for me there. The signs there say they charge for more than a few cuts, but I've never had an issue with being charged (and even if you are, it's like $0.25 a cut, which is a heck of a lot cheaper than a saw...also less chance of losing fingers) I also got 1 x 2" cut long enough to go the width of the headboard
2. Next step- Measure out each piece of foam on a board and cut the foam into pieces. You generally want to make sure the piece of foam is the same size as the board or slightly smaller, or you'll have some overhanging foam bulge (the technical term for it) and it could be more difficult to connect all channels together.

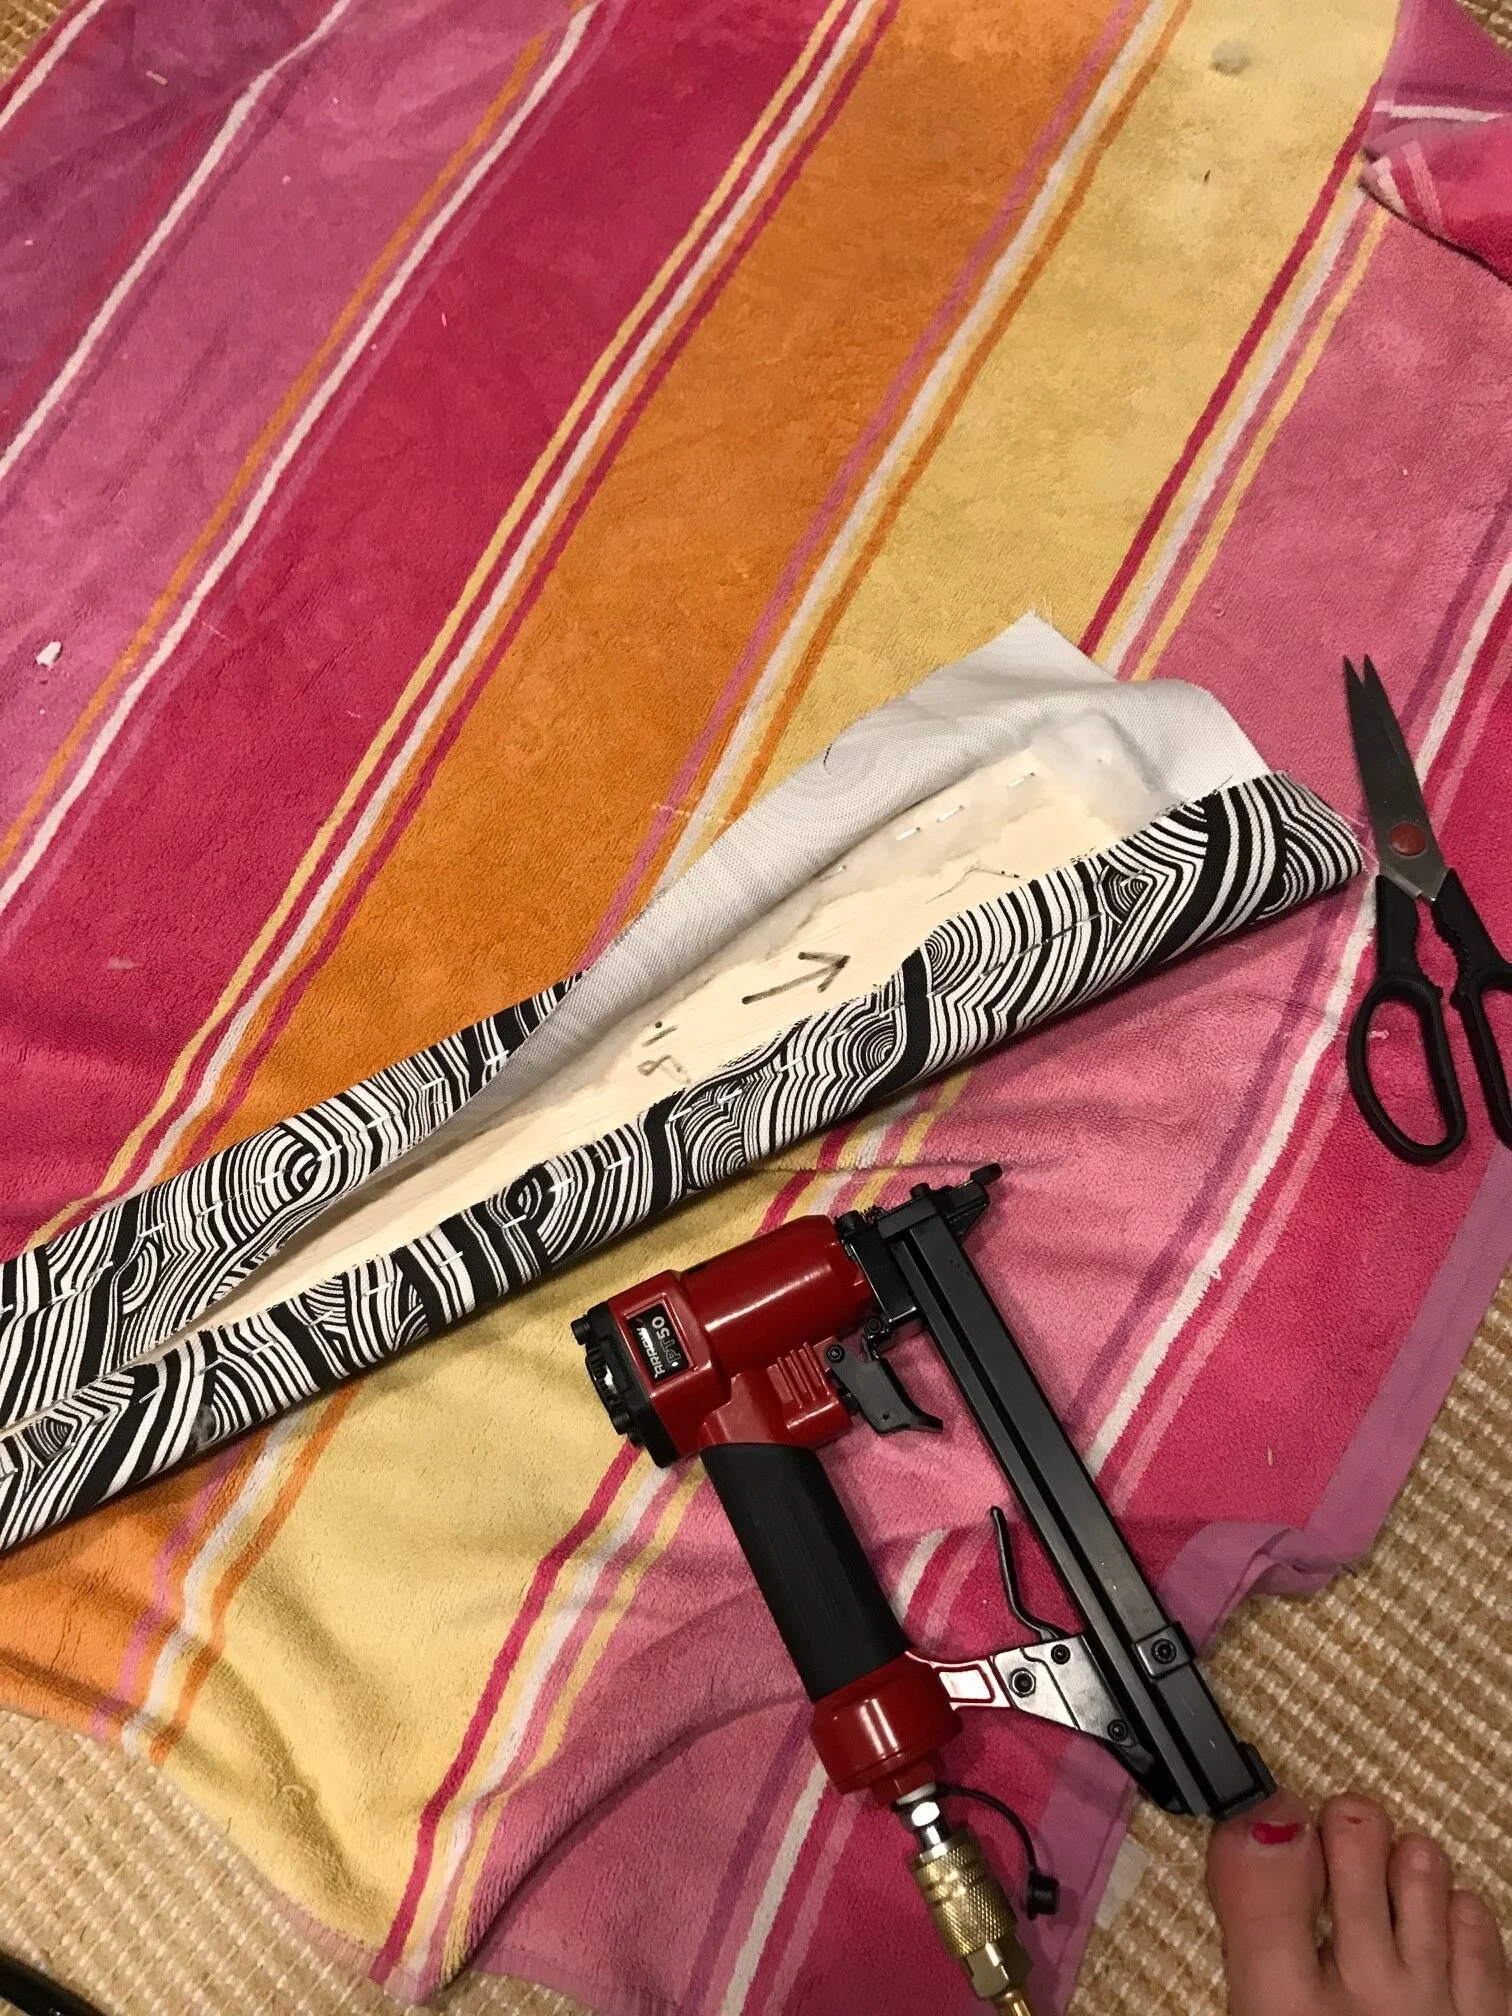
3. Batting: you're going to need a piece of batting large enough to wrap each piece of foam and board. Think about wrapping a present, Staple the crap out of the batting.


4. Fabric: Once you've got each board wrapped with batting, cut fabric to size to cover each individual board (once again you want to wrap it like a present). Flip the foam board covered with batting upside down on the fabric (so you can see the staples you just put in) and proceed to wrap board like a present. Take care when folding the corners at the top, so they're flat and uniform on all the boards, because you'll be able to see them. Staple away.
5. Once you've got all the boards foamed, wrapped in batting and covered in fabric, line them up in the order you want them to be. Then flip them fabric side down/staple side up on the floor.
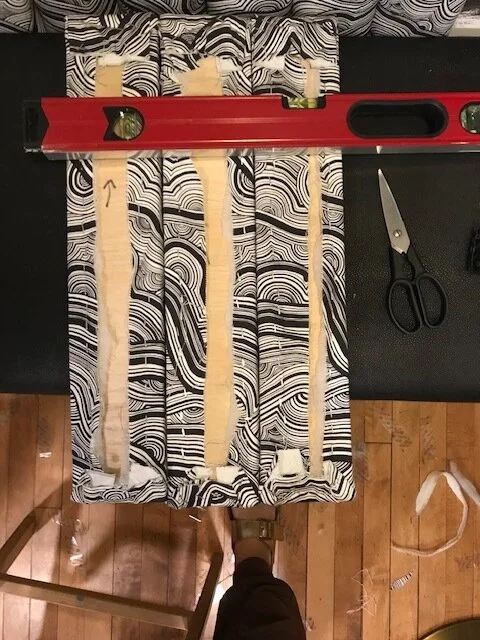
6. You might need help with this step- or you could use some heavy things to hold the boards together.
You want to take the 1x2's and place them on 2 sections of the headboard- their purpose is to hold all the boards together. you want the highest one to be about 1/3 of the way down the headboard, and the second about 2/3 of the way down so they're placed evenly. (In the picture above, the level is to imitate how you would attach a 1x2 to the fabric wrapped pieces of wood).
Screw some long enough screws into the wood, so you can connect the two boards (you want the screws long enough to go into the second board and hold the two boards together, but not too long that it's going to poke out the foam in the front...Not a super comfy bed if a screw is hitting you in the head).
7. Attach the french cleat onto the back of top 1x2". Attach other french cleat to wall (do some measuring first to make sure it's in the right spot, and make sure you're using a few studs. (use a big french cleat with a high weight limit)
8. Hang headboard on wall.
9. Go take a nap in your nice new bed.

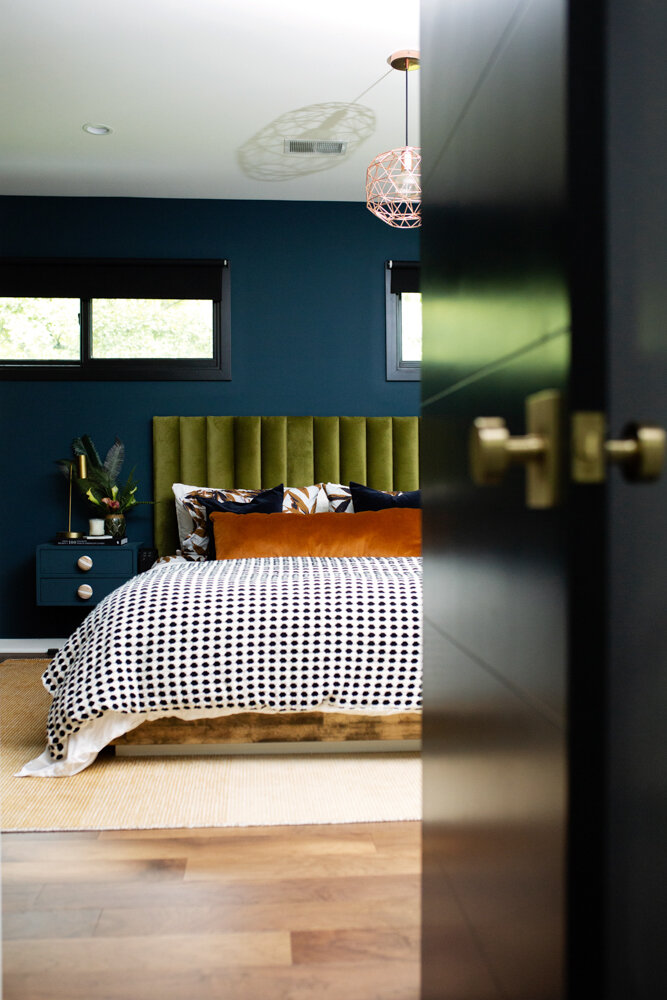
(You’ll notice some of these pictures are from the channel tufted banquette we made recently- you can go to that post to see more info. Both the headboard and banquette were made with same method, but I lost the pictures from when I made the headboard)

Let me know if you have any questions!