interior design

How to Make a Channel Tufted Headboard


How To Create A Channel Tufted Headboard

Get a Luxe Look For Less

Sometimes I get an idea in my head for a piece of furniture and I can't find it anywhere.  Or I find a picture of something similar, yet it's about 487 million dollars, and it turns out I only have 387 million dollars, so alas, I can't afford it.  

Green Velvet Headboard tutorial grand rapids interior designer.jpg

Life is hard.  Hashtag first world problems. 

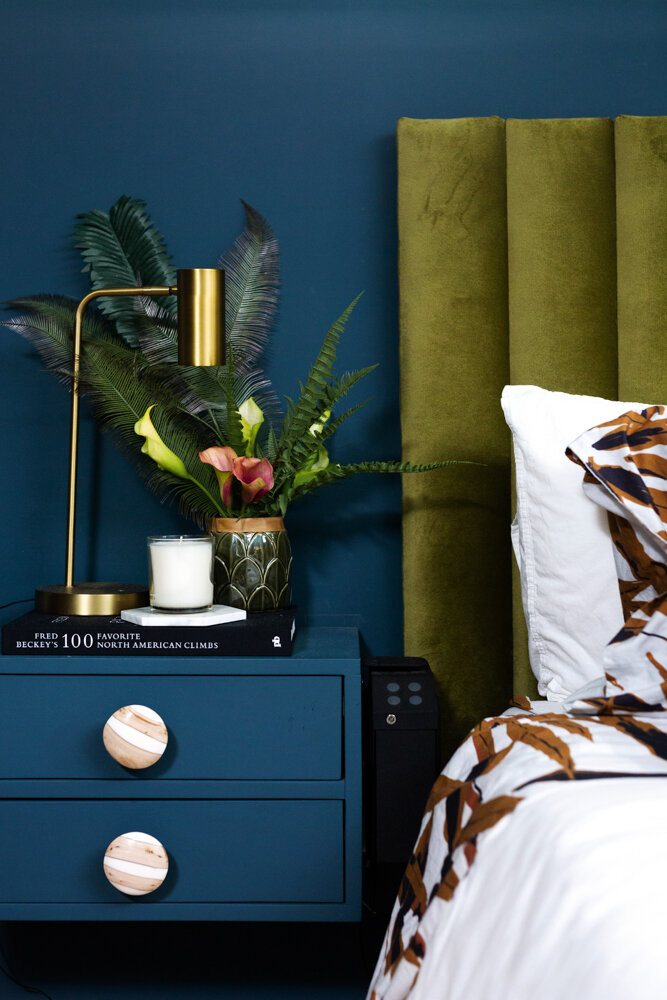
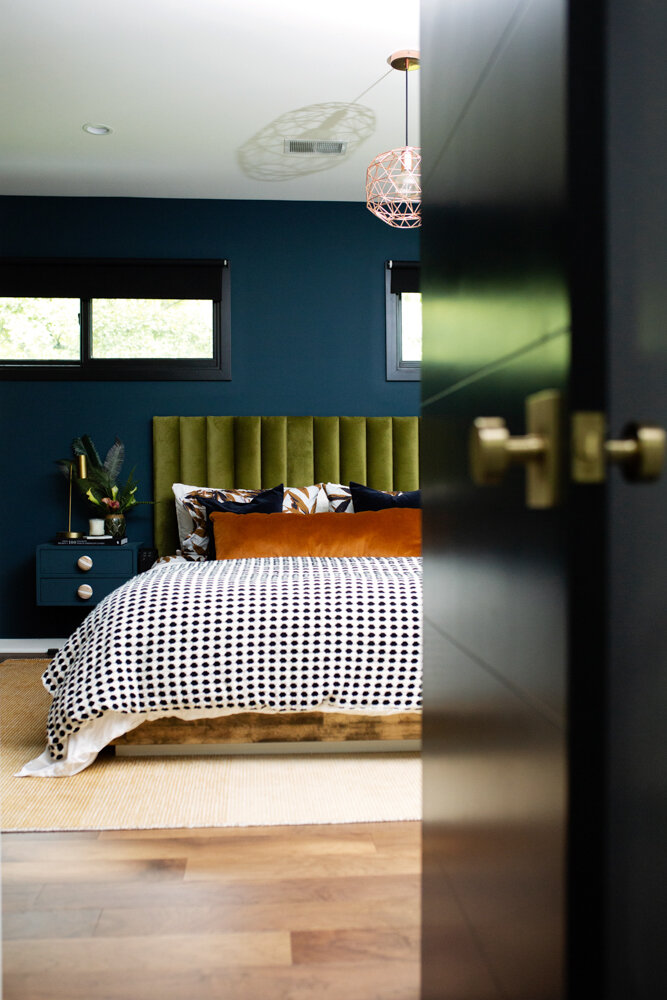
That is the story of this headboard.  It was almost four years ago, and I couldn't find a green velvet headboard ANYWHERE.

 It's one of the most commented on item when I post on instagram so I wanted to share how I made it. It's really easy.  If you read all the way down, you can see how I made it with NO SAWS or cutting items (because I don't do saws, because I like all my fingers). 

Green Velvet Channel Tufted Headboard tutorial DIY.jpg

(You can now find a green velvet headboard lots of places, but if you want a different more unique color- you’re gonna have to make it yourself)

Supplies Things You Need: 

  • Boards: Decide what width you want the channels to be, and how high of a headboard.  (If you want to be most cost conscious, do a headboard height that can be cut out of 8 or 12 feed boards evenly (so 4ft/6ft high), as opposed to picking a 5ft tall headboard and having a bunch of 3 ft left over scraps).  

  • batting (do not try to do it without the batting)

  • 2" foam

  • staple gun and LOTS of staples

  • french cleat 

  • 1x2" boards for back

  • drill 

  • screws

  • Fabric 

How To Steps

1.  Figure out how many boards you need.  I used 1x6's (which are really more like 1x5s) and needed 12 of them, and for our bedroom I needed them to 40” tall.  I went to Home Depot and had them cut the boards for me there.  The signs there say they charge for more than a few cuts, but I've never had an issue with being charged (and even if you are, it's like $0.25 a cut, which is a heck of a lot cheaper than a saw...also less chance of losing fingers)  I also got 1 x 2" cut long enough to go the width of the headboard

2. Next step- Measure out each piece of foam on a board and cut the foam into pieces.  You generally want to make sure the piece of foam is the same size as the board or slightly smaller, or you'll have some overhanging foam bulge (the technical term for it) and it could be more difficult to connect all channels together.  

DIY Channel TUfted green velvet headboard.jpg

3. Batting: you're going to need a piece of batting large enough to wrap each piece of foam and board.  Think about wrapping a present, Staple the crap out of the batting. 

DIY Channel Tuft Upholstered Headboard.jpg
DIY Channel Tuft Headboard.jpg

4. Fabric:  Once you've got each board wrapped with batting, cut fabric to size to cover each individual board (once again you want to wrap it like a present).  Flip the foam board covered with batting upside down on the fabric (so you can see the staples you just put in) and proceed to wrap board like a present.  Take care when folding the corners at the top, so they're flat and uniform on all the boards, because you'll be able to see them.  Staple away. 

How to make a channel Tufted Headboard.jpg

5.  Once you've got all the boards foamed, wrapped in batting and covered in fabric, line them up in the order you want them to be.  Then flip them fabric side down/staple side up on the floor.

DIY Channel Tuft Banquette Bench.jpg

6.  You might need help with this step- or you could use some heavy things to hold the boards together. 

You want to take the 1x2's and place them on 2 sections of the headboard- their purpose is to hold all the boards together.  you want the highest one to be about 1/3 of the way down the headboard, and the second about 2/3 of the way down so they're placed evenly. (In the picture above, the level is to imitate how you would attach a 1x2 to the fabric wrapped pieces of wood).

Screw some long enough screws into the wood, so you can connect the two boards (you want the screws long enough to go into the second board and hold the two boards together, but not too long that it's going to poke out the foam in the front...Not a super comfy bed if a screw is hitting you in the head).  

7.  Attach the french cleat onto the back of top 1x2".   Attach other french cleat to wall (do some measuring first to make sure it's in the right spot, and make sure you're using a few studs.  (use a big french cleat with a high weight limit)

8.  Hang headboard on wall.  

9.  Go take a nap in your nice new bed.  

Green velvet channel tufted headboard DIY.jpg
DIY Chanel Tufted headboard green velvet headboard.jpg

(You’ll notice some of these pictures are from the channel tufted banquette we made recently- you can go to that post to see more info. Both the headboard and banquette were made with same method, but I lost the pictures from when I made the headboard)

Green Velvet Headboard DIY Mid century bedroom.jpg

Let me know if you have any questions!


You Had Kids....How to Design a Beautiful House Without Getting Rid of Them


You Had Kids....How to Design a Beautiful House Without Getting Rid of Them

8 Tips For a Kid Friendly House

Life goes something like this: You graduate from college.  You get a solid job. You miraculously climb out of the student loan hole. First home purchased.  First home sold.  More exciting second home purchased. 

Anticipation of finally using that inspiration folder you’ve been keeping for the last 10 years of ripped out Architectural Digest and House Beautiful pages. 

After all, you are now a fully formed adult with taste, style and (most importantly) a home improvement/design budget. 

They Cute….but they ruin everything.

They Cute….but they ruin everything.

Then… the double blue line.  One baby, two babies, and three (followed shortly by a vasectomy) while your folder sits gathering dust. 

There’s no way you can have kids in a beautiful home. 

They. Ruin. Everything. 

Plus, who knew they needed so much stuff??  You went from Millennial Minimalistic to next in line for being profiled on “Hoarders” in 4.2 years.  Giving up just seems like the right thing to do.

 But, wait!  *Cue tinkling music* Behold: the Fairy Godmother of your design dreams

 We’ve got a bag of kid-friendly design tricks that will last longer than midnight and possibly longer than Prince Charming too.  

HIDDEN STORAGE Is Key

You’ve got to do something about the piles.  Open shelving is not your friend.  What 6 year-old is going to neatly stack his books in chromatic order or curate her stuffed animals by height? 

Not mine!  And probably not yours either. 

Fill your home with storage ottomans, lidded bins, cupboards with doors and nightstands with drawers. 

That gold table holds a ton of kid crap!

That gold table holds a ton of kid crap!

Don’t forget that sometimes you’re hiding things from your children. Examples include remotes, ink pens and the emergency pacifier (not to mention the emergency chocolate). This requires doors + height

PATTERN, COLOR & MOVEMENT

If you’re anything like us, you need to be able to do a 6-minute clutter clear when your mother-in-law calls to say she’s dropping by.  Six minutes is not enough time for vacuuming, wiping, sweeping or scrubbing. 

This is when you’re going to call and thank us for talking you out of the white tile floor, pinstripe rug and matte blue countertop. 

Become friends with patterns of all types: plaids, modern florals, deconstructed stripes, mottled granite, 2” hickory planks, etc. 

Toys get lost on this rug.  It’s magic.

Toys get lost on this rug. It’s magic.

They can all perform the most amazing optical illusion known to parents – looking clean when they most certainly are not.  Check the bottom of your socks for proof. 

Wondering how to put this all together without looking like the circus threw up in your house?  Look out for our upcoming post on working with patterns!

SOFT  CORNERS

First tip: if you have access to a Children’s Hospital they do a wonderful job with forehead stitches, but cost approximately 257x as much as Urgent Care. 

Second tip: Urgent Care won’t treat a concussion; they’ll make you drive 100mph to the Children’s Hospital. 

Poufs!

Poufs!

Third tip: the coffee table isn’t worth it.  There are great alternatives to just about every sharp-edged object you’ve had your eye on. 

Think about poufs and ottomans as tables, waterfall edges, radiator covers and fabric covered everything.  Your HSA thanks us.

 Performance Fabrics

Speaking of fabrics….you do not want to spend the next 18 years of your life staring at that spitup stain. Fortunately the options for materials that repel and resist all the standard kid ammunition are currently endless. 

Yes, leather is good.  But Sunbrella is better (and cheaper!).  Also, have you ever heard of Crypton?  We are just blown away by the magic of this textile technology. 

On second thought, maybe you can have that white couch or that non-poodle based dog breed… but we woudn’t recommend both.  That just seems like laughing at God.

DOORKNOBS For Kids

We’ll make this sweet and simple.  If you’d like a chance at privacy to go to the bathroom, get dressed or eat stolen Halloween candy while living with a 15-36 month-old, don’t use lever handles.  I’m not sure why schools are so obsessed with STEM education.  Kids intuitively understand simple machines.

It’ll take them much longer to learn how to open these.

It’ll take them much longer to learn how to open these.

WHEELS

Only if they lock or you know how to use furniture coasters.  Failure to follow this rule will result your favorite coffee table being used as a weapon in the murder of your formerly favorite lamp. 

However, if you’ve mastered the lock/coaster technique, wheels can be the key to your success.  Especially if your kitchen island can act as a child lock for your beverage cooler.

PATINA

Make it your new favorite word.  Choose objects and materials that gain character and depth with every scratch, ding and scuff mark.

This vintage Eames reproduction can handle anything

This vintage Eames reproduction can handle anything

Wood and leather are shoe-ins for this job.  Don’t avoid vintage furniture and décor.  They come pre-seasoned!   Take a few steps back and you’ll see that small blemishes don’t usually diminish the overall beauty of a piece.  Also, teach yourself to not panic: Mr. Clean Magic Eraser is just that – MAGIC. 

And finally… PATIENCE

Kenny Rogers had the right idea.  Design happiness can come to you if you know when to hold ‘em with the one item you love most and make everything else a sacrifice. 

Know when to fold ‘em and accept the lesser but also less breakable version – surprisingly we’ve actually come to love faux plants.

Know when to walk away.  Your inspiration folder shouldn’t be recycled just yet. 

Some things might just have to wait until retirement.


Pinterest 2021 Home Decor Predictions: Why We Think They’re Wrong


Pinterest 2021 Home Decor Predictions: Why We Think They’re Wrong

Soooo…..Pinterest put out their predictions for home décor/design for 2021. 

They come up with these predictions based on what people are searching for and how certain topics have increased.  All I gotta say, and I’m going to say this nicely….but I think they are mostly wrong. 

Pinterest 2021 Home Decor Trend #1: Vibey Lights

Think 1990’s lava light in LED form.  All I can say is NO.  Just NO.

This may take off in 13-19yo set or in a strip club, but I just don’t see a lot of our interior design clients going for a fluorescent blue light on their wall that says “netflix and chill” or whatever it is that these lights say. 

Picture via Pinterest Home Trends

Picture via Pinterest Home Trends

Pinterest 2021 Home Decor Trend #2: Japandi Asthetic

Pinterest describes it as, “Japanese design meets Scandinavian minimalism in this rising home décor trend. Sleek lines, neutral color schemes and calming setups.” 

Picture via Pinterest Home Trends

Picture via Pinterest Home Trends

Here I think they are both right AND wrong.  Are people going for minimalism and neutral color schemes? 

Yes they are!

Is it an upcoming trend for 2021?  No.  Slatted beds/doors/dividers have been around for years now…it’s nothing new in the design world.

Below are two types of doors we installed in a project a few years ago.

Swatts & Co Design Studio

Swatts & Co Design Studio

Slatted wood closet doors scandi japan japandi design grand rapids interior designer custom doors.JPG

There might be a slight turn from Scandi to Japan, but not so much that the average person can tell the difference in the end product.

Pinterest 2021 Home Decor Trend #3: Shelfies are the new gallery walls

As Pinterest says, “Calling it now: kitchen shelves will be the new favorite corner of the house in 2021. People will collect and invest in eye-catching dinnerware, from colored glassware to handmade clay plates.” 

This one goes along the lines of the modern minimalism above.  Call me a jerk, but I don’t think you can call it ‘predicting trends’, when it’s already a huge trend.

Swatts & Co Design Studio

Swatts & Co Design Studio

Search for “open kitchen shelving” on pinterest or google and you won’t have the time to look at all the results. I almost wonder if the large format open shelving will be going out of style in the next 5 years. 

Swatts & Co Design Studio

Swatts & Co Design Studio

I still like open shelving in small doses for items that are used a lot (if they’re not used a lot, you’re gonna have yourself some dusty dishes).  I like them so much, that I incorporate them into A LOT of our kitchen projects.

Swatts & Co Design Studio

Swatts & Co Design Studio

They allow for small spaces to feel more open and can add more storage to places that previously had none.  The above pics of open shelving are from projects that we’ve done in the past.  Some of these projects go back 4-5 years, so let’s not say this is an upcoming trend. 

Pinterest 2021 Home Decor Trend #4: Cloffice is the new home office

Pinterest says, “Say goodbye to open floor plans. Pinners are getting creative with closed doors. In 2021 we’ll all learn what a “cloffice” is. Even when doors aren’t available, people will find new ways to create some personal space.”

Yes to this!

Anyone who has lived through 2020 and working from home is saying, “YAAASSS!!! GIVE ME A ROOM TO MYSELF WHERE MY SAVAGE CHILDREN CAN’T INTERRUPT MY ZOOM MEETINGS!”  I’m not generally an all-caps type of person, but that previous sentence would be yelled off the rooftops by parents everywhere…if parents weren’t too exhausted to climb up onto the rooftops. 

Design by A Lo Profile

Design by A Lo Profile

First, you might wonder what a “Cloffice” is? Closet + Office = Cloffice. If you have an extra room and a lot of clothes, you can combine and create a super functional space like Lauren did over at A Lo Profile. (see pic above) I’m super jealous of all of her closet space, and a door that probably locks.

Swatts & Co Design Studio

Swatts & Co Design Studio

In one of our past projects, we created a home office and put a desk into the laundry room to create a work space in a house that had no room for an office…it ended up turning into a place for kids to do crafts- which we can all agree is better than the kitchen table.

I think pinterest is 100% right on this one!

What do you think?

Are any of these going to explode more than they already have? Are neon lights going to become a staple in the average household?