Kitchens

Learn How To Create A Kitchen You Love by Painting Your Cabinets


Learn How To Create A Kitchen You Love by Painting Your Cabinets

(No paint sprayer needed)

So you hate your kitchen cabinets and don’t want to spend the money for new ones. 

I get it. 

Painting is a great way to change the whole look of a kitchen without spending a ton of money.  It takes some time and effort, but you can do it well…even WITHOUT a paint sprayer. 

DIY paint your kitchen cabinets with paint roller. mustard yellow kitchen cabinets grand rapids interior designer.jpg

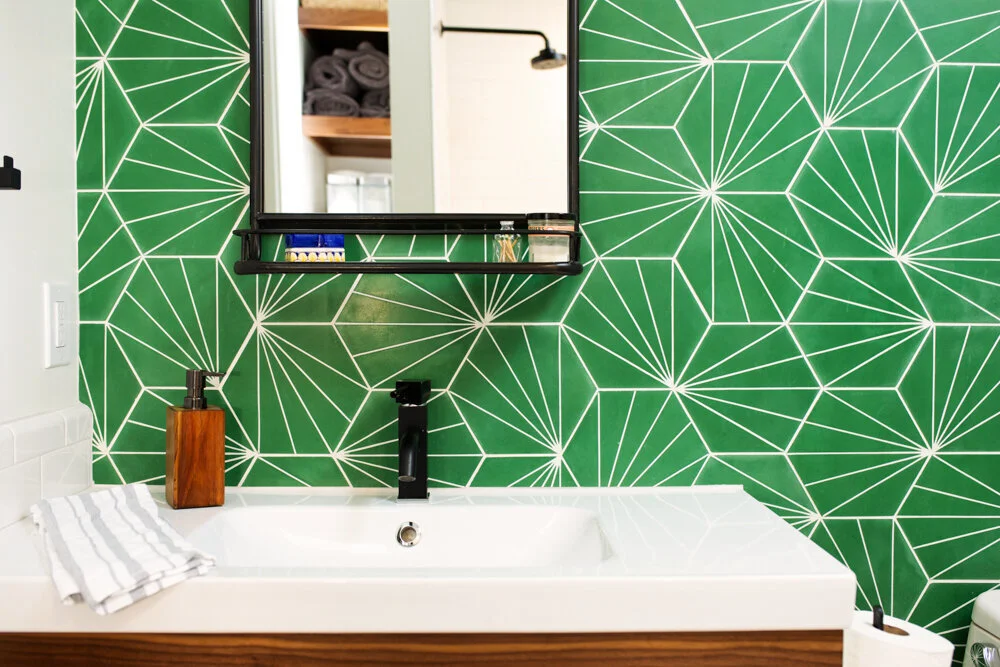
I painted the lower cabinets in the kitchen above for the fall 2020 One Room Challenge and they turned out really well. (Scroll to bottom to see what they looked like before, and some more after pics).

I’ve sprayed kitchen cabinets before & I’ve rolled them.  They both have pros & cons, but this time around I didn’t want to deal with all the spray prep, and I also didn’t have a warm place to do the painting if we were to spray them. 

Ben Moore Advance Paint.png

The thing that makes it possible to roll these is the most amazing paint product to ever hit the market….Benjamin Moore’s Advance line.

No, they’re not paying me (unfortunately). This paint is a latex paint, but levels like an oil. Which means it takes 16 hours to dry (boo!), but gives you the best finish you could ask for as a non-professional (yay!).

Supplies You Need To Paint Your Cabinets

  • ziplock bags (for door hardware

  • Screwdriver

  • Orbital Sander

  • 100 Grit, 200-300 grit sandpaper

  • Fine grit sanding block

  • 4” roller with short nap

  • 1-2” Angled paint brush

  • Benjamin Moore Advance Primer

  • Benjamin Moore Advance Paint (Matte/Satin/Semigloss/High Gloss options)

    • I have used all of these sheens for painting cabinets or furniture, and the only one I don’t like is the satin. For some reason I never like the way it comes out.

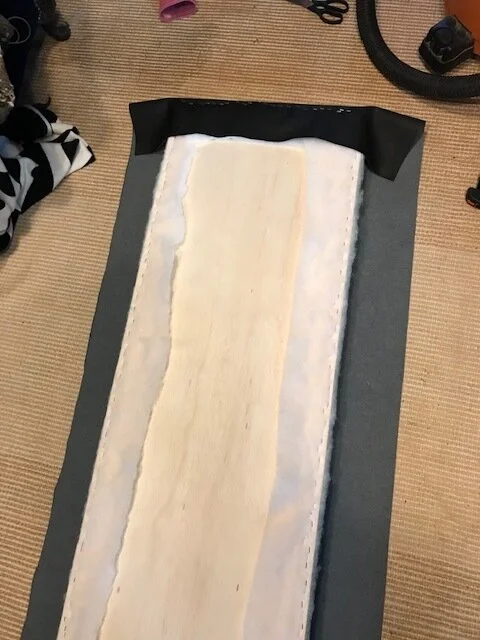
Step One: You gotta take the cabinet doors off.

No. Don’t try to do this with the doors on. It’s gonna look bad. Real Bad. Pro tip is put hardware from each door into a ziplock bag and label it with door number. Write the door number in the notch where hardware goes, so you know it won’t be painted over (if you’re spraying cabinets, cover the number with a small piece of painters tape so you know what doors go where)

how to paint kitchen cabinets with roller for beginners.jpg

Step Two: Sand, Sand Sand

This step is the hardest and the worst.  It takes the most time, and if you don’t put the time and effort in, your whole project is gonna look real crappy real soon. 

You have to sand those suckers down and get rid of all the gloss on the cabinets so the paint will stick.  And when I say sand, you need to sand em’ good.  You also have to remember that you want the finish to stay smooth, so don’t sand with 60 grit, or it’s going to gouge out the fronts.  You should start sanding with 100 grit to get all of the initial finish off, and then go to 180-200grit to smooth everything up. 

how to paint kitchen cabinets sand kitchen cabinets.jpg

Use a sanding sponge in the corners and the places that are hard to reach with your sander.  

Plan for the sanding to take you a few hours at the VERY LEAST, if not longer.  Do not skimp on this step.

Step Three: Clean Cabinets

I first vacuum the fronts with my dyson, and then I wipe them down with a soft, damp cloth, and then I vacuum them AGAIN.  Then I run my hands all over them to make sure that A) they’re consistently smooth and B) there is not any dust on them.  (you can also use tack cloth for this, but I prefer a damp rag)

Step Four: Prime Kitchen Cabinets

If you’re fancy, you will drill holes in the bottom of your cabinets door fronts so you can have the sticking up and paint both front and back and same time.  I’m not fancy. 

I used bins in my basement to set the fronts on. 

How to paint kitchen cabinets with roller ben moore advance paint.PNG

Remember to start painting the BACK of the cabinet FIRST.  You do this because then you will need to flip them over, and there is always a chance paint is dinged slightly from laying on a new paint job (which is why people suspend them in the air). 

Prime both sides and then let them dry.  We use Benjamin Moore Advanced line to paint, and use the Ben Moore Advanced primer.  If this is the only project you’re doing, then tint the primer to match your final color.  We bought a gallon of the primer in white, because we have a lot of projects we are using it for. 

Step Five: More Sanding

Oh yay!  Use a really smooth grit (200-300grit) to sand the primer. 

Try to get a really really smooth finish, because this will dictate how smooth your final finish is. 

Step Six: Painting Cabinets For Real

Finally the fun part! Remember to start with the back of the cabinets (also will give you some time to practice how to get a smooth finish with the roller). 

I used a 4” roller with a really smooth roller nap that is meant for cabinets and smooth surfaces (ask your local paint store to recommend the best kind). 

How to paint kitchen cabinet with roller BM advance paint yellow kitchen cabinets.PNG

The trick to this paint is to try to get the most even surface (ie, don’t do one section of cabinet with a ton of paint, and the other just using what ever is left on the roller).  The paint will do an amazing job of leveling (smooth out), but try to put the same amount of paint with no huge blobs. 

Do not try to suck as much paint out of that roller as you can- on a wall with eggshell, you can roll and roll and use all the paint prior to getting more paint.  If you do that, you will not have a great finish. 

For these cabinets, I used a combination of a 4” roller and a small angled brush to get into the corners and crevices. 

You will need 2-3 coats of your final color. 

Step Seven: More Sanding

If you want to do an extra nice job, you will sand the cabinets between each coat of paint.  I was sort of lazy, so I only sanded them after the primer, and then prior to the 3rd and final coat of paint.  (don’t be lazy like me). 

Step Eight: WAIT FOR 2-3 Weeks

Now the trick is to let the door fronts sit for 2 weeks AT LEAST.  The Benjamin moore paint takes up to 21 days to cure completely, so if you start using them right away, the paint with ding…and chip.  If you wait until it completely hardens, you are much more likely to have a durable finish. 

I had to put the fronts on earlier than I wanted so I could get pictures to finish the One Room Challenge, and they got dinged up pretty bad in that first week.  After another week or so, they’ve been pretty hardy and are still looking good a few months later. 

Let me know if you have any questions and/or how your project goes!

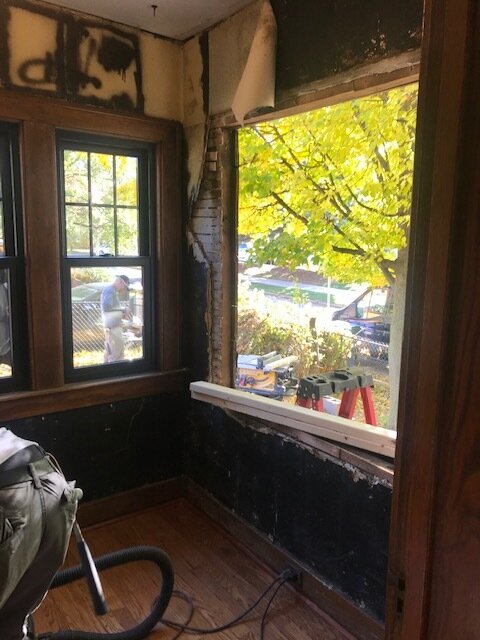
What the kitchen looked like before:

black tile kitchen yellow floral wallpaper.jpg

And After:

Grand Rapids Interior Designer How to paint your kitchen cabinets with a paint roller.jpg
DIY paint your kitchen cabinets with a roller mustard yellow cabinets gold hardware.jpg
How to Paint your kitchen cabinets with a paint roller yellow kitchen banquette bench.jpg
 

Pinterest 2021 Home Decor Predictions: Why We Think They’re Wrong


Pinterest 2021 Home Decor Predictions: Why We Think They’re Wrong

Soooo…..Pinterest put out their predictions for home décor/design for 2021. 

They come up with these predictions based on what people are searching for and how certain topics have increased.  All I gotta say, and I’m going to say this nicely….but I think they are mostly wrong. 

Pinterest 2021 Home Decor Trend #1: Vibey Lights

Think 1990’s lava light in LED form.  All I can say is NO.  Just NO.

This may take off in 13-19yo set or in a strip club, but I just don’t see a lot of our interior design clients going for a fluorescent blue light on their wall that says “netflix and chill” or whatever it is that these lights say. 

Picture via Pinterest Home Trends

Picture via Pinterest Home Trends

Pinterest 2021 Home Decor Trend #2: Japandi Asthetic

Pinterest describes it as, “Japanese design meets Scandinavian minimalism in this rising home décor trend. Sleek lines, neutral color schemes and calming setups.” 

Picture via Pinterest Home Trends

Picture via Pinterest Home Trends

Here I think they are both right AND wrong.  Are people going for minimalism and neutral color schemes? 

Yes they are!

Is it an upcoming trend for 2021?  No.  Slatted beds/doors/dividers have been around for years now…it’s nothing new in the design world.

Below are two types of doors we installed in a project a few years ago.

Swatts & Co Design Studio

Swatts & Co Design Studio

Slatted wood closet doors scandi japan japandi design grand rapids interior designer custom doors.JPG

There might be a slight turn from Scandi to Japan, but not so much that the average person can tell the difference in the end product.

Pinterest 2021 Home Decor Trend #3: Shelfies are the new gallery walls

As Pinterest says, “Calling it now: kitchen shelves will be the new favorite corner of the house in 2021. People will collect and invest in eye-catching dinnerware, from colored glassware to handmade clay plates.” 

This one goes along the lines of the modern minimalism above.  Call me a jerk, but I don’t think you can call it ‘predicting trends’, when it’s already a huge trend.

Swatts & Co Design Studio

Swatts & Co Design Studio

Search for “open kitchen shelving” on pinterest or google and you won’t have the time to look at all the results. I almost wonder if the large format open shelving will be going out of style in the next 5 years. 

Swatts & Co Design Studio

Swatts & Co Design Studio

I still like open shelving in small doses for items that are used a lot (if they’re not used a lot, you’re gonna have yourself some dusty dishes).  I like them so much, that I incorporate them into A LOT of our kitchen projects.

Swatts & Co Design Studio

Swatts & Co Design Studio

They allow for small spaces to feel more open and can add more storage to places that previously had none.  The above pics of open shelving are from projects that we’ve done in the past.  Some of these projects go back 4-5 years, so let’s not say this is an upcoming trend. 

Pinterest 2021 Home Decor Trend #4: Cloffice is the new home office

Pinterest says, “Say goodbye to open floor plans. Pinners are getting creative with closed doors. In 2021 we’ll all learn what a “cloffice” is. Even when doors aren’t available, people will find new ways to create some personal space.”

Yes to this!

Anyone who has lived through 2020 and working from home is saying, “YAAASSS!!! GIVE ME A ROOM TO MYSELF WHERE MY SAVAGE CHILDREN CAN’T INTERRUPT MY ZOOM MEETINGS!”  I’m not generally an all-caps type of person, but that previous sentence would be yelled off the rooftops by parents everywhere…if parents weren’t too exhausted to climb up onto the rooftops. 

Design by A Lo Profile

Design by A Lo Profile

First, you might wonder what a “Cloffice” is? Closet + Office = Cloffice. If you have an extra room and a lot of clothes, you can combine and create a super functional space like Lauren did over at A Lo Profile. (see pic above) I’m super jealous of all of her closet space, and a door that probably locks.

Swatts & Co Design Studio

Swatts & Co Design Studio

In one of our past projects, we created a home office and put a desk into the laundry room to create a work space in a house that had no room for an office…it ended up turning into a place for kids to do crafts- which we can all agree is better than the kitchen table.

I think pinterest is 100% right on this one!

What do you think?

Are any of these going to explode more than they already have? Are neon lights going to become a staple in the average household?


DIY Channel Tuft Banquette Bench How-To


DIY Channel Tuft Banquette Bench How-To

I know a lot of people wanted to know how we upholstered our banquette bench from our Fall 2020 One Room challenge project, so this post is for you my friends!

First…look at some pretty pictures. Isn’t it lovely!??

Modern Vintage Yellow FLoral Kitchen Wallpaper DIY Channel Tufted Banquette Bench (1).jpg
Channel Tufted Banquette Bench Yellow Kitchen Cabinets floral kitchen wallpaper (1).jpg

Not only is it lovely, it is COMFORTABLE! I love sitting there, and now it’s my favorite place to sit on the computer and work before the savages wake up.

Please note, that we had the bench and drawers made by our friends at Re.Dwell because we didn’t have time to deal with that. You could do something similar by using an Ikea Besta series with drawers for the bench and putting some wood on top and for the back, and then pick up my directions here.

What you need

  • a bench

  • 1/4” plywood cut to size

  • staple gun (and huge amount of staples)

  • batting found at joanns or hobby lobby

  • High Density Foam (Joanns or Hobby Lobby)

    • 3” Foam for bench

    • 1” foam for back

  • Whatever fabric you’re using

  • Industrial Velcro

There are a lot of ways you could do this. You could just upholster some foam like a pillow, and throw it up on the bench. I wanted a custom upholstered look, like at a fancy restaurant, so I figured out how to do that (it wasn’t hard).

Since the bench was sturdy, the wood I used as backing for the upholstery, didn’t have to be. We didn’t want a lot of extra bulk, so we went with 1/4” plywood (the cheap stuff). We (the husband), cut the plywood into the size of the bench- making it slighttttlllly smaller than actual bench to account for fabric and batting.

Steps to DIY upholstered Banquette Bench

  • cut the foam to match the size of your plywood

  • wrap batting around foam and wood, pull tight and staple (make sure you have extra batting on the edge that will be the front edge of bench)

  • now take the fabric you’re using to upholster (we used a faux leather to make clean up easy) and upholster the sides first and then the back of bench, leaving the front edge UN-STAPLED

DIY how to Upholster a channel tuft banquette bench.jpg
DIY how to Upholster a channel tuft banquette bench (3).jpg
  • Now you can take the upholstered piece of plywood to your bench. I used heavy duty velcro to attach the plywood to the bench. I wanted to be able to change it out if I needed to without too much trouble.

built in upholstered banquette bench DIY.jpg
Built in banquette bench upholstery DIY Grand Rapids Interior Design.jpg
  • Do not fold the batting underneath the plywood- you want the batting to come out towards the front of the bench so you can fold it over the ledge of the bench like in picture (this is what will give you the ability to make it look more built in)

  • Staple the batting along the whole length of under the ledge of the bench.

  • Then I pulled the black fabric tight and wrapped it over the batting and stapled it underneath the edge of the bench. (the corners took a few trys to fold and get right because of the extra fabric, but it’s not hard to get the staples out and do it over)

DIY Banquette Bench Upholstery Built in upholstered bench channel tuft back.jpg

Here we are ready to upholster the back of the bench! (this can still be done if you don’t have a back to your bench- you just need to use 1” thick boards instead of the 1/4” plywood and attach to wall with a french cleat.)

How to DIY Upholster a Channel Tufted Banquette

  • The steps for these are very similar to the bench, except more time consuming because there are so many more pieces involved

  • You need 1” foam, batting, and 1/4” plywood

  • First wrap the batting around foam and plywood pulling tight- this give you the rounded edges

  • Then wrap fabric around and staple away

  • If you are using patterned fabric, number the backs of your pieces of wood so you can keep the pattern repeat in order.

DIY Channel Tuft Upholstered Banquette.jpg
DIY Channel Tuft Upholstered Banquette (2).jpg
DIY Channel Tuft Upholstered Banquette (3).jpg

For this bench, we used 4” wide boards that were 26” high (would’ve gone higher if the window trim wasn’t there). If you want to make less work for yourself, you can go with 5” or 6” wide boards.

DIY Channel Tuft Upholstered Banquette (5).jpg

First I organized the boards onto the back of bench. Because the bench was upholstered almost all the way to the back, I was able to squish them a little bit in between black upholstered foam and the back of the bench.

I put pieces of velcro on each board and stuck it in place.

Grand Rapids Interior Design Channel Tufted Banquette Bench.jpg

With the velcro, I can easily remove one board and reupholster if it gets ruined, and I can also easily pull out the board if I want to use that outlet behind.

Important- If you do not have an angled bench back board to velcro individual boards to, you need to use 1” thick boards to upholster individually-

DIY Channel Tuft Banquette Bench.jpg

Then you will line them all up together like in the above picture, and use 2 thin boards (imagine level is a board) and screw into each piece of upholstered board so that they are all stuck together. Then you can attach a french cleat to back of upholstered boards and hang on wall.

Yellow built in banquette bench black and white channel tufted banquette seating.jpg

And there you have it- your very own, super comfy, super pretty channel tufted, upholstered bench.

(If you look close, you can see some batting sticking out under the bench edge…it’s on the to-do list someday to glue a small piece of fabric up there to cover it up….but if I were a betting woman, that probably never happens.

Black Zellige kitchen backsplash Channel Tufted Banquette Bench Yellow Kitchen Cabinets floral kitchen wallpaper (2).jpg
Modern Vintage Yellow FLoral Kitchen Wallpaper DIY Channel Tufted Banquette Bench Grand Rapids Interior Designer Susannah Watts.jpg

Let me know if you have any questions!


Gucci Grandma Kitchen: One Room Challenge Reveal

Gucci Grandma Kitchen: One Room Challenge Reveal

We. Are. Done.

Done. Done. Done with our second One Room Challenge.

Yellow vintage floral wallpaper black wall green kartell lucite pendant.jpg

(well…we still have to actually put all of our junk that is currently in bins all over our living room into the mudroom cabinets…but that seems like a good job for a Saturday afternoon with a cocktail in hand).

ORC.Logo.jpeg

First off- we want to thank Linda from Calling It Home and Better Homes and Gardens for hosting the One Room Challenge. Without them, there is NO WAY we would’ve had neither the motivation nor the drive to finish this in 7 weeks.

A big shout out and thank you to Belwith-Keeler for sponsoring this project and providing cabinet hardware for the kitchen and mudroom.

And let’s not forget to thank our talented photographer Dionel, from The Mittentog…without whom we would be left with our 3 year old to take the pictures.

Kitchen & Mudroom you ask? I thought this was a ONE room challenge? My brain works in funny ways…I hear One Room Challenge and my brain says, “Why don’t you decide to do 3 rooms?! That would be a good way to conserve energy and strengthen your marriage!”

Apparently math and logical thinking aren’t my strong suits.

black tile kitchen yellow floral wallpaper.jpg
IMG_2453.jpg
black tile kitchen yellow floral wallpaper grand rapids interior designer.jpg

We started with a kitchen that wasn’t terrible…it had new cabinets and countertops from the previous owners, so I did not want to rip everything out.

I wanted to add just a little bit of personality to make me happier about being a short order cook for three of the world’s most demanding restaurant patrons.

black tile kitchen yellow floral wallpaper.png
IMG_2455.jpg

The bathroom was right next to the kitchen, and had pretty ugly paper-like linoleum floor, and no other personality.

The mudroom was nice if you ignored the barnwood….and happened to be a family of one and needed zero storage space.

Disclaimer: Just like I don’t know the meaning of the number one, I also don’t know the meaning of ‘a little personality’.

So without further ado…Behold, (per my husband): The Gaudy Grandma Kitchen

I prefer “Eclectic, Modern-Vintage Kitchen”, but what are you gonna do? (He did upgrade me to Gucci Grandma Kitchen by the end of it).

Waiting for my Gucci sponsorship to come through…

Glass open shelfs kitchen gold brass brackets black zellige kitchen backsplash yellow floral wallpaper.jpg
Glass open shelfs kitchen gold brass brackets black zellige kitchen backsplash.jpg
Glass open shelfs kitchen gold brass brackets black zellige kitchen backsplash yellow cabinets.jpg

As you can see, we removed the window by the bathroom door and had it drywalled, and installed some open shelving. This kitchen was not only boring, but also had zero storage.

We tiled the backsplash, counter to ceiling with black zellige type tile from Tile Bar.

Yellow built in banquette bench black and white channel tufted banquette seating.jpg
Built in bench banquette with drawers channel tufted banquette tulip table.jpg

Then, to create MORE storage….and a cozy place to hang out, we had our friends at Re.dwell build us a banquette bench with drawers underneath. That’s six feet of premium kitchen storage folks.

It would be a tight fit, but I could fit at least two of my kids under there if need be.

I had a banquette plan for this space when we bought the house, so I bought the marble table from World Market & the lucite chairs from CB2. The light fixture is the FL/Y pendant from Kartell and helps make the sapce!

Vintage floral wallpaper modern lucite lamp.jpg

I took my upholstery skills to a whole new level and upholstered the bench giving it a built in upholstered look with a channel tufted back in some crazy, modern, black and white fabric from Spoonflower.

The yellow floral wallpaper from Drop It Modern was something I loved (yellow being my favorite color), but was a bit nervous about. It may not be everyone’s cup of tea, but I loveeeee it.

1. yellow vintage floral wallpaper kitchen black doors grand rapids interior designer.jpg
 
SwattsCo_ORC-20_web (1).jpg
1. mustard yellow kitchen cabinets black zellige tile backsplash yellow vintage floral wallpaper.jpg

Originally, I was planning on painting lower cabinets a dark green, but made a decision midway through the process and decided to go with a yellow tone from the wallpaper. Yellow being my favorite color and all.

2. glass kitchen shelves brass brackets white and black bathroom.jpg
2. Black and white malachite wallpaper square subway tile dark grount bathroom.jpg

The bathroom design was based on leftover tile we already had from our previous projects. We did a 2” matte black hex tile on the floor and 4” square white subway on the walls. And then because I couldn’t contain myself, black and white malachite wallpaper on the walls and ceiling from Cole & Sons.

2. gold bathroom mirror black and white malachite wallpaper square subway tile.jpg

When the door is open, the black and white wallpaper makes a play with the black and white upholstered bench back in the kitchen. It’s not the same matchy-matchy, but it’s not all that different.

black+and+white+malachite+wallpaper+bathroom+walls+wallpaper+on+ceiling+gold+mirror.jpg

For the mudroom, we had the barnwood walls removed, and installed drywall, took out one of the windows, so we could install floor to ceiling cabinets.

I can definitely fit all 3 of my children in these cabinets…

3. black cabinets black cabinet pulls.jpg
3. black floor to ceiling cabinets black pulls black and white rug mudroom storage.jpg

In the mudroom we did Ikea cabinets with Semihandmade fronts. Black pulls are from Belwith-Keeler. It isn’t hard to put together Ikea cabinets, but it did come with a little bit of PTSD from our last Ikea project.

We still have the countertop to install and some shelving in the mudroom, but it’s pretty much done.

grand rapids interior designer eclectic design yellow vintage floral wallpaper in kitchen black walls.jpg

Thank you so much to all of you for your cheerleading while we worked to finish this project. Seeing your excitement made me work harder to get all these projects finished on time.

glass open shelving in kitchen brass gold brackets.jpg
0. Grand Rapids interior designer modern vintage kitchen built in banquette seating.jpg
Yellow floral kitchen wallpaper black zellige tile backsplash open glass shelving gold brackets built in banquette bench.jpg
0. Floral Kitchen wallpaper kitchen wall organizer.jpg
brass and gold kitchen faucet black kitchen backsplash grand rapids interior design.jpg
black kitchen backsplash black windows white trim in kitchen.jpg
Mustard yellow kitchen cabinets floral wallpaper geometric black and white rug.jpg
black kitchen backsplash glass shelving gold brackets.jpg
mustard yellow kitchen cabinets two tone kitchen yellow floral wallpaper grand rapids interior designer.jpg

It was SO much work and I’m really tired (and my husband is tired of all the house projects), but I’m super thankful for the push to get it done.

I don’t think he reads my blog, but if he does…I’m finding out if he reads to the end of my blog….a big, huge, tremendous, thank you to my husband for being a good sport and tiling everything, installing pulls, trim, and almost anything else he did throughout.

He complained a lot, and he’s leaving tomorrow on a fun trip for a week “in payment” for his work, but I wouldn’t have been able to do it without him.

As always….don’t forget to check out all of the other guest designers here and the amazing featured designers of this season.

If you want to see the whole process click on the below links for week to week progress.

Week One I Week Two I Week Three I Week Four I Week Five

Week 5 One Room Challenge: Modern Vintage Kitchen in Grand Rapids, MI


Week 5 One Room Challenge: Modern Vintage Kitchen in Grand Rapids, MI

Here I am posting a few days late. We had a client presentation for a big project this week (it’s going to be amazing, and I can’t wait to show it to you…in like 8 months), and that means that our own projects go on the back burner.

see the pretty new windows!??

see the pretty new windows!??

I can only imagine how long this project would take us if we didn’t have the ORC to give us a kick in the butt.

SO! Week 5! Big things happened this week!.

We had new windows installed! We actually ended up getting new windows throughout the whole house which is exciting since the original ones were literally a hundred years old. Winter will be more enjoyable now.

grand rapids interior design removing window for shelf space.jpg
grand rapids interior design removing window for shelf space (2).jpg

We also had them remove the window in the kitchen and frame it in. Same for the window in the mudroom. The mudroom won’t be all finished by next thursday as they can’t install the cabinets until thursday….but considering that’s my third room in this seasons one room challenge, I don’t feel too bad about finishing that room late.

grand rapids interior design removing window for shelf space 3 mudroom makeover.jpg
Mudroom entry makeover drywall over windows for more cabinet space.jpg

My hot tile guy finished up tiling over that wall where the window used to be. He gets to grout this weekend and the tile will be completely finished!

counter to ceiling black tile backsplash with dark grout grand rapids interior design.PNG

I’ve started working on upholstering for the banquette bench. I’m totally making it up as I go along. No idea how to really upholster for a built in upholstered look, and so I’m winging it with my trusty stapler.

grand rapids interior design bench upholstering.PNG

I haven’t decided if I should paint the two doors in the kitchen black or not. I prefer dark doors to white, but 1) I’m not convinced I’ll love it in this room 2) I’m running out of time.

Since I’m running out of time, I thought maybe I would add one more things on my list and paint the mudroom ceiling the color of the kitchen cabinets. It remains to be seen if that actually happens.

built in banquette upholstered bench black leather seat black interior windows.JPG

I got lulled into thinking “we are almost done, we’ve totally got this!”. And then we made a to-do list last night and I was reminded we still have so much to do in order to have a finished room.

  • Grout tile

  • Hang shelves on tiled wall (drilling into tile can be a pain in the butt)

  • Install new kitchen faucet

  • Finish upholstering banquette bench and back (no idea how long this will take)

  • paint trim to finish trimming bathroom

  • smooth wall to prepare for wallpaper…(we ripped off a chair rail)

  • Hang cabinet doors

  • Install all cabinet hardware

  • Put together Ikea cabinets for mudroom

  • Potentially paint mudroom

  • maybe paint kitchen doors.

Who wants to come over and do some projets?? Anyone? Bueller??

ORC.Logo.jpeg

Don’t forget to check out the progress from the other guest participants in this seasons one room challenge and also some of the super fun stuff that the featured designers are doing!


Week 4 One Room Challenge: Modern Vintage Kitchen


ORC Week Four: Modern Vintage Kitchen Update

It’s week four of the One Room Challenge. And I’m being reminded again why it’s a challenge.

To see the previous weeks, click below:

Week One I Week Two I Week Three

ORC.Logo.jpeg

This is gonna be a short one because no one wants to read in detail about the millions of coats of paint that I painted on our kitchen cabinets.

It was 3 actually…on each side….which meant 6 nights of painting after the kids went to bed which means I’m tired and annoyed now.

finished doors…look better in photos! The color is BM 280 Renaissance Gold

finished doors…look better in photos! The color is BM 280 Renaissance Gold

Annoyed especially because I probably should’ve sprayed the cabinets or paid someone to spray them. But I was being lazy and cheap, and I rolled them and…well, I’ve done better work.

built in banquette bench with drawers one room challenge.jpg

The exciting part of this week was our banquette bench was installed! It has drawers! This means 6 feet of storage space under there. HUGE drawers. Can you imagine all the rubbermaids I can store under there??!

Yes, I’ve reached that point in my life where I get excited about rubbermaid storage.

I also am pretty excited to see what it’s like when I reupholster it. Assuming I figure out HOW to reupholster it.

built in bench banquette with drawers black marble tulip table lucite chairs.JPG

The husband also finished the top row of uneven tile- you can still tell that ceiling is unlevel, but since we did a vertical stack with 2x8 tile instead of continuing the 4x4 tile, it’s less noticeable…and I almost have myself convinced it looks like we planned to do a tile border at the top.

When the window on the right is removed, he can finish tiling across that wall and install some shelves!

Mustard Yellow kitchen cabinets Benjamin moore Renaissance Gold 280 Black zellige subway tile backsplash grand rapids interior designer.JPG

I think we are also going to use a dark grout instead of white grout so that the uneven ceiling is less noticeable. I have mixed feelings about this because I had been planning on light colored grout. TBD.

And. That’s about all we’ve done!

To see the rest of the guest designers progress, click here! To see what all the featured designers are up to, click here!