
DIY Channel Tuft Banquette Bench How-To
I know a lot of people wanted to know how we upholstered our banquette bench from our Fall 2020 One Room challenge project, so this post is for you my friends!
First…look at some pretty pictures. Isn’t it lovely!??


Not only is it lovely, it is COMFORTABLE! I love sitting there, and now it’s my favorite place to sit on the computer and work before the savages wake up.
Please note, that we had the bench and drawers made by our friends at Re.Dwell because we didn’t have time to deal with that. You could do something similar by using an Ikea Besta series with drawers for the bench and putting some wood on top and for the back, and then pick up my directions here.
What you need
a bench
1/4” plywood cut to size
staple gun (and huge amount of staples)
batting found at joanns or hobby lobby
High Density Foam (Joanns or Hobby Lobby)
3” Foam for bench
1” foam for back
Whatever fabric you’re using
Industrial Velcro
There are a lot of ways you could do this. You could just upholster some foam like a pillow, and throw it up on the bench. I wanted a custom upholstered look, like at a fancy restaurant, so I figured out how to do that (it wasn’t hard).
Since the bench was sturdy, the wood I used as backing for the upholstery, didn’t have to be. We didn’t want a lot of extra bulk, so we went with 1/4” plywood (the cheap stuff). We (the husband), cut the plywood into the size of the bench- making it slighttttlllly smaller than actual bench to account for fabric and batting.
Steps to DIY upholstered Banquette Bench
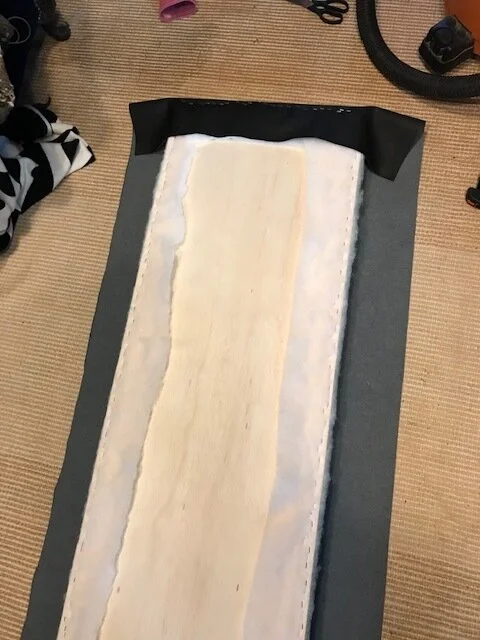
cut the foam to match the size of your plywood
wrap batting around foam and wood, pull tight and staple (make sure you have extra batting on the edge that will be the front edge of bench)
now take the fabric you’re using to upholster (we used a faux leather to make clean up easy) and upholster the sides first and then the back of bench, leaving the front edge UN-STAPLED


Now you can take the upholstered piece of plywood to your bench. I used heavy duty velcro to attach the plywood to the bench. I wanted to be able to change it out if I needed to without too much trouble.


Do not fold the batting underneath the plywood- you want the batting to come out towards the front of the bench so you can fold it over the ledge of the bench like in picture (this is what will give you the ability to make it look more built in)
Staple the batting along the whole length of under the ledge of the bench.
Then I pulled the black fabric tight and wrapped it over the batting and stapled it underneath the edge of the bench. (the corners took a few trys to fold and get right because of the extra fabric, but it’s not hard to get the staples out and do it over)

Here we are ready to upholster the back of the bench! (this can still be done if you don’t have a back to your bench- you just need to use 1” thick boards instead of the 1/4” plywood and attach to wall with a french cleat.)
How to DIY Upholster a Channel Tufted Banquette
The steps for these are very similar to the bench, except more time consuming because there are so many more pieces involved
You need 1” foam, batting, and 1/4” plywood
First wrap the batting around foam and plywood pulling tight- this give you the rounded edges
Then wrap fabric around and staple away
If you are using patterned fabric, number the backs of your pieces of wood so you can keep the pattern repeat in order.


For this bench, we used 4” wide boards that were 26” high (would’ve gone higher if the window trim wasn’t there). If you want to make less work for yourself, you can go with 5” or 6” wide boards.

First I organized the boards onto the back of bench. Because the bench was upholstered almost all the way to the back, I was able to squish them a little bit in between black upholstered foam and the back of the bench.
I put pieces of velcro on each board and stuck it in place.

With the velcro, I can easily remove one board and reupholster if it gets ruined, and I can also easily pull out the board if I want to use that outlet behind.
Important- If you do not have an angled bench back board to velcro individual boards to, you need to use 1” thick boards to upholster individually-

Then you will line them all up together like in the above picture, and use 2 thin boards (imagine level is a board) and screw into each piece of upholstered board so that they are all stuck together. Then you can attach a french cleat to back of upholstered boards and hang on wall.

And there you have it- your very own, super comfy, super pretty channel tufted, upholstered bench.
(If you look close, you can see some batting sticking out under the bench edge…it’s on the to-do list someday to glue a small piece of fabric up there to cover it up….but if I were a betting woman, that probably never happens.


Let me know if you have any questions!