Tips: How to Stage Your Bar

TIPS: How to Stage Your Home Bar

(And some Bonus Holiday cocktail recipes)

The holidays are upon us, so what better time than to share a few tips on how to style that ravishing collection of barware currently stowed away in your cupboard?

Take stock.

It may seem daunting, but collect your half-filled bottles, glasses, bar jigger and a few fun accessories you may have lying around your house. 

Edit.

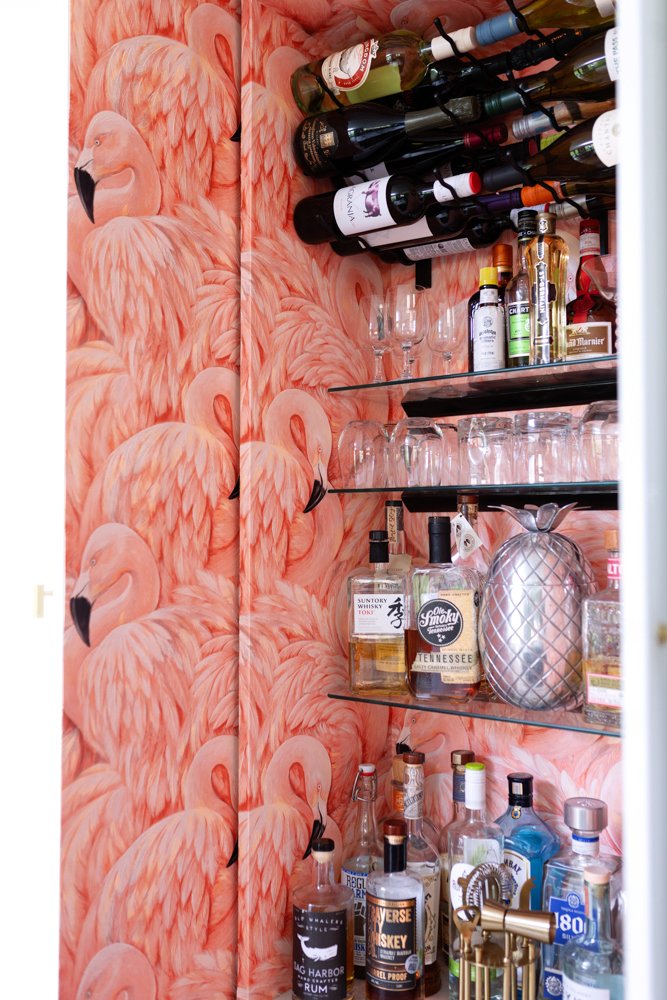
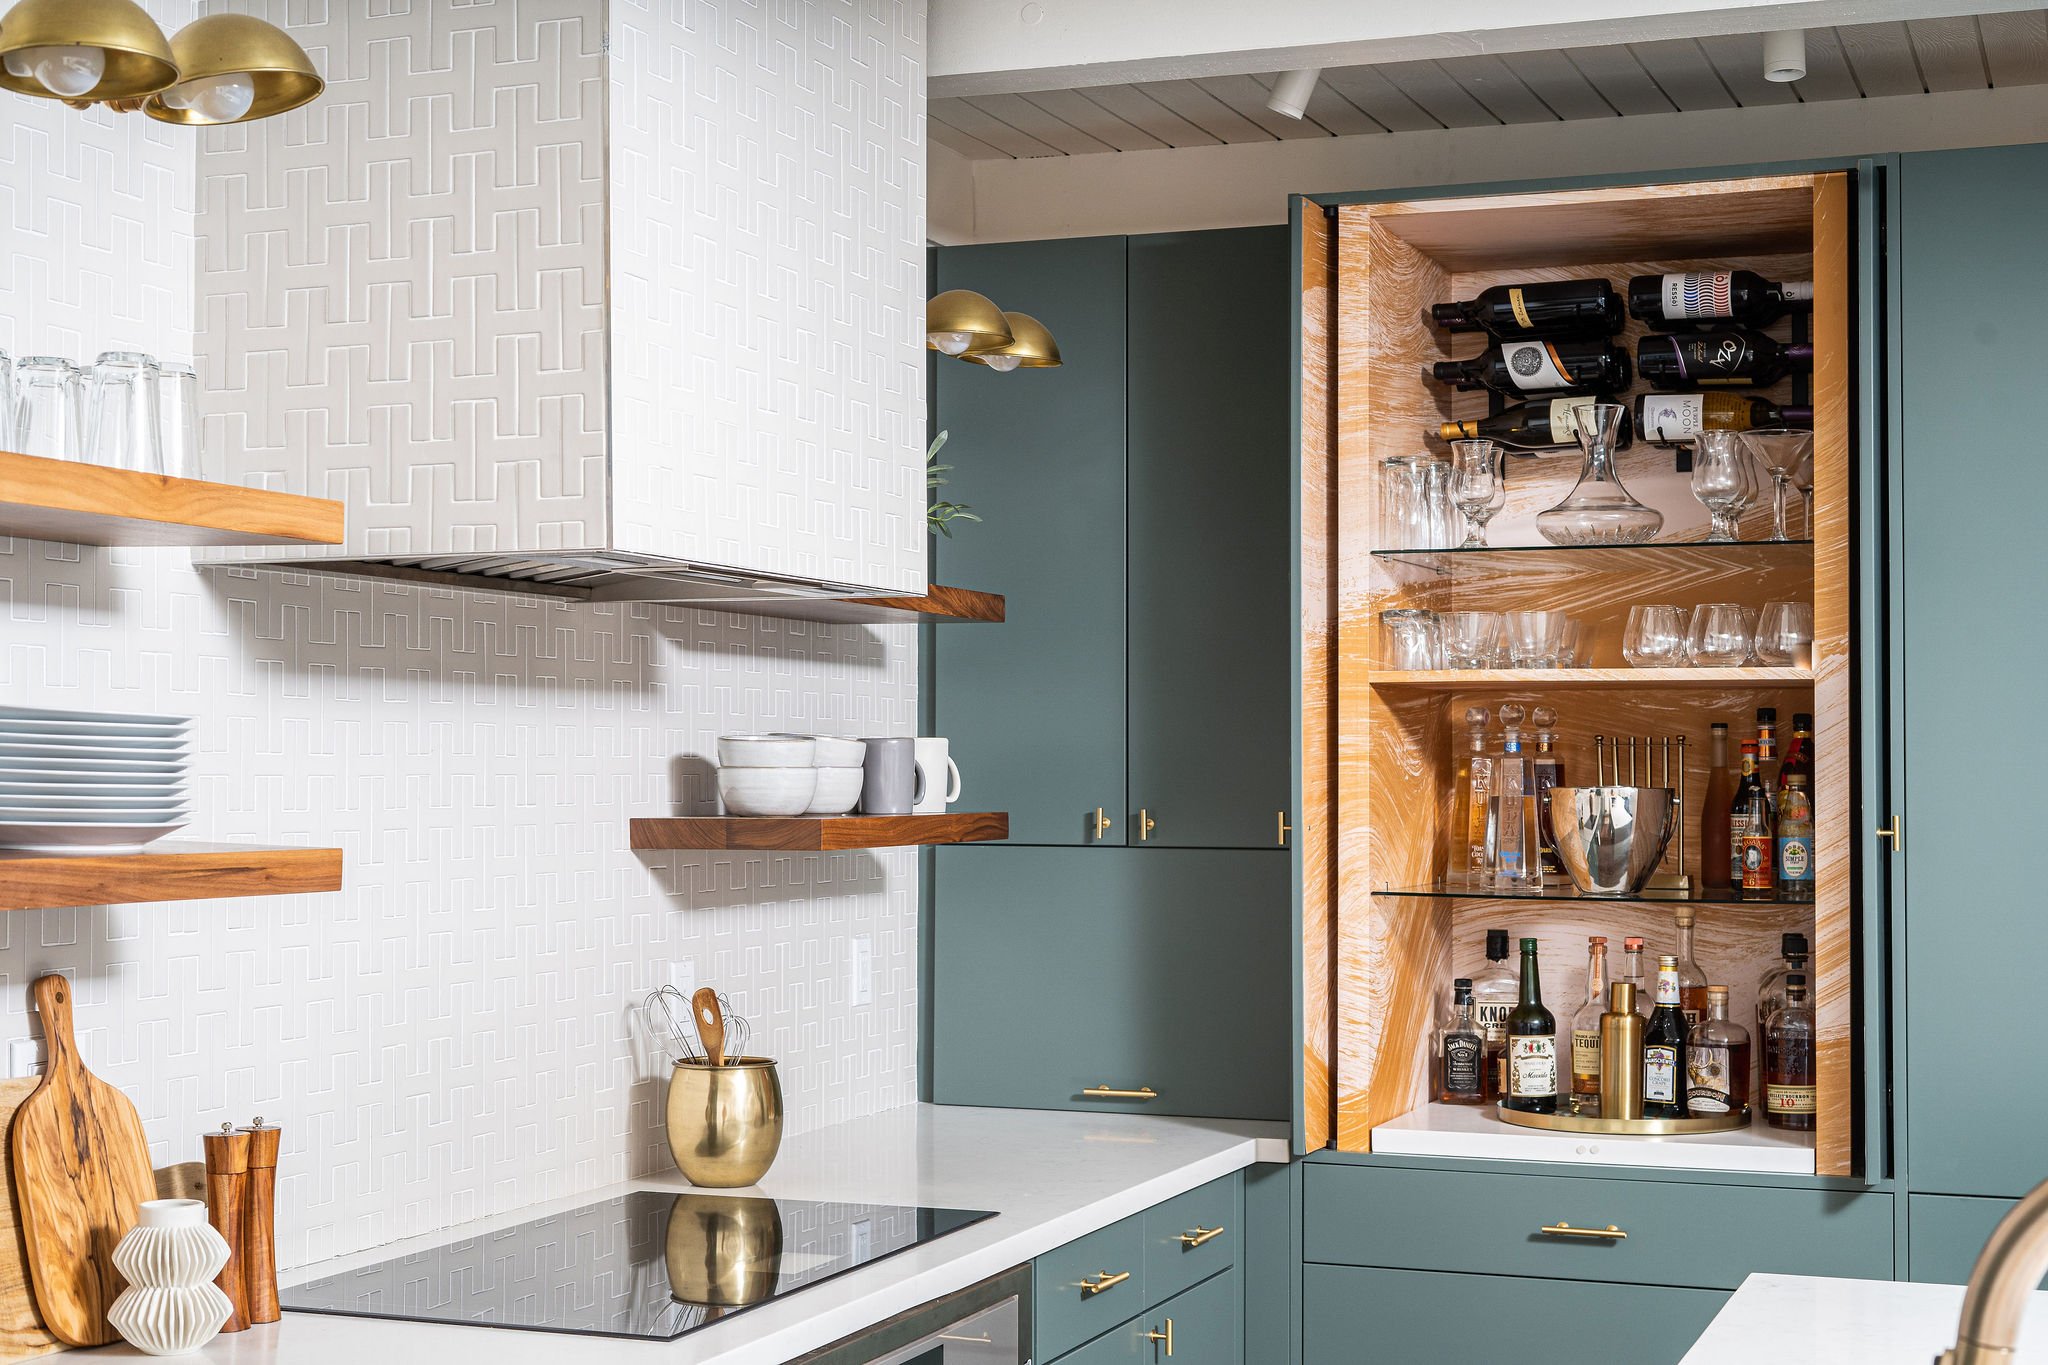
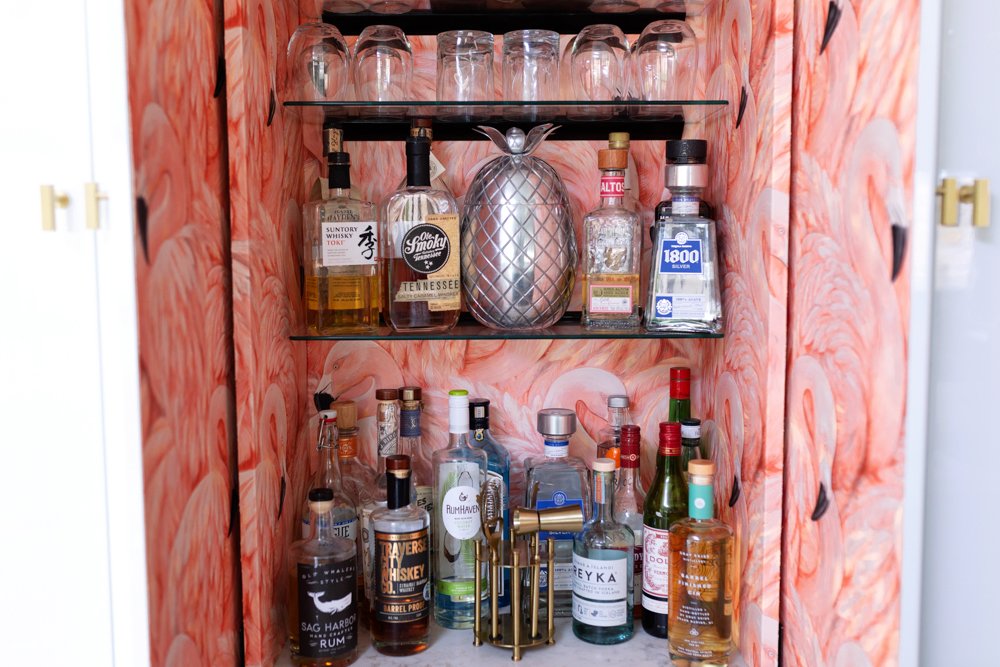
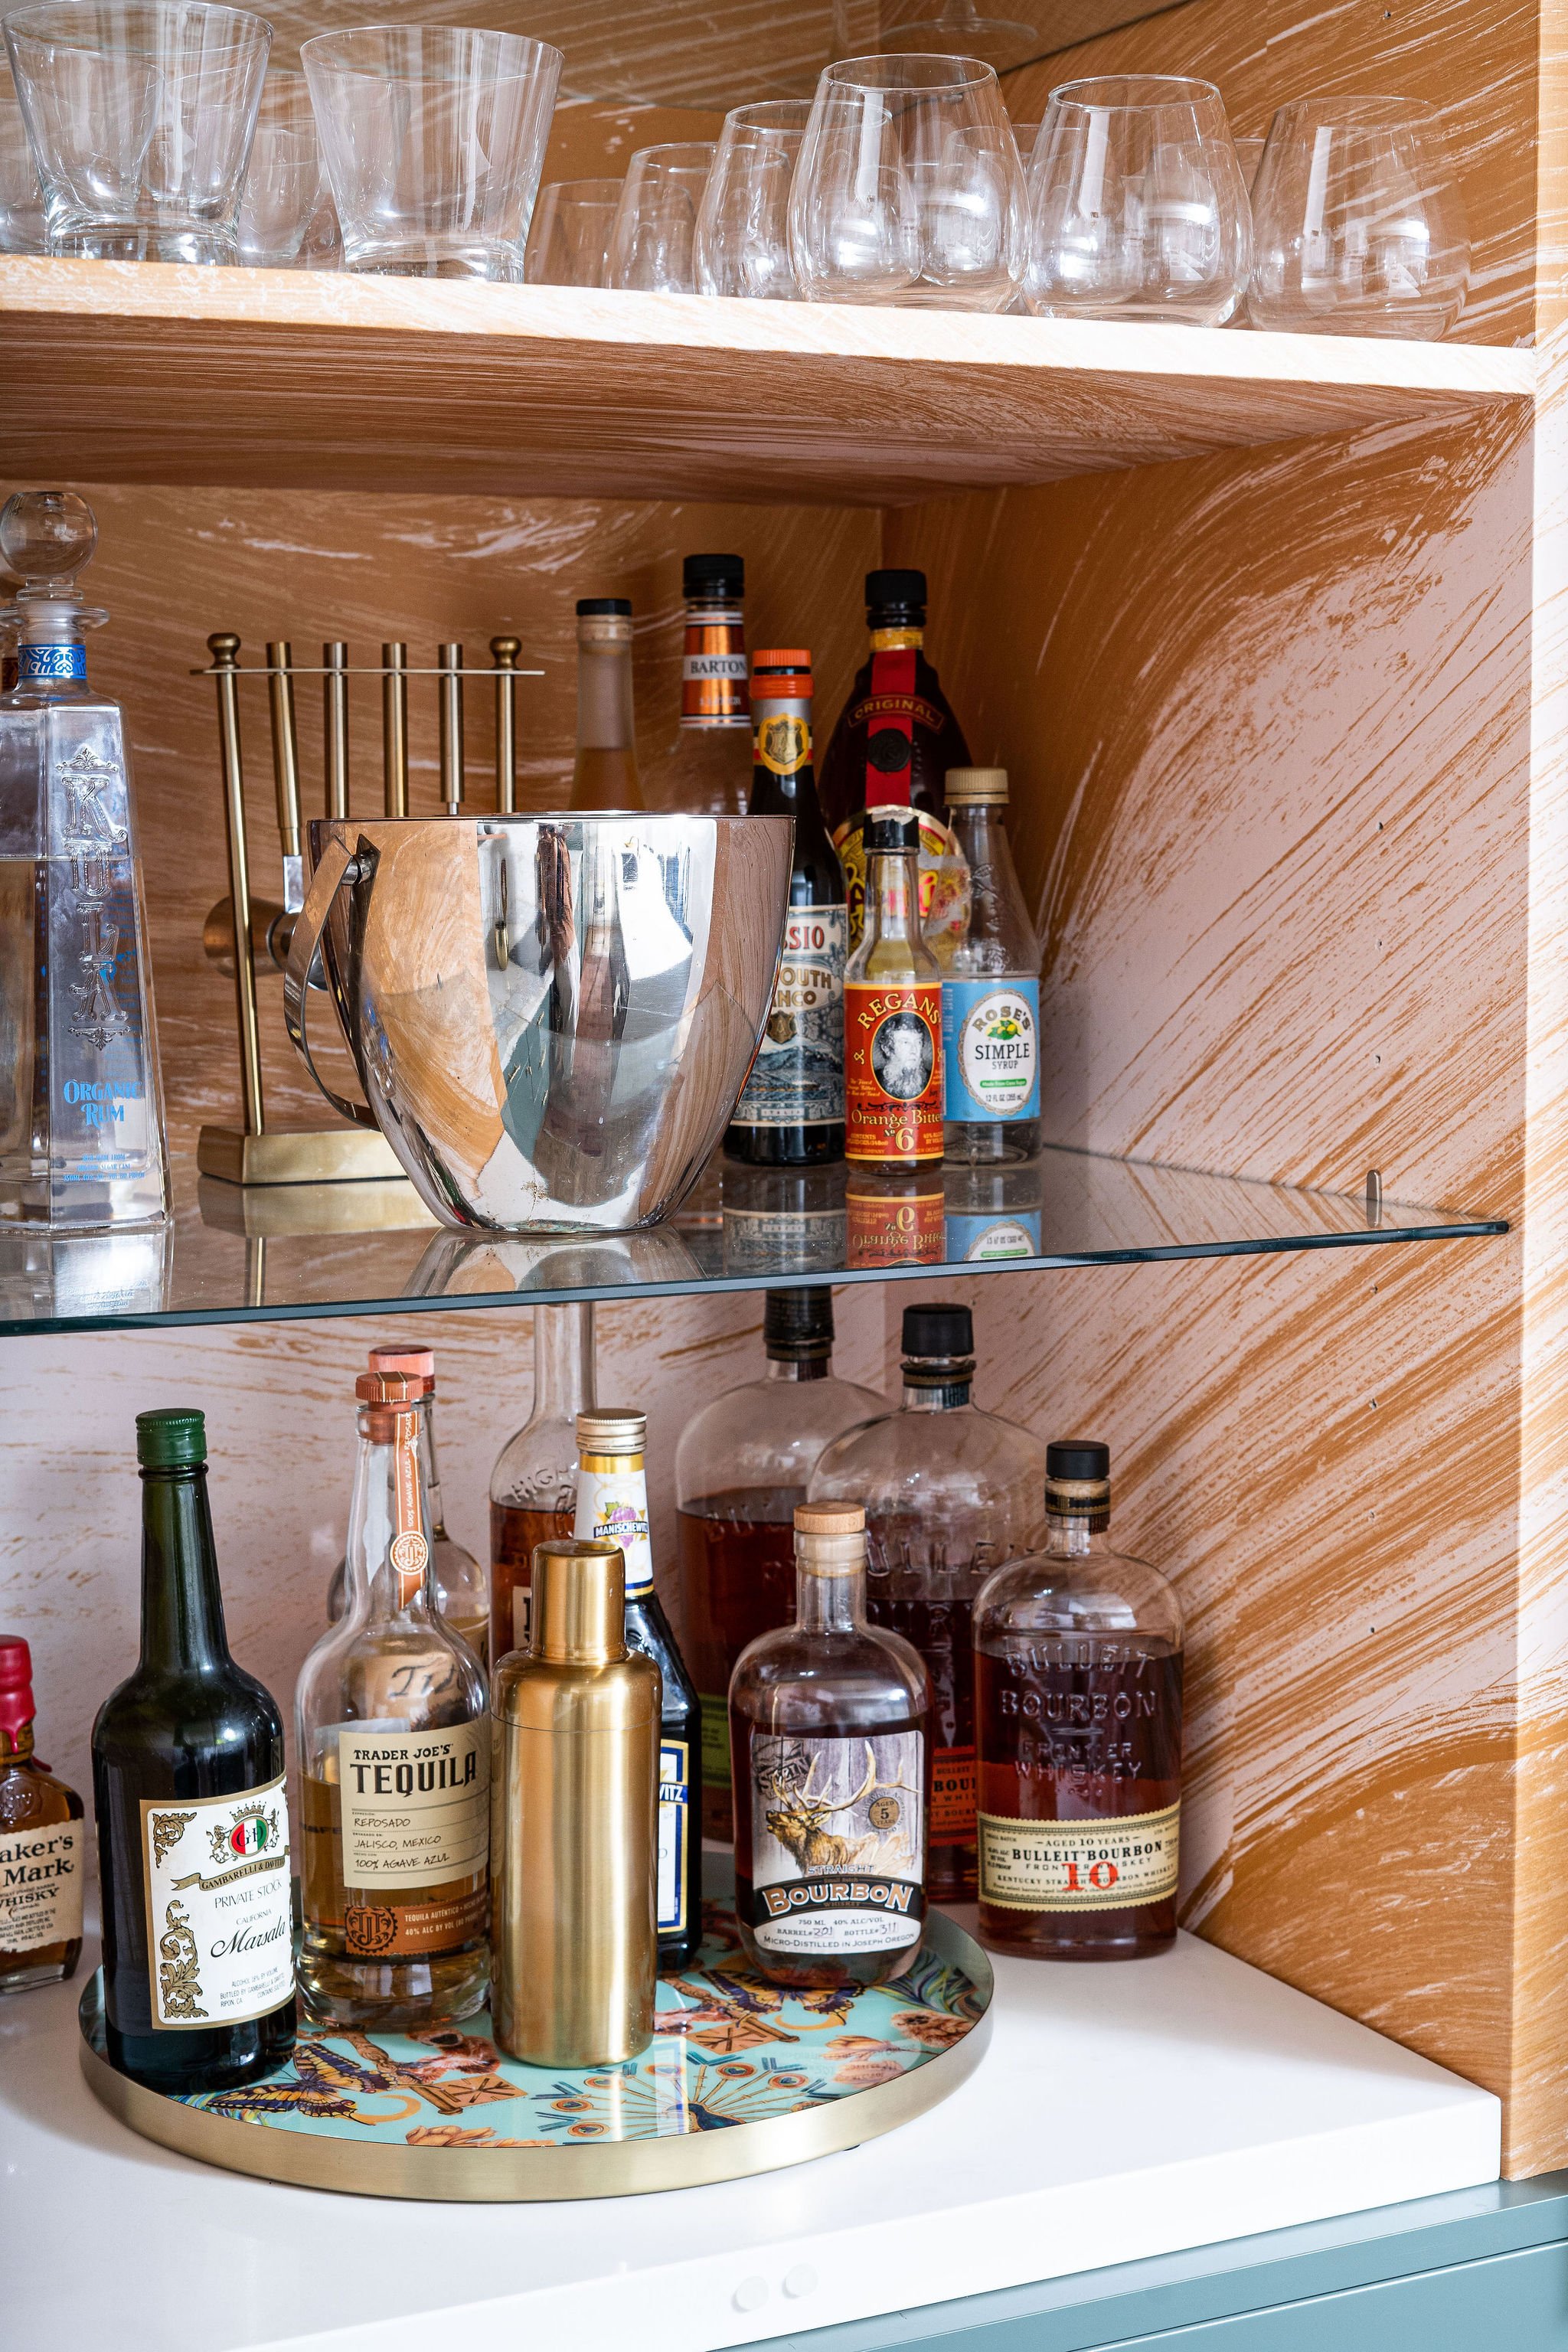
Select your favorite bottles – the ones with most visual interest.When selecting, be sure to consider height. You don’t want all high or all low, a variety will look the best in your display.

Shop the Look

Add glassware.

Pick some tall glasses and mix with low ball glasses. We strongly recommend decanters for any essentials you may have in high quantities (we’re looking at you Costco Irish Whiskey). Select your best glassware. While there are exceptions to the rule, stick with matching pairs – preferably logo-free.
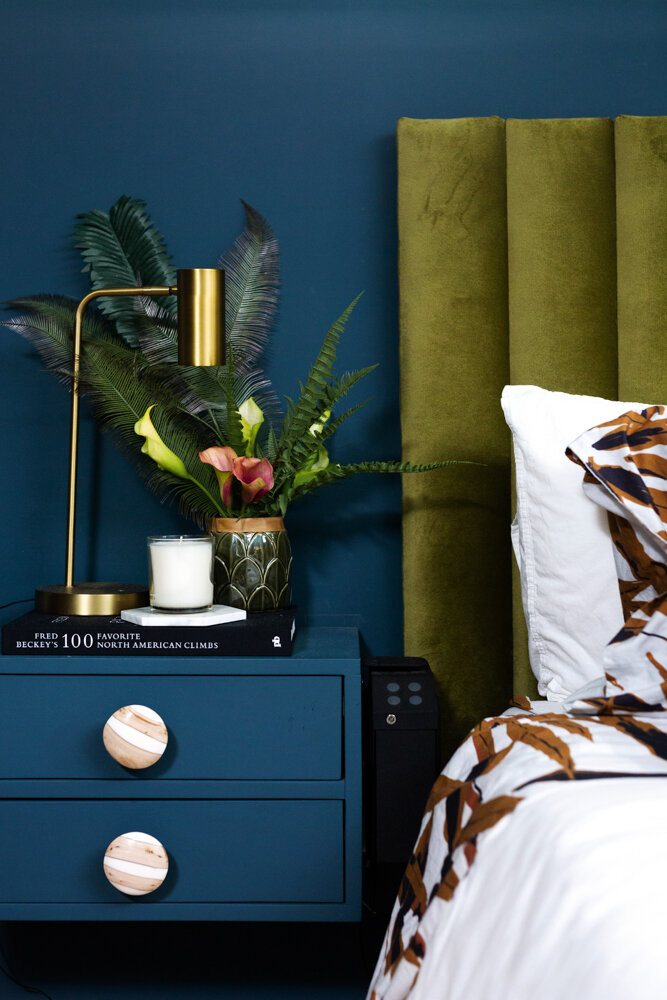
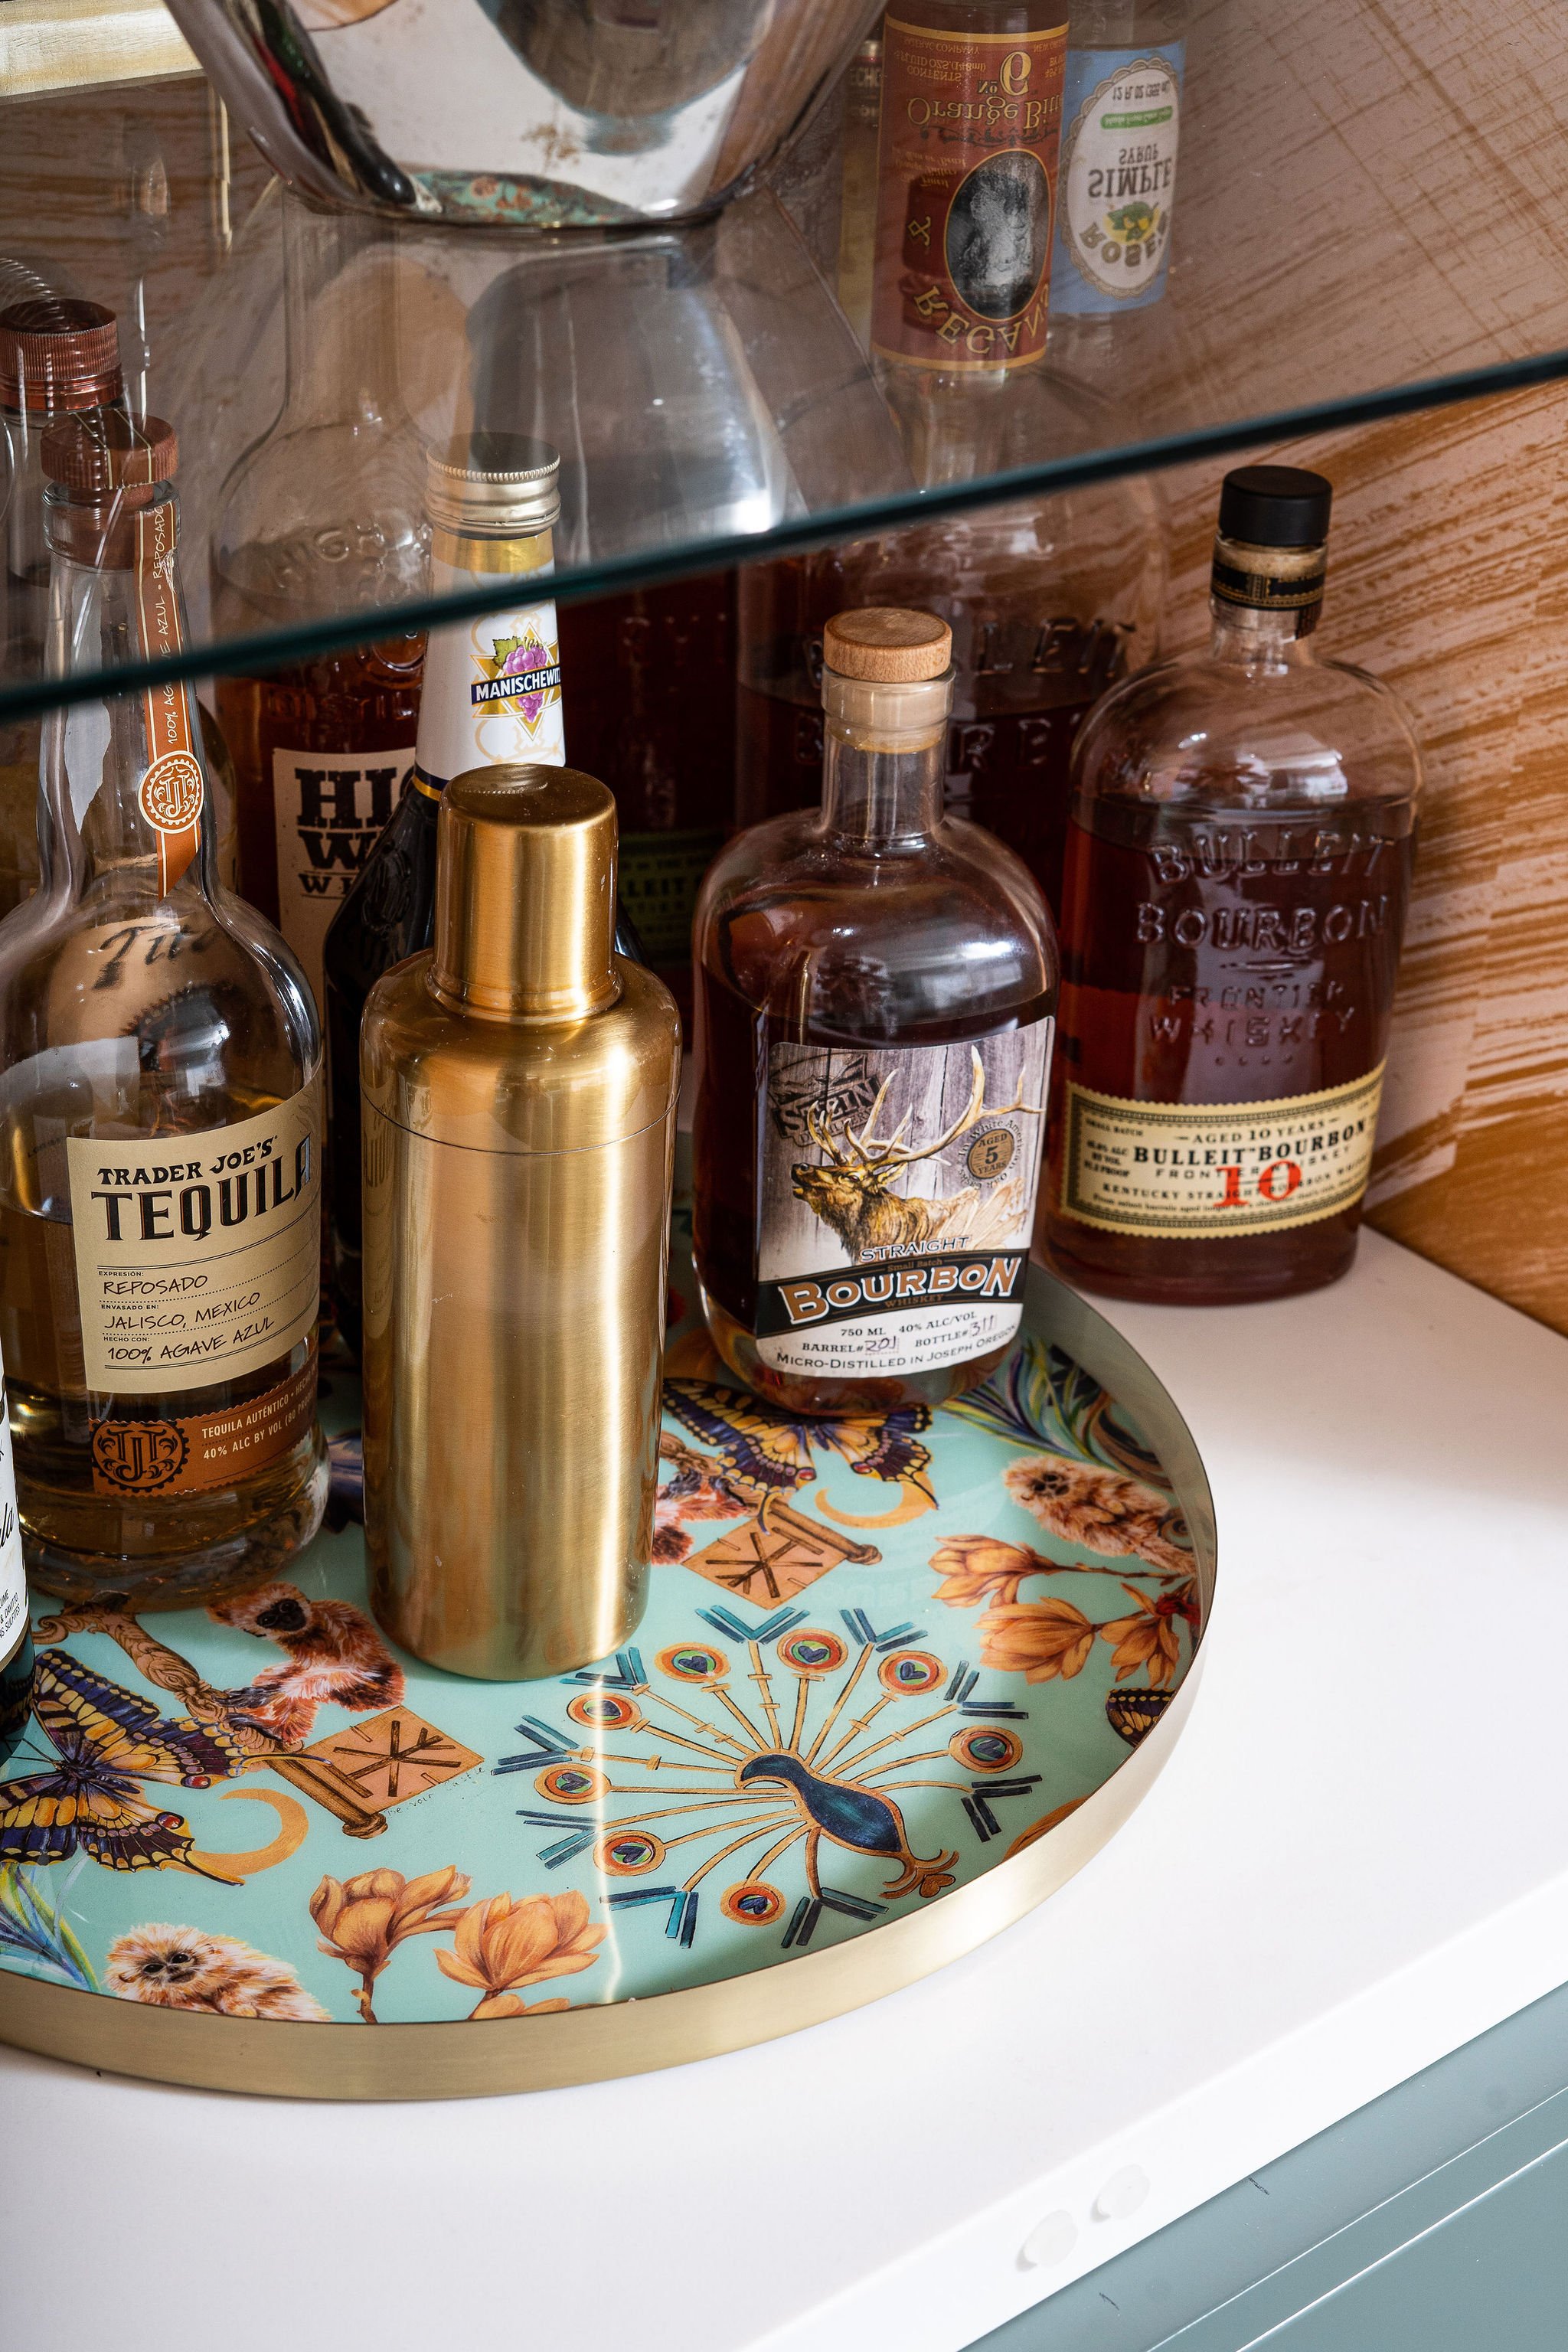
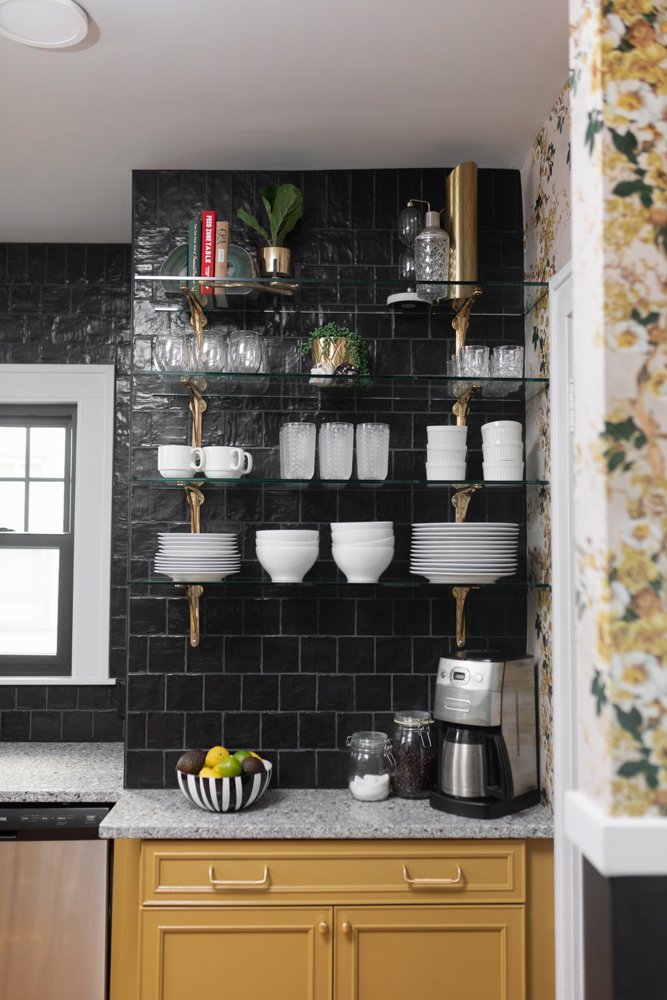
accessorize

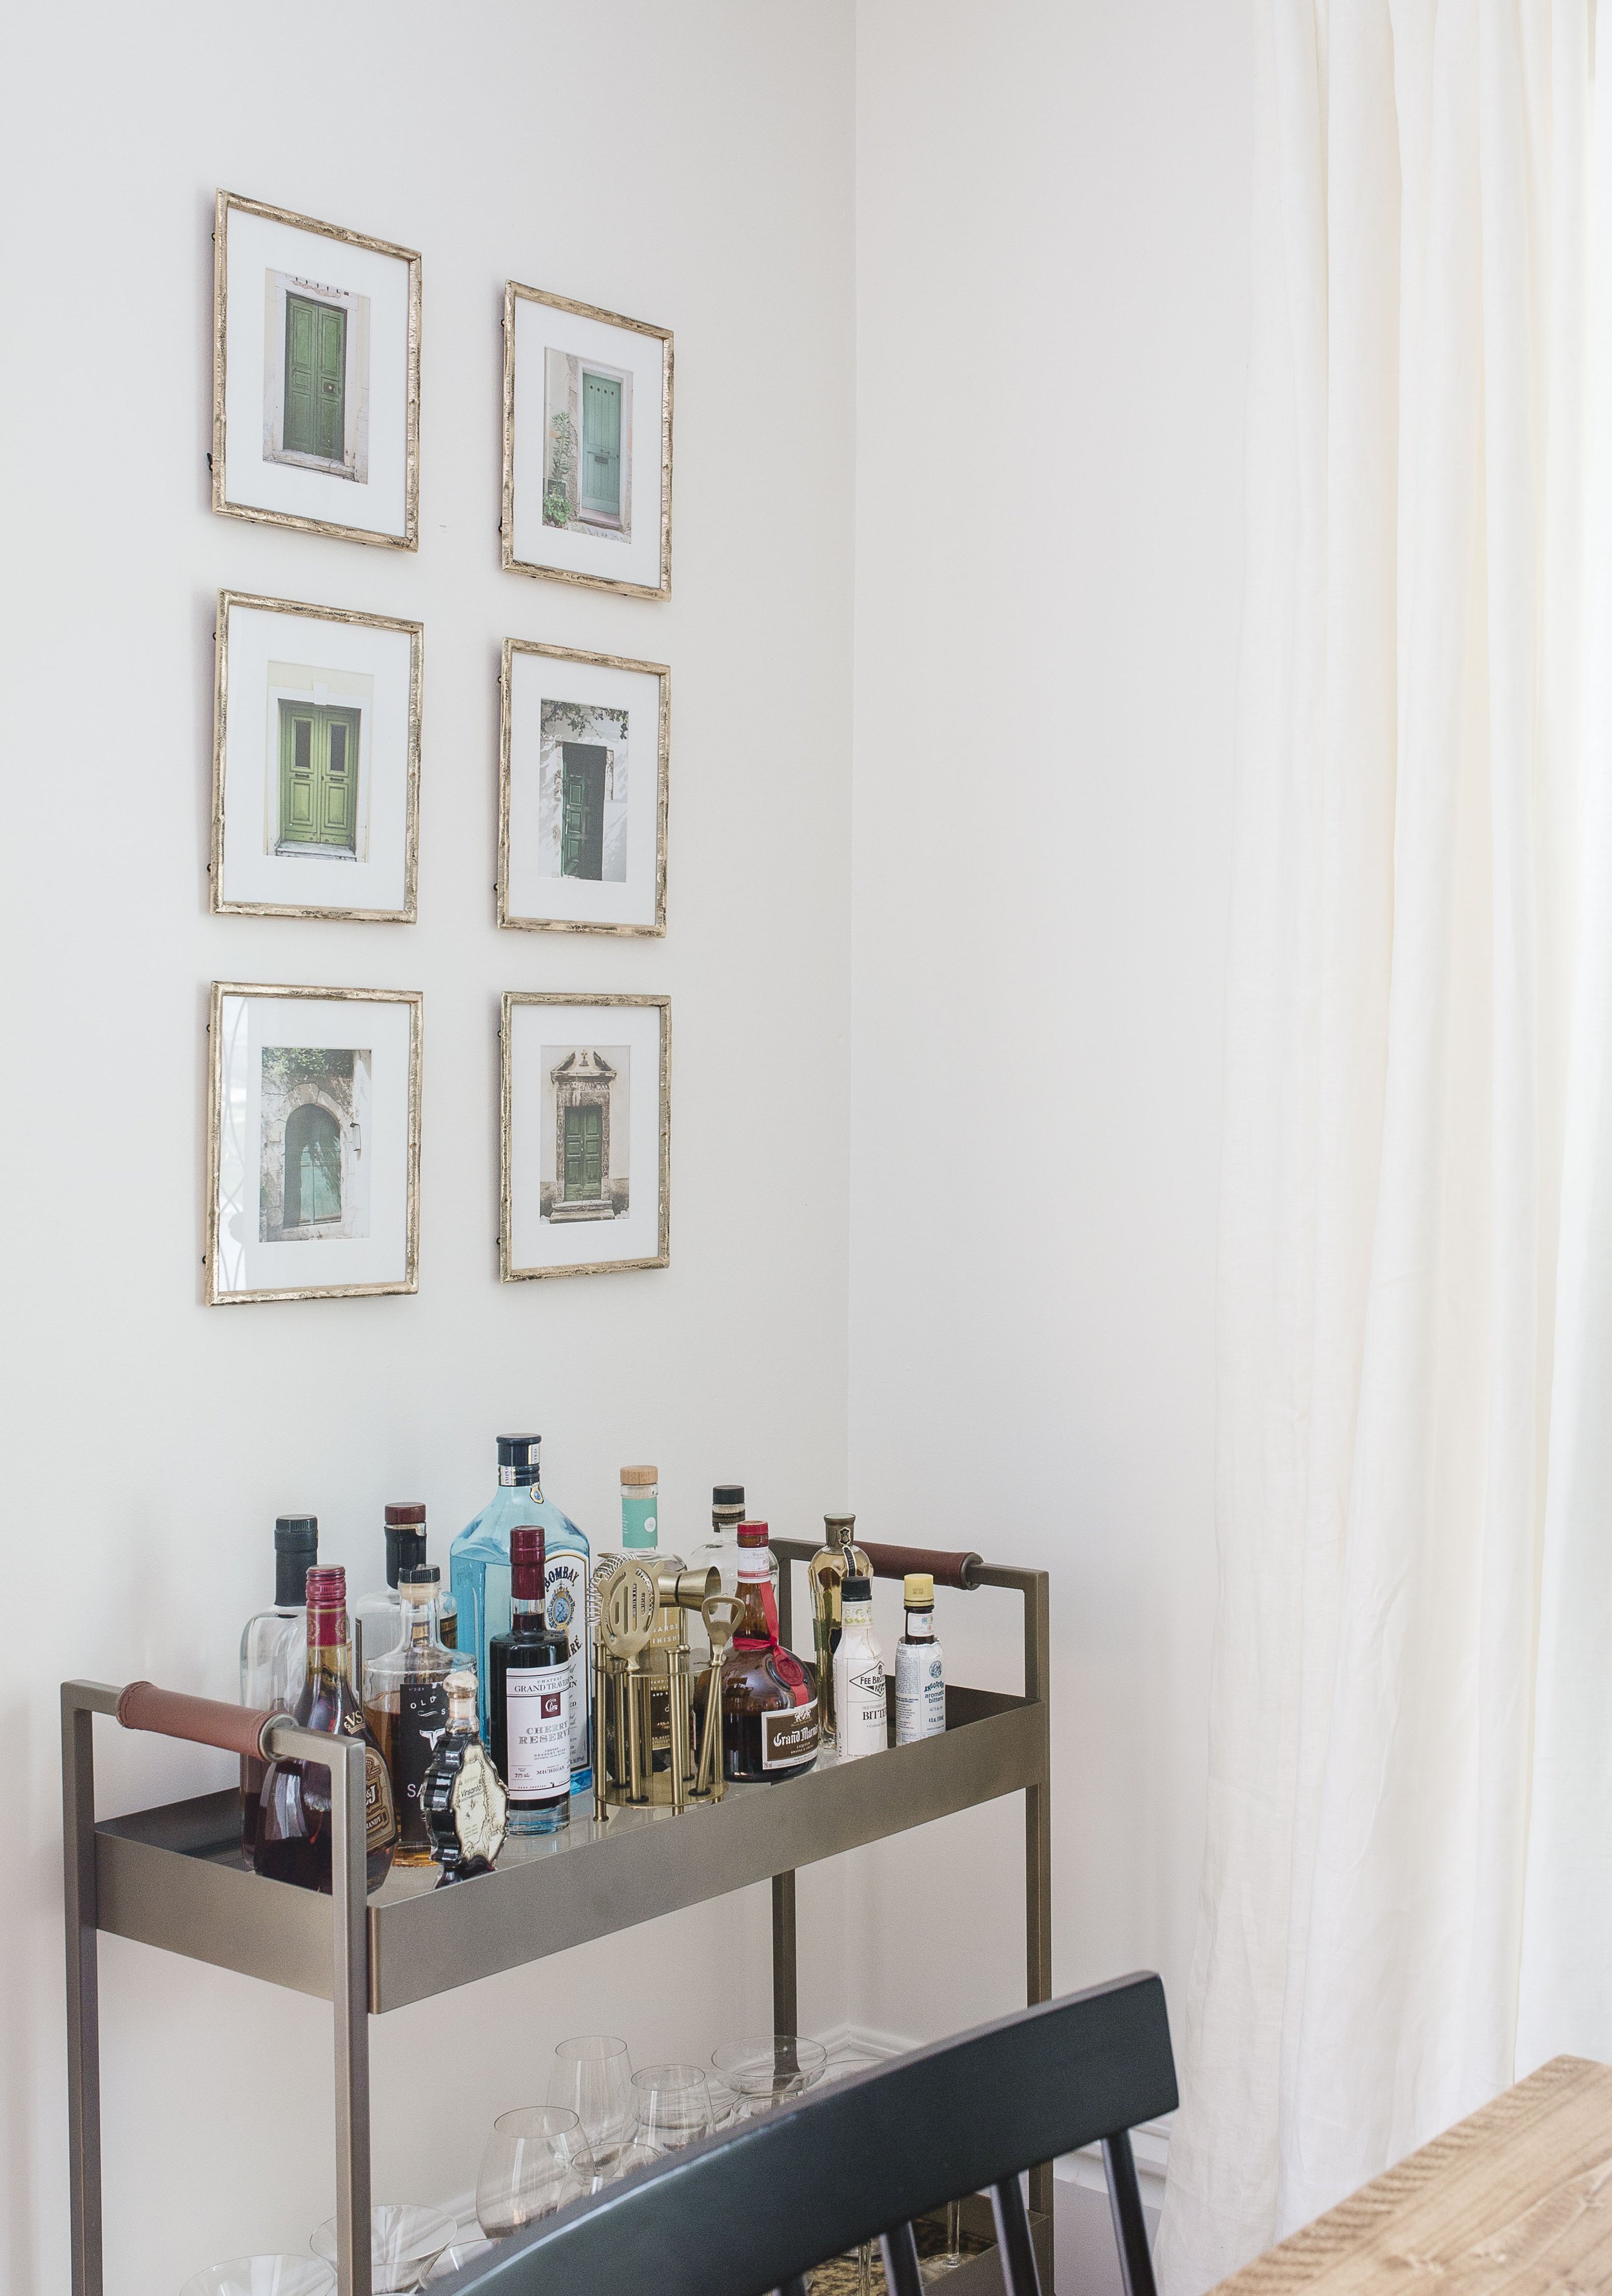
Here’s where you can have some fun! Need height in your setup? Add a vase with greenery. Looking to fill in an empty space? Try a stack of cocktail books with your shaker and barware. Play around with the look. We also love adding found objects such as geodes, driftwood and other visual items of interest.

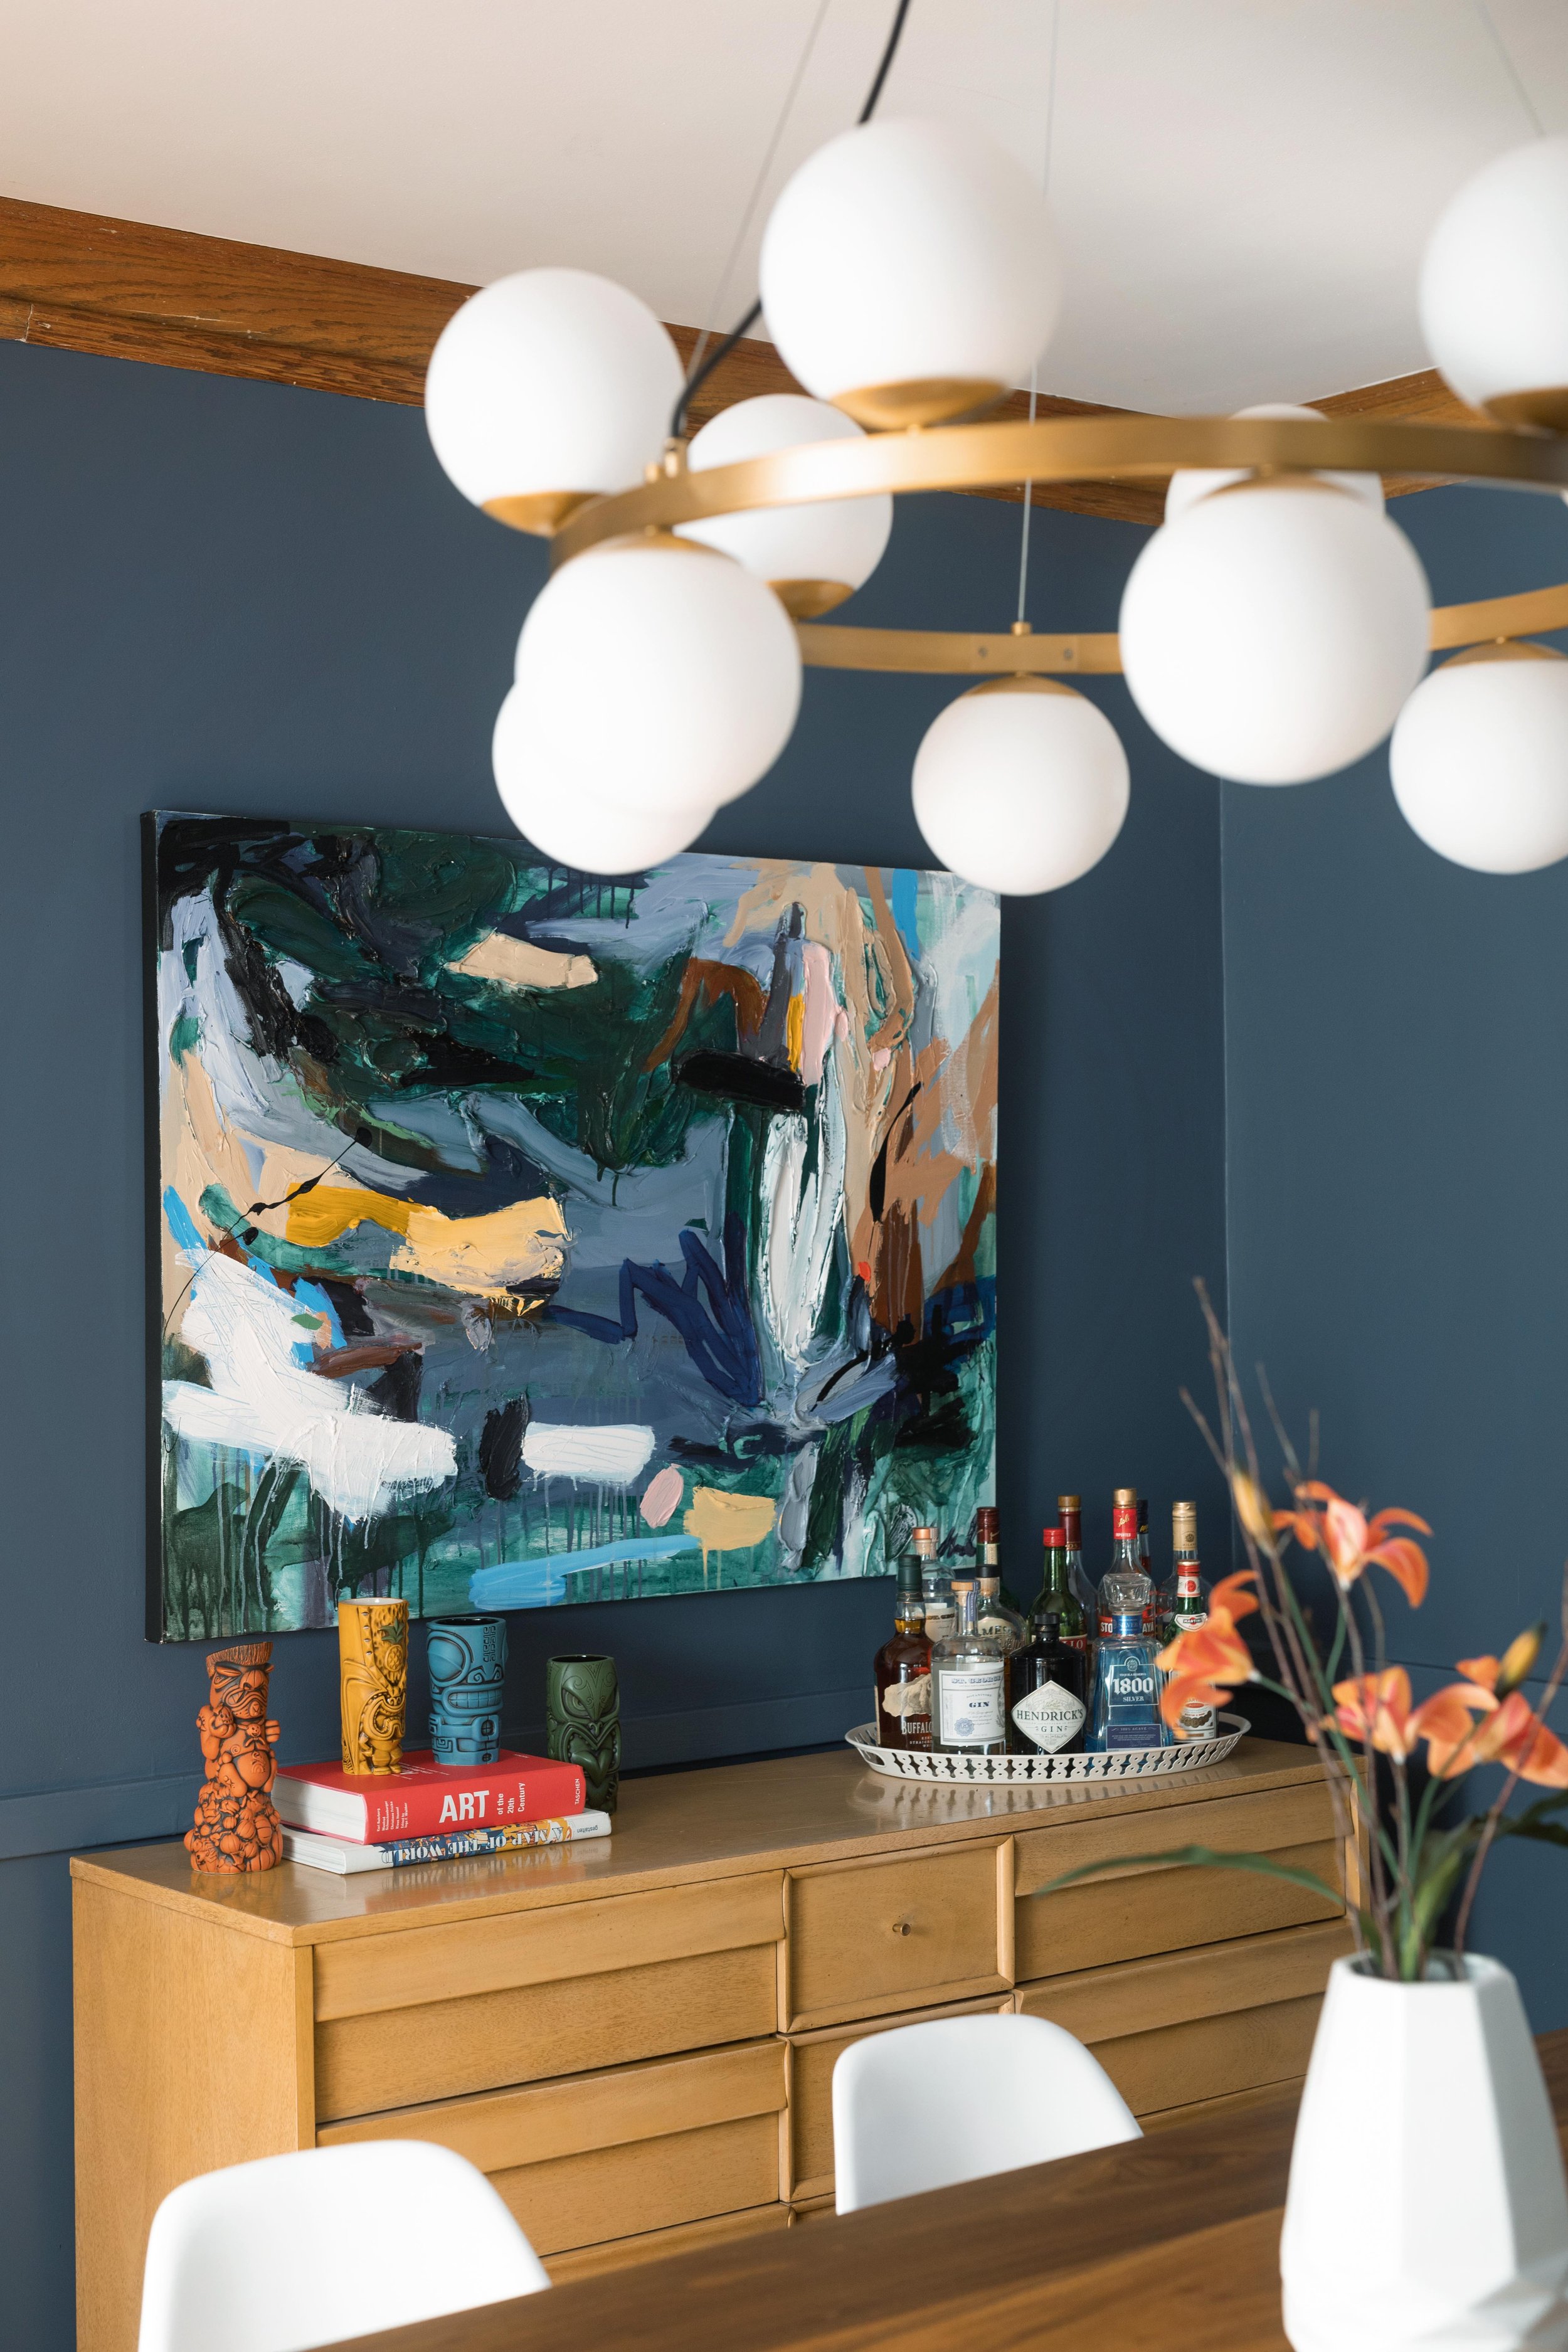
Tip: Avoid the cluttered look by putting the bottles on a tray. Visually, it groups a potentially chaotic array into a singular station.

piece of art.

A phrase you may hear us use from time-to-time is “shop your house.” Not every styling occasion calls for purchasing new items. Look around your house and find a piece of art or mirror that will station your home bar and draw the eye. Hang it, or if you’re setting up the bar temporarily, simply lean it against the backdrop of the bar.

sweet Success.

Wah la! All the components are there. Don’t be daunted to search the web for ideas. Even professionals benefit from inspiration and good examples of styling. We’ve compiled some of our bar ideas from past projects below!

KEEP READING…COCKTAILS ARE COMING!

Wait, wait! We’re not done! In the spirit of bar styling, the Swatts & Co. team conducted a mixology research session. We’ve each selected a favorite festive cocktail for your enjoyment. 

Please drink responsibly — and Happy Holidays!

Coconut Mint Mojito

2 ounces Rum
1 Tbsp. cream of coconut
Club soda
Mint
Lime

Muddle several slices of lime with 4-5 mint leaves. Add rum, coconut cream and top with club soda. Serve on ice and garnish with lime and mint.

Cheers!

Susannah

Ginger-Pomegranate Paloma

Ginger syrup:

Combine 1/2 c. sugar, 1/2 c. water and 1/4 cup chopped ginger in a saucepan. Bring to a boil and simmer for 5 minutes. Turn off the heat, add a small bunch of mint. Cover and let steep for 10 minutes. Drain the solids and set aside.

In a glass with ice, mix:

2 oz. tequila
2 oz. grapefruit juice 2 oz. pomegranate juice
1 Tbsp fresh lime juice
1 Tbsp ginger syrup (see above)
Top with ginger beer, give it a stir and enjoy!

Stay warm!

Christy

Maple Whiskey Old Fashion

2 ounces Whiskey or Bourbon
1 tsp. Maple Syrup
2-3 drops of bitters
2-3 Maraschino Cherries
Orange Peel for garnish

Who doesn’t love classic, easy and delicious? Muddle maraschino cherries, syrup and bitters in the bottom of your glass. Add bourbon and ice, garnish with an orange peel. Syrup can be added for more or less sweetener.

Happiest New Year!

Andrea

Swatts & Co. Gift Guide

It’s November! And while the Holiday season is whirling toward us at an unprecedented speed, fear not – the Swatts & Co. gift guide is back! This year we have something for everyone:

For the Host & Hostess

This Twelve Days of Christmas glassware collection is holiday whimsical at its best. Whether used for celebratory cocktails or a festive vessel for Santa's milk – the intricate design is certain to become a nostalgic favorite for years to come. The collection offers four different designs and a carafe.

For The Aspiring Chef

As you may know, we’re big on form and function at Swatts & Co. This modern yet elegant salt and spice set won’t disappoint. It's so pretty, leave it on the counter or use it in an open shelf display.

For The Reader

Gift a Cozy Up and Read gift box. Offered by none-other-than Reese Witherspoon’s book club (which has some excellent book recommendations). The box includes a club book of your choice along with an array of cozy essentials, perfect for curling up for a winter’s night read.

For the Young Ones

Pique the curiosity of the little adventurer in your life with a package of or subscription to Honest History. Each magazine explores true tales from around the world with beautifully illustrated pictures, written to explore the past and spark curiosity.

Well Behaved Women Puzzle

For The puzzler

For the teacher, the brother or the childhood friend? Commemorate the time-honored tradition of puzzles and brave women with this beautiful 1000-piece project.

For the crafter

Paint by number kits have come A LONG WAY. Let's Paint Anywhere offers a range of colorful scenes that will whisk you from Fall in NYC to a snowy mountain scene. Decor hack? We think any of these would look lovely framed alone or as part of set.

For the out of towner

So they can't make it home for the Holidays? Send a sweet little reminder of how much they’re missed with Sugarwish. The recipient will select a choice of candy, coffee or snacks and within days it's delivered to their doorstep (impeccably packaged, by the way). It’s a perfect little reminder of home.

https://1canoe2.com/collections/games/products/pups-memory-game

For the Littlest

This pup-themed memory game is perfect as a stocking stuffer or stand alone gift. Be warned… playing this game at length may decrease your resistance to getting a real puppy of your own.

For the toughest tough guy

We understand hot sauce. We do. But what we really understand is truffle-infused hot sauce. A pack of three, no less!

https://www.cb2.com/life-meets-art-inside-the-homes-of-the-worlds-most-creative-people/s378864

For you

It's about time someone sneaks into the homes of the World's most creative people, takes photos and packages it into a socially acceptable coffee table book. We want it. You may too.

How to Live Through a Renovation

Congratulations! You’ve decided to pull the trigger and demo that __(fill in the blank)__. It’s a milestone, to be certain. But the bigger milestone? Living through the renovation dust. It’s not for the faint of heart, but we’re here to tell you it can be done, and it can be done with relative serenity. So before packing your bags and moving to your in-laws, consider a few tips:  

Designate one space to be your clean, functional getaway: It’s no mystery that renovation is codeword for demolition. Designate one room in your home that will remain untouched. Treat this space as your sanctuary. DO NOT allow it to become a “catch all” and fill up with items that seem to have no other place. Let me say it again, keep the space void of anything that doesn’t get daily use. Your laptop? Great. A cozy bedside lamp and your favorite rug? Absolutely. The rain coat you use twice a year? Nope. The box of family pictures from 1992? You get the idea.

Kitchen Sanity: While waiting for your new, clean and open kitchen to become a reality, it’s dire you don’t forget to eat. The team at Swatts & Co. has lived through more than one kitchen renovation, and the resounding piece of advice is be prepared. Below we’ve divided kitchen prep into four parts. Albeit, we do recommend saving the complicated paella recipe until your kitchen is finished.

  • Water: determine your source of water – whether it’s the outdoor hose for washing dishes or a bathroom sink, make a decision that it’s the go-to source for h2o. 

  • Storage: plastic tubs with bins are a great way to store your pantry and food prep items. It creates a barrier to the renovation dust with the added benefit of being easy to move around. Sort your cans, your foil, your flatware and cooking utensils in easy-to-find dividers. Again, organization will be your best friend. 

  • Appliances. We recommend at the very least a microwave and/or a toaster over as well as a minifridge. Are you feeling like a college student living in dorm yet? Good. If the weather is warm, plan your meals around grilling season – and in the colder months opt for a plug-in skillet

  • Disposable dishes: We’re a huge fan of the growing marketplace of biodegradable one-time use dishware. Technology has come so far and it is high time we say farewell to plastic forks and coated paper plates in favor of a earth-friendly option. Here’s a quick round up of our favorite biodegradable kitchen products

    Biodegradable Plates
    Flatware
    Compostable food wrap
    Compostable Food Storage

Storage: As much as you can, put away items that are not part of your daily regime. We’re talking art, board games, throw pillows and furniture – all the things you love to be surrounded by when your space isn’t under construction. Not only will it simplify the zones, it will protect your items from being broken, lost and filthy. 

Plastic totes are a great way to keep kitchen items out of the dust.

Plan: The best you can plan ahead, the better. Make a list of easy meals (to make and clean up). Plan in advance what to wear for the day (boxes of clothes will disappear). 

Layout clothing and work items the night before - it will save you a headache.

Set expectations: Construction always takes longer than promised. When you have a project projected to take three weeks, plan on six. It’s easier on the psyche to celebrate the completion early than lament a project dragging on late. 

Have you lived through a renovation and have additional tips? Share them with us! 

5 Tips for Creating A Great Outdoor Space


5 Tips For Creating A Great Outdoor Space

I’m assuming since you are reading this, you’re actually concerned about the appearance and functionality of your outdoor space. 

Success starts by closing your eyes and pretending you are… INDOORS! 

blackhouseexterior.outdoorentertaining..jpg

Seriously, there are certainly additional things to consider when arranging an outdoor space, but the biggest mistake made is often to forget all of our indoor design tools – balance, proportion, lighting, etc.

Think about cohesiveness with your indoor style and color scheme and don’t be afraid to do something unique.  Repeat after me: “I am not defined by Home Depot’s Garden section!” 

Lucky for us, there are a lot of super fabulous retailers getting into the outdoor game.  But that good fortune aside, the same creative willpower we use in our indoor spaces can be applied to our outdoor spaces as well.  When designing your outdoor space, kindly consider the following…

Outdoor Area Rug

You would never go rugless inside your house, right?  RIGHT?!? 

Don’t go rugless outside. 

This rug from West Elm, makes the space!

This rug from West Elm, makes the space!

Area rugs can both define your outdoor space and give it personality and depth.  Not to mention adding comfort and cleanliness. 

Use the same sizing rules as you would with indoor area rugs: go bigger than your gut (and wallet) tells you, all front furniture legs should overlap the rug by at least 4 inches. 

What material should your rug be made of? 

If your outdoor space is under a permanent roof, you have a lot of options.  Pretty much anything with a loose enough weave and no backing should work.  Even if the rug won’t get directly rained on, it will be exposed to more moisture than an indoor rug and needs to have decent air circulation to prevent mold. 

Yes, your conclusion is correct, no shag rugs outdoors.  Sorry. 

If your ourdoor space is en plein air, there are a few more restrictions.  Seriously consider something made out of a synthetic material.  I know it doesn’t appeal to the naturalist in you, but neither will throwing out your moldy jute rug.

Outdoor Plants

This seems like a no-brainer, but you would be surprised by how many outdoor spaces are completely lacking any greenery.  There are loads of options here.  Understand that potted trees are just as fantastic outdoors as they are indoors. 

Moderncedarfence.outdoorpatio.cementpaver.outdoorpatioflowers.jpg
  • Find a big cool planter and, um, plant things in it. 

  • Put a small pot of succulents on the coffee table. 

  • Hang a basket with trailing ivy. 

  • Cut a border around the patio and drop in a row of annuals. 

  • But, for heaven’s sake, please read the flag in the plant and follow the instructions for sun/shade conditions. 

  • If you’re space is totally in the shade, let me introduce you to my friend coleus.

coleus-leaves outdoor entertaining area.jpg

Outdoor Lighting

OK, friends, this is important.  Your space should not only be available for use during the full daylight hours of mid-summer.  We all know the best parties and most compelling books find their reluctant end sometime around 1am. 

Don’t prematurely end the evening’s enjoyment because you neglected to equip your outdoor space with the proper lighting. 

Brooklyn Limestone made this firepit area a place no one wants to leave!

Brooklyn Limestone made this firepit area a place no one wants to leave!

As you would indoors, think about layering your lighting.  Overhead string lights or lanterns hung from tree branches provide “whole room” illumination.  Floor and table lamps or candle in hurricanes give more specific lighting and ambiance. 

Climate

I know you were hoping to avoid the giant umbrella look.  But, if you live somewhere South of the Mason-Dixon line, you’ll never use your outdoor space in the summer if there is no shade. 

Check out how our friend Studio Plumb transformed her backyard- she’s got it all!

Check out how our friend Studio Plumb transformed her backyard- she’s got it all!

Be realistic about the limitations of the climate you live in.  And think beyond the umbrella.  Pergolas are all the rage and with good reason.  They can be customized for your space and shade needs and also provide definition to your space.  But, they’ll run you approximately 10x the cost of your run of the mill umbrella and possibly require a contractor to install. 

Consider sails, which can be with anything from a $100 trip to the hardware store to much more elaborate designer looks (and price tags). 

This particular shade is from Cabelas, but the options are endless

This particular shade is from Cabelas, but the options are endless

Remember the power of air circulation.  Give Mother Nature some help with a ceiling fan in a covered porch or floor fan outdoors.  If your problem is not the heat, but the chilly spring/fall days, COVID has brought outdoor heaters and portable firepits to the masses. 

Join the club.

Vertical Space

Yes, you have vertical space outdoors.  And you can use it!  Yes, lights and plants work for you.  But, so does art!  Clear lacquer + your sweet flea market find = durable outdoor art. Or choose weather-resistent wood or metal as the medium.  Just don’t feel like a blank wall is doomed just because it happens to be outside!

This space from CoolGardens.co.uk is great!

This space from CoolGardens.co.uk is great!

And that my friends is one way to create a pretty cool outdoor space. If you want to see this kind of transformation in action…stay tuned for our Spring One Room Challenge.


How to Make a Channel Tufted Headboard


How To Create A Channel Tufted Headboard

Get a Luxe Look For Less

Sometimes I get an idea in my head for a piece of furniture and I can't find it anywhere.  Or I find a picture of something similar, yet it's about 487 million dollars, and it turns out I only have 387 million dollars, so alas, I can't afford it.  

Green Velvet Headboard tutorial grand rapids interior designer.jpg

Life is hard.  Hashtag first world problems. 

That is the story of this headboard.  It was almost four years ago, and I couldn't find a green velvet headboard ANYWHERE.

 It's one of the most commented on item when I post on instagram so I wanted to share how I made it. It's really easy.  If you read all the way down, you can see how I made it with NO SAWS or cutting items (because I don't do saws, because I like all my fingers). 

Green Velvet Channel Tufted Headboard tutorial DIY.jpg

(You can now find a green velvet headboard lots of places, but if you want a different more unique color- you’re gonna have to make it yourself)

Supplies Things You Need: 

  • Boards: Decide what width you want the channels to be, and how high of a headboard.  (If you want to be most cost conscious, do a headboard height that can be cut out of 8 or 12 feed boards evenly (so 4ft/6ft high), as opposed to picking a 5ft tall headboard and having a bunch of 3 ft left over scraps).  

  • batting (do not try to do it without the batting)

  • 2" foam

  • staple gun and LOTS of staples

  • french cleat 

  • 1x2" boards for back

  • drill 

  • screws

  • Fabric 

How To Steps

1.  Figure out how many boards you need.  I used 1x6's (which are really more like 1x5s) and needed 12 of them, and for our bedroom I needed them to 40” tall.  I went to Home Depot and had them cut the boards for me there.  The signs there say they charge for more than a few cuts, but I've never had an issue with being charged (and even if you are, it's like $0.25 a cut, which is a heck of a lot cheaper than a saw...also less chance of losing fingers)  I also got 1 x 2" cut long enough to go the width of the headboard

2. Next step- Measure out each piece of foam on a board and cut the foam into pieces.  You generally want to make sure the piece of foam is the same size as the board or slightly smaller, or you'll have some overhanging foam bulge (the technical term for it) and it could be more difficult to connect all channels together.  

DIY Channel TUfted green velvet headboard.jpg

3. Batting: you're going to need a piece of batting large enough to wrap each piece of foam and board.  Think about wrapping a present, Staple the crap out of the batting. 

DIY Channel Tuft Upholstered Headboard.jpg
DIY Channel Tuft Headboard.jpg

4. Fabric:  Once you've got each board wrapped with batting, cut fabric to size to cover each individual board (once again you want to wrap it like a present).  Flip the foam board covered with batting upside down on the fabric (so you can see the staples you just put in) and proceed to wrap board like a present.  Take care when folding the corners at the top, so they're flat and uniform on all the boards, because you'll be able to see them.  Staple away. 

How to make a channel Tufted Headboard.jpg

5.  Once you've got all the boards foamed, wrapped in batting and covered in fabric, line them up in the order you want them to be.  Then flip them fabric side down/staple side up on the floor.

DIY Channel Tuft Banquette Bench.jpg

6.  You might need help with this step- or you could use some heavy things to hold the boards together. 

You want to take the 1x2's and place them on 2 sections of the headboard- their purpose is to hold all the boards together.  you want the highest one to be about 1/3 of the way down the headboard, and the second about 2/3 of the way down so they're placed evenly. (In the picture above, the level is to imitate how you would attach a 1x2 to the fabric wrapped pieces of wood).

Screw some long enough screws into the wood, so you can connect the two boards (you want the screws long enough to go into the second board and hold the two boards together, but not too long that it's going to poke out the foam in the front...Not a super comfy bed if a screw is hitting you in the head).  

7.  Attach the french cleat onto the back of top 1x2".   Attach other french cleat to wall (do some measuring first to make sure it's in the right spot, and make sure you're using a few studs.  (use a big french cleat with a high weight limit)

8.  Hang headboard on wall.  

9.  Go take a nap in your nice new bed.  

Green velvet channel tufted headboard DIY.jpg
DIY Chanel Tufted headboard green velvet headboard.jpg

(You’ll notice some of these pictures are from the channel tufted banquette we made recently- you can go to that post to see more info. Both the headboard and banquette were made with same method, but I lost the pictures from when I made the headboard)

Green Velvet Headboard DIY Mid century bedroom.jpg

Let me know if you have any questions!


You Had Kids....How to Design a Beautiful House Without Getting Rid of Them


You Had Kids....How to Design a Beautiful House Without Getting Rid of Them

8 Tips For a Kid Friendly House

Life goes something like this: You graduate from college.  You get a solid job. You miraculously climb out of the student loan hole. First home purchased.  First home sold.  More exciting second home purchased. 

Anticipation of finally using that inspiration folder you’ve been keeping for the last 10 years of ripped out Architectural Digest and House Beautiful pages. 

After all, you are now a fully formed adult with taste, style and (most importantly) a home improvement/design budget. 

They Cute….but they ruin everything.

They Cute….but they ruin everything.

Then… the double blue line.  One baby, two babies, and three (followed shortly by a vasectomy) while your folder sits gathering dust. 

There’s no way you can have kids in a beautiful home. 

They. Ruin. Everything. 

Plus, who knew they needed so much stuff??  You went from Millennial Minimalistic to next in line for being profiled on “Hoarders” in 4.2 years.  Giving up just seems like the right thing to do.

 But, wait!  *Cue tinkling music* Behold: the Fairy Godmother of your design dreams

 We’ve got a bag of kid-friendly design tricks that will last longer than midnight and possibly longer than Prince Charming too.  

HIDDEN STORAGE Is Key

You’ve got to do something about the piles.  Open shelving is not your friend.  What 6 year-old is going to neatly stack his books in chromatic order or curate her stuffed animals by height? 

Not mine!  And probably not yours either. 

Fill your home with storage ottomans, lidded bins, cupboards with doors and nightstands with drawers. 

That gold table holds a ton of kid crap!

That gold table holds a ton of kid crap!

Don’t forget that sometimes you’re hiding things from your children. Examples include remotes, ink pens and the emergency pacifier (not to mention the emergency chocolate). This requires doors + height

PATTERN, COLOR & MOVEMENT

If you’re anything like us, you need to be able to do a 6-minute clutter clear when your mother-in-law calls to say she’s dropping by.  Six minutes is not enough time for vacuuming, wiping, sweeping or scrubbing. 

This is when you’re going to call and thank us for talking you out of the white tile floor, pinstripe rug and matte blue countertop. 

Become friends with patterns of all types: plaids, modern florals, deconstructed stripes, mottled granite, 2” hickory planks, etc. 

Toys get lost on this rug.  It’s magic.

Toys get lost on this rug. It’s magic.

They can all perform the most amazing optical illusion known to parents – looking clean when they most certainly are not.  Check the bottom of your socks for proof. 

Wondering how to put this all together without looking like the circus threw up in your house?  Look out for our upcoming post on working with patterns!

SOFT  CORNERS

First tip: if you have access to a Children’s Hospital they do a wonderful job with forehead stitches, but cost approximately 257x as much as Urgent Care. 

Second tip: Urgent Care won’t treat a concussion; they’ll make you drive 100mph to the Children’s Hospital. 

Poufs!

Poufs!

Third tip: the coffee table isn’t worth it.  There are great alternatives to just about every sharp-edged object you’ve had your eye on. 

Think about poufs and ottomans as tables, waterfall edges, radiator covers and fabric covered everything.  Your HSA thanks us.

 Performance Fabrics

Speaking of fabrics….you do not want to spend the next 18 years of your life staring at that spitup stain. Fortunately the options for materials that repel and resist all the standard kid ammunition are currently endless. 

Yes, leather is good.  But Sunbrella is better (and cheaper!).  Also, have you ever heard of Crypton?  We are just blown away by the magic of this textile technology. 

On second thought, maybe you can have that white couch or that non-poodle based dog breed… but we woudn’t recommend both.  That just seems like laughing at God.

DOORKNOBS For Kids

We’ll make this sweet and simple.  If you’d like a chance at privacy to go to the bathroom, get dressed or eat stolen Halloween candy while living with a 15-36 month-old, don’t use lever handles.  I’m not sure why schools are so obsessed with STEM education.  Kids intuitively understand simple machines.

It’ll take them much longer to learn how to open these.

It’ll take them much longer to learn how to open these.

WHEELS

Only if they lock or you know how to use furniture coasters.  Failure to follow this rule will result your favorite coffee table being used as a weapon in the murder of your formerly favorite lamp. 

However, if you’ve mastered the lock/coaster technique, wheels can be the key to your success.  Especially if your kitchen island can act as a child lock for your beverage cooler.

PATINA

Make it your new favorite word.  Choose objects and materials that gain character and depth with every scratch, ding and scuff mark.

This vintage Eames reproduction can handle anything

This vintage Eames reproduction can handle anything

Wood and leather are shoe-ins for this job.  Don’t avoid vintage furniture and décor.  They come pre-seasoned!   Take a few steps back and you’ll see that small blemishes don’t usually diminish the overall beauty of a piece.  Also, teach yourself to not panic: Mr. Clean Magic Eraser is just that – MAGIC. 

And finally… PATIENCE

Kenny Rogers had the right idea.  Design happiness can come to you if you know when to hold ‘em with the one item you love most and make everything else a sacrifice. 

Know when to fold ‘em and accept the lesser but also less breakable version – surprisingly we’ve actually come to love faux plants.

Know when to walk away.  Your inspiration folder shouldn’t be recycled just yet. 

Some things might just have to wait until retirement.